To complete this guide, you need:
- a Render account
To deploy to Render, click the following button and follow the instructions:
After that, create a name for the service group (for example OpenVSCode Server) and click Apply.
Render starts the server automatically.
When the deployment is complete, you will see your server listed in the Services section of the Dashboard. Click the dashboard entry to see your server URL to access OpenVSCode Server.
Delete the service in your dashboard.
To complete this guide, you need:
- a Render account
- an account with the OAuth Provider of your choice.
Consult the OAuth2-Proxy Provider Configuration Documentation, and select at least one provider to use for authenticating users of Open VSCode. Create an OAuth application with your provider of choice. For the Homepage/Base URI, enter a placeholder like https://openvscode-secure-server.onrender.com, and for the Callback/Redirect URI, enter a placeholder like https://openvscode-secure-server.onrender.com/oauth2/callback. You will update the OAuth2 app with your URIs once your OAuth2-Proxy Server deployment is complete. Save the Client Secret and ID in a secure place like a password manager for later reference.
To deploy Open VSCode to Render as a private service, click the following button and follow the instructions:
After that, create a name for the service group (for example Private OpenVSCode Server) and click Apply.
Render starts the server automatically. Copy the service address to the clipboard:

Fork the OAuth2-Proxy Render Example Repository. In the Render Dashboard, select YAML from the side navigation and click the New From YAML button:

After that, use your connected GitHub account or the full URL of your public OAuth-Proxy fork to create a deployment based on the fork.
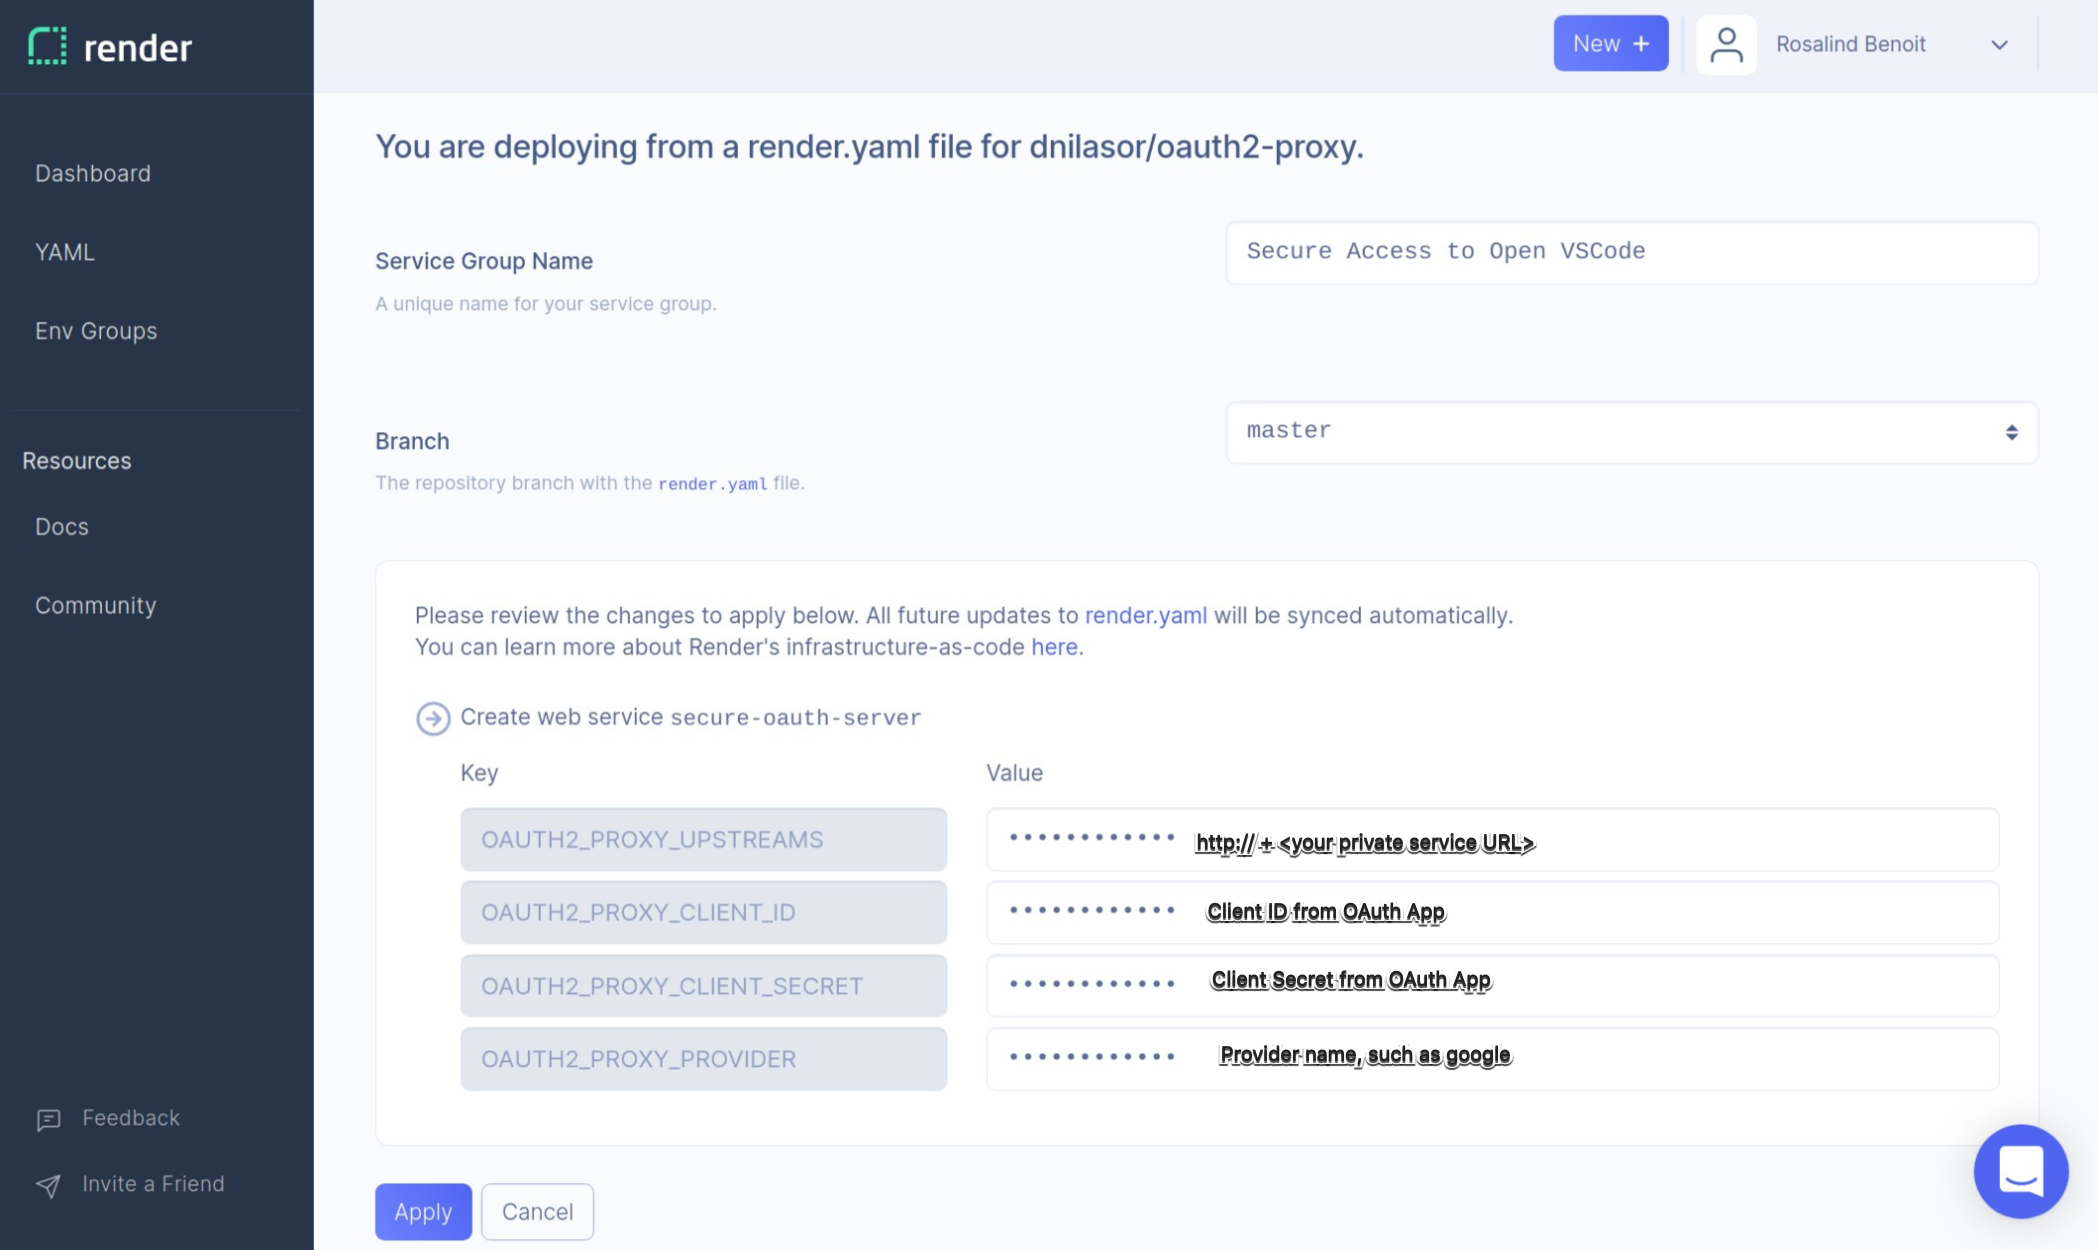
Create a name for the service group (for example, Secure Access To Open VSCode). Next, enter the environment variable values to configure OAuth.
- For
OAUTH2_PROXY_UPSTREAMSenter the Service Address for Private Open VSCode Server appended by http:// - For
OAUTH2_PROXY_CLIENT_IDenter the Client ID from your OAuth App - For
OAUTH2_PROXY_CLIENT_SECRETenter the Client Secret from your OAuth App or password manager - For
OAUTH2_PROXY_PROVIDERenter the name of your OAuth provider
Render starts the server automatically.
When the deployment is complete, you will see your OAuth server listed in the Services section of the Dashboard. Click the dashboard entry to see your server URL to access OpenVSCode Server. You will be prompted to authenticate and then redirected to the private Open VSCode service.
Delete the service in your dashboard.


