Docker


Before starting with Docker, it’s important to understand virtualization and virtual machines (VMs) as foundational concepts, as these concepts form the basis for many container technologies.
❖Virtualization❖
Virtualization is a technology that allows us to create virtual machines (VMs) from a single physical resource. VMs are like computers within a computer and we can run different operating systems on the same machine. This is done using a hypervisor, which is a software that creates and manages the virtual machines.
Key Components of Virtualization:
- Hypervisor (Virtual Machine Monitor):
The software used for virtualization is called hypervisor.
A hypervisor is a software that creates and runs virtual machines (VMs). It sits between the physical hardware and the virtual machines, ensuring that each VM has its own isolated environment. A computer on which a hypervisor runs one or more virtual machines is called a host machine and each virtual machine is called a guest machine.
There are two types of hypervisors:
(1) Type 1 Hypervisor (Bare-Metal Hypervisor)
Installs directly on bare metal hardware without the presence of an operating system.
Use Cases: Ideal for data centers, cloud environments and scenarios where performance and scalability are critical.
Examples: VMware ESXi, Microsoft Hyper-V.
(2) Type 2 Hypervisor (Hosted Hypervisor)
Requires an operating system to run.
Use Cases: Suitable for desktop virtualization, development, testing and situations where ease of use and compatibility with existing operating systems are more important than raw performance.
Examples: VMware Workstation, Oracle VirtualBox.
2. Virtual Machine (VM):
- A VM is an isolated, self-contained software environment that behaves like a physical computer. Each VM has its own operating system, applications and resources, but all of them share the underlying physical hardware.
- VMs are commonly used to run multiple OS instances on a single server, allowing better resource usage.
3. Guest OS:
- The operating system running inside a VM is called the guest OS, which can be different from the host OS (the OS running on the physical hardware).
Benefits of Virtualization:
- Resource Utilization: Enables running multiple operating systems on a single physical machine, improving resource usage.
- Isolation: Each VM is isolated from others, making them secure and preventing interference.
- Flexibility: Virtual environments can be quickly created, moved or deleted without affecting the host machine.
- Cost Savings: Reduces the need for multiple physical servers, cutting hardware and maintenance costs.
Drawback of virtualization:-
- Performance Overhead: Can slow down systems slightly.
- Complex Management: Requires skilled people and tools to manage.
- Risk of Total Failure: If the host fails, all virtual machines go down.
- Costly Licenses: Can be expensive for businesses to license.
- Security Issues: If the hypervisor is hacked, all VMs are at risk.
- Limited Hardware Access: Some resource-heavy apps may not perform well.
- Slowdowns: Multiple VMs can compete for resources, affecting speed.
- Backup Challenges: Backing up can be more complicated.
- Training Required: Staff may need training to handle virtual systems.
- Difficult Migrations: Moving VMs between systems can be tricky.
Docker introduces the Docker Engine to tackle the challenges of traditional virtualization.
Containers and virtual machines

- Virtual machines are heavyweight, full system virtualization that run separate operating systems with their own kernels, while containers are lightweight, OS-level virtualization that share the host OS kernel
- Virtual Machines are slow and take a lot of time to boot.
- Containers are fast and boots quickly as it uses host operating system and shares the relevant libraries.
- Containers do not waste or block host resources unlike virtual machines.
- Containers have isolated libraries and binaries specific to the application they are running.
- Containers are handled by Containerization engine.
- Docker is one of the containerization platforms which can be used to create and run containers.

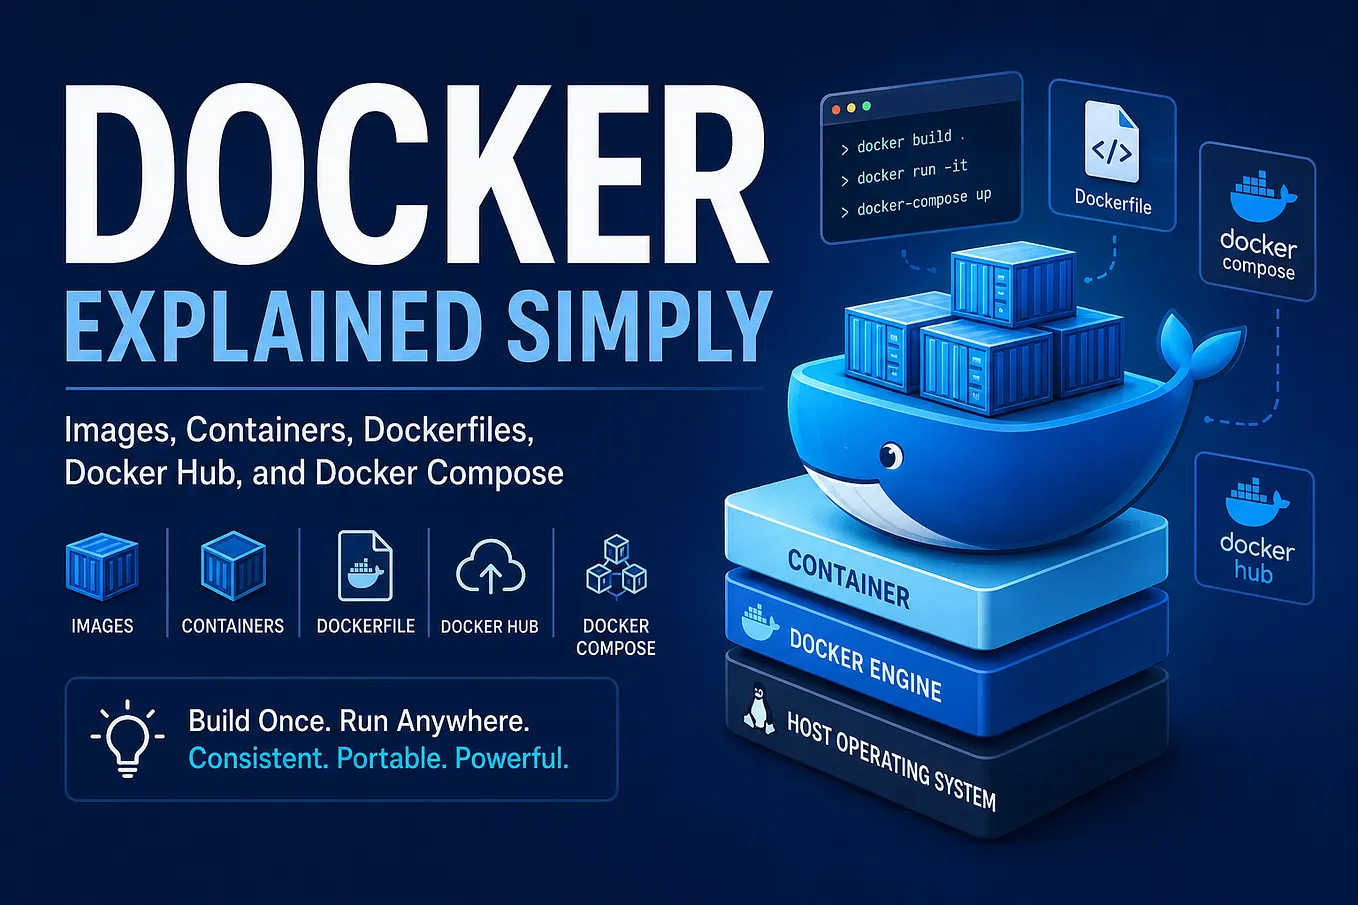
Docker is an open source platform that helps us build, share and run applications in containers. It helps ensure that our applications are consistent and portable across different environments, which is especially useful in modern development practices.
“Docker is a set of platform as a service products that use OS-level virtualization to deliver software in packages called containers.”
A container is like a virtual machine.
Docker engine is a tool which creates this virtual machine (container).
Docker is an advanced version of virtualization.
What is Container?
A Docker container is like a lightweight, portable and self-contained box that holds everything needed to run a piece of software. It includes the application itself, its dependencies (like libraries and tools) and the configuration files. This allows the software to run consistently on any computer, regardless of its underlying operating system or setup.
“code + dependencies”
Why Use Docker?
1. Portability: Run containers consistently across different environments.
2. Consistency: Docker ensures that our application runs the same way in development, testing, and production.
3. Isolation: Containers isolate applications from each other and from the host system, reducing conflicts and increasing security.
4. Efficiency: Containers share the host OS kernel and are more lightweight compared to traditional virtual machines.
5. Microservices-Friendly: Supports breaking apps into smaller, manageable services.
6. Simplified Deployment: Package apps with dependencies for straightforward deployment.
7. No Pre-Reserved Resources: Containers don’t pre-allocate RAM or other resources, allowing for better overall resource utilization.
8. Scalability: Easily scale applications by adding or removing containers.
9. Version Control: Versioned images allow easy rollbacks.
10. CI/CD Integration: Works well with automated testing and deployment.
Docker architecture:
1. Client
The Docker Client is the tool we interact with to manage Docker containers and images. It’s the command-line interface (CLI) or graphical interface we use to issue commands to Docker.
Docker run
- Starts a new container from a Docker image.
Docker build
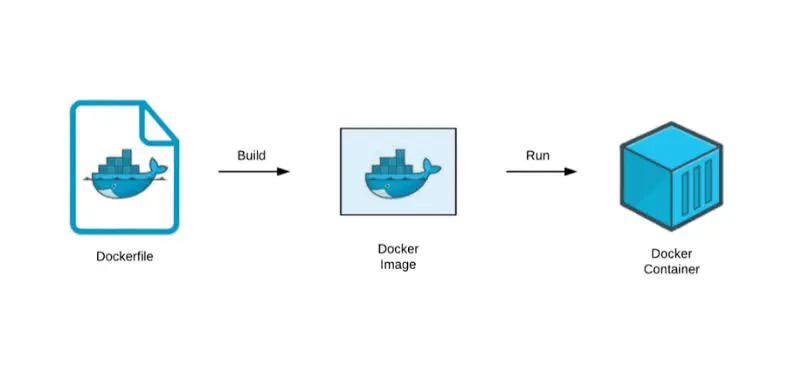
- Creates a Docker image from a Dockerfile.
Docker pull
- Downloads a Docker image from a Docker Registry.
2. Docker Host
The Docker Host is the machine or server where Docker is installed and where containers run. It could be our local development machine, a server in a data center, or a cloud-based virtual machine.
Example: If we have Docker installed on our laptop, our laptop acts as a Docker Host.
Docker Daemon
The Docker Daemon (also known as dockerd) is a background service that manages Docker containers and images on a Docker Host. It handles various tasks related to container lifecycle, such as building, running, and monitoring containers.
Images:
- Definition: An image is a snapshot of a container. It contains the code, runtime, libraries and settings needed for an application.
- Usage: We create an image from a Dockerfile and we can share and reuse images easily.
Container
Containers are like lightweight, portable packages that include everything an application needs to run: code, runtime, system tools, and libraries.
- Definition: A container is an isolated environment where an application runs. It includes the app and all its dependencies.
- Features: Containers are fast to start, and they use the host system’s operating system efficiently.
3. Docker Registry (Docker Hub)
A Docker Registry is a storage system where Docker images are stored and managed. It’s like a repository for Docker images.
Public vs. Private:
- Public Registry: Docker Hub is the default public registry where anyone can upload or download images.
- Private Registry: Organizations can set up their own private registries to store images securely within their network.
Function: When we build an image, we can push it to a registry. When we need an image, we pull it from the registry.
Example: If we build a custom image for our application, we might push it to Docker Hub or a private registry so others can access and use it.
Docker Objects:
In Docker, there are several types of “objects” that are used to build, run, and manage containers.
1. Images:
An image is a lightweight, standalone, and executable package that includes everything needed to run a piece of software, such as code, libraries, dependencies, and the runtime.
“Templates for creating containers. Stopped stage of container.”
Commands:
docker build= to build an image from a Dockerfiledocker pull= to download an image from a registry like Docker Hubdocker push= to upload an image to a registrydocker images= to list images
2. Docker file:
A Dockerfile is a text file that contains a series of instructions used to build a Docker image. It defines how the image should be constructed, including the base image to use, environment variables, dependencies to install and commands to run.
“Instructions for building an image.”
docker file names must be “Dockerfile”
FROM amazonlinux:2 # Use Amazon Linux 2 as the base image

WORKDIR /app # Set the working directory inside the container

RUN yum update -y && \ # Install any necessary packages (e.g., update and install curl)
    yum install -y curl

COPY . /app # Copy your application code (adjust the source directory as needed),For example, if your app files are in the current directory,

CMD ["echo", "Hello, Amazon Linux 2!"] # Define the command to run your application (e.g., a simple echo)

EXPOSE 80 # Expose the necessary port (if required for your app)Commands:
docker build= to build an image from a Dockerfile
Docker File Parameters
The various commands and settings we can use within a Dockerfile to define how our image should be built.
1. FROM
- Parameter: The base image name and tag
- Example: FROM ubuntu:20.04
- Parameter Description: Here, ubuntu:20.04 is the parameter specifying which base image to use.
2. RUN
- Parameter: The command(s) to execute.
- Example: RUN apt-get update && apt-get install -y curl
- Parameter Description: The parameters here are apt-get update && apt-get install -y curl, which are the commands that will be executed in the image.
3. COPY
- Parameter: Copy from server to container.
- Example: COPY . /app
- Parameter Description: The parameters are . (the source path on the host) and /app (the destination path in the container).
4. ADD
- Parameter: Same as copy but download from URLs.
- Example: ADD https://example.com/file.tar.gz /app/
- Parameter Description: The parameters include a URL (https://example.com/file.tar.gz) and a destination path (/app/).
5. EXPOSE
- Parameter: Port numbers.
- Example: EXPOSE 80
- Parameter Description: The parameter is 80, which specifies the port number that the container will listen on.
6. CMD
- Parameter: The default command.
- Example: CMD [“nginx”, “-g”, “daemon off;”]
- Parameter Description: The parameters here are nginx and -g daemon off;, which define the command and its arguments to run by default.
7. ENTRY POINT
- Parameter: The command to run as the main process.
- Example: ENTRYPOINT [“python3”, “app.py”]
- Parameter Description: The parameters are python3 and app.py, specifying the command to execute.
8. WORKDIR
- Parameter: Set current directory.
- Example: WORKDIR /app
- Parameter Description: Sets the working directory for any subsequent instructions. If the directory does not exist, Docker will create it.
9. MAINTAINER
- Provide information about the owner of the docker file.
10. ENV
- Parameter: key=value
- Example: Dockerfile
- Parameter Description: Sets environment variables in the Docker image. key is the environment variable name, and value is its value.
11. ARG
- Parameter: name[=default]
- Example: ARG VERSION=1.0
Parameter Description: Defines a variable that users can pass at build-time to the builder with the docker build command. name is the variable name, and default is an optional default value.
Get D-Adda’s stories in your inbox
Join Medium for free to get updates from this writer.
3. Containers:
A container is a running instance of an image. It is a lightweight and portable environment for running applications. Containers are isolated, meaning they do not interact with other containers or the host system unless explicitly configured to do so.
“Running instances of images. Running stage of image.”
Commands:
docker run= to create and start a container from an imagedocker ps =to list running containersdocker stop= to stop a running containerdocker exec= to execute commands inside a running container
Flow of build container:
4. Volumes:
A Docker volume is a way to store data outside of a Docker container, so that data can persist even if the container is deleted or recreated. Think of it as a dedicated storage space that containers can use to read and write data. This makes it easy to manage and keep our data safe and accessible across different containers and container versions.
“Persistent storage for containers.”
Commands:
docker volume create= to create a new volumedocker volume ls= to list volumesdocker volume rm= to remove a volume
Docker volumes are essentially mount points to our filesystem outside of the Docker container.
Mount point : /var/lib/docker/volumes/<Volume Name>/_data.
We can’t attach volume to the running container.
Types of Docker Volumes
(1) Volume Mount
- Volume mounts are the most commonly used type. They allow us to mount volumes from the Docker volume directory (`/var/lib/docker/volumes`) directly into the container. Volume mounts provide a convenient way to manage persistent data across containers.
(2) Bind Mount
- Bind mounts enable us to mount directories from the host machine into the container. This type of mount provides flexibility by allowing us to use data stored on the host machine or any other location accessible from the host.
- Bind mounts are particularly useful when we want to share data between the host and the container.
(3) Tmpfs Mount
- Tmpfs mounts are ideal for sensitive data or situations where we don’t want the data to be stored on the host machine or in the container’s file system.
- Tmpfs mounts create a temporary file system in memory, providing fast access to data but not persisting it beyond the lifetime of the container.
5. Networks:
Networks are used to enable communication between containers. Docker provides several types of networks, such as bridge, host, and overlay, to control how containers communicate with each other and with the external world.
“Communication channels between containers.”
Types of Docker Networks
(1) Bridge Network Driver
- This is the default network created when we run Docker. Containers on the same bridge network can communicate with each other by IP addresses. Docker assigns IP addresses from a configurable range.
(2) Host Network Driver
- As the name suggests, host drivers use the networking provided by the host machine. And it removes network isolation between the container and the host machine where Docker is running.
(3) Overlay Network Driver
- Used for communication between containers running on different Docker hosts or Swarm nodes.
- Overlay driver is for multi-host network communication.
(4) Macvlan Network Driver
- Allows us to assign MAC addresses to containers, making them appear as physical devices on the network. This enables containers to directly access external networks.
(5) Ipvlan Network Host
- It allows containers to have IP addresses (Ipv4 and ipv6) within a network but without MAC address isolation.
(6) None Network Driver
- Containers attached to this network have no network connectivity. It’s useful for containers that don’t need network access.
- Complete isolation
6. Docker Compose: Tool for managing multi-container applications.
7. Registries: Repositories for storing and sharing images.
LAB - 1 (Install nginx on amazon linux machine)
===============================================

Step-1 Create Dockerfile
vi docker file
 FROM amazonlinux
 RUN yum update
 RUN yum install nginx -y
 EXPOSE 80
 CMD ["nginx", "-g", "daemon off;"]
Step -2 Install Docker (if not installed)
yum update -y
yum install docker
systemctl start docker
systemctl enable docker
systemctl status docker
Step -3 Build Docker Image and run container
docker build -t myimage:v1 .
docker run -d -P myimage:v1
docker exec -it <container ID> /bin/bash
cd /usr/share/nginx/html
ls
echo "WELLCOME IN DOCKER'S WORLD"> index.html
Step -4 Verify this message on web
Hit public ip of instance:port number (80)
Other key concept of Docker:
Multi-stage Dockerfile
A multi-stage Dockerfile is a technique to optimize the size of our Docker images by using multiple stages within a single Dockerfile. Each stage can be used for different tasks, like building, testing or packaging our application. After each stage, we can choose to only keep the artifacts we need, leaving behind unnecessary files and dependencies that we no longer need and make our images more lightweight.
In multi-stage Dockerfile there is multiple FROM instructions in a single Dockerfile.
Each stage begins with a FROM instruction, which creates a new build environment.
Why use Multi-stage builds?
- Smaller image size: By only copying the necessary files to the final stage, the final image is smaller and more efficient.
- Cleaner images: We don’t have unnecessary build tools or intermediate files in our production image.
- Faster deployments: Smaller images are faster to transfer and deploy.
Multi-stage Dockerfiles help keep our Docker images clean, lean and optimized for production.
Multi-Staged Dockerfile Concept for Tomcat on Ubuntu
Step-1 (Pull Docker Images)
docker pull tomcat

Step-2 Create multi staged docker file
FROM ubuntu AS source
RUN apt update -y && apt-get update -y
RUN apt-get install openjdk-8-jdk -y && apt install maven -y
COPY student-ui /opt/student-ui
WORKDIR /opt/student-ui
RUN mvn clean install

FROM tomcat
COPY --from=source /opt/student-ui/target/*.war /opt/tomcat/webapps/student.war


Step- Create Image from this docker file
docker build -t student-app .

Step- Now run the container from this image.
docker run -d -p 8080:8080 student-app

# Start the container in detached mode (-d).
# Map port 8080 on your localhost to port 8080 on the container, allowing you to access the application in a web browser at http://localhost:8080/student.
Stage 1: Build Stage (FROM ubuntu AS source)
In the first stage, we build the application. This stage involves setting up a development environment and running the build process (in this case, using Maven to build a Java web application).
Stage 2: Runtime Stage (FROM tomcat)
In the second stage, we use a new image (in this case, the official Tomcat image) to run the application. We also copy the artifact built in the first stage into the Tomcat server.
Docker commands:
Container Commands
- docker create: Create a container from an image.
- docker run: Run a command in a new container.
- docker start: Start a stopped container.
- docker stop: Stop a running container.
- docker restart: Restart a container.
- docker rm: Delete one or more containers.
- docker kill: Immediately stop a running container.
Image Commands
- docker images: List all available Docker images.
- docker pull: Download an image from a registry.
- docker push: Upload an image to a registry.
- docker rmi: Remove one or more images.
- docker tag: Create a new tag for an image.
- docker build: Build a new image from a Dockerfile.
- docker history: View the history of an image.
Volume Commands
- docker volume create: Create a volume for persistent data.
- docker volume inspect: Show detailed information about a volume.
- docker volume ls: List all volumes.
- docker volume rm: Delete a volume.
- docker volume prune: Delete all unused volumes.
Network Commands
- docker network create = to create a new network
- docker network ls = to list networks
- docker network connect = to connect a container to a network
- docker network disconnect = to disconnect a container from a network
- docker network create <network-name> = Create a new network with the specified name.
- docker network create — driver <driver> <network-name> = Create a new network with a specific driver.
- docker network ls = List all networks.
- docker network inspect <network-name> = Inspect a specific network and view its detailed configuration.
- docker network connect <network-name> <container-name> = Connect a container to a specific network.
- docker network disconnect <network-name> <container-name> = Disconnect a container from a specific network.
- docker network rm <network-name> = Remove a specific network.
- docker network prune = Remove all unused networks (networks not used by any containers).
- docker network inspect <network-name> = Inspect a network for detailed information including its configuration and connected containers.
- docker network states = View statistics for networks
System Commands
- docker info: Show general Docker system information.
- docker version: Show Docker version info.
- docker system prune: Remove unused data (e.g., stopped containers, unused images).
Security Commands
- docker login: Log in to a Docker registry.
- docker logout: Log out from a Docker registry.
Experimental Commands
- docker manifest: Work with Docker image manifests.
- docker swarm: Manage Docker Swarm (cluster of Docker hosts).
- docker service: Manage Docker services (e.g., scaling, updating).
Other Commands
- docker exec: Run a command inside a running container.
- docker logs: View logs of a container.
- docker port: Show port mappings for a container.
- docker top: Show running processes inside a container.
- docker unpause: Resume a paused container.
- docker update: Update the configuration of a running container.
For more clarity and concepts you can visit https://dev.to/prodevopsguytech/how-to-reduce-docker-image-size-best-practices-and-tips-for-devops-engineers-1ahg