ACL Ruptures: A Quick-Start Path to Recovery

So you’ve torn your ACL and it feels like life as you once knew it is over. Or is it?
Decades ago, an ACL tear often meant the end of an athletic career and months of rehab that may or may not have returned a person to a shadow of their former athletic self. Thankfully, nowadays our understanding of ACL rehab has significantly improved.
In this article, I’d like to share some advice to help guide you through the next year of your life as you progress from newly injured all the way to being amazing again.
Immediate Post-Injury
Your #1 priority immediately after suffering a torn ACL is to understand that you’re gonna be ok, that this is not the end of the world, and that, almost without exception, your strength and athleticism can return, perhaps to even greater levels than pre-injury!
The second thing you will want to do is gain some understanding of what has just happened to your knee and why it’s behaving the way it is.
Here’s the basics: ligaments are living, noncontractile (they don’t shorten or lengthen in response to load), connective tissues that connect one bone to another. Your freshly ruptured ACL used to connect your femur (thigh bone), to your tibia (shin bone). You actually have several ligaments in your knee that make the same femur-tibia connection, each performing a distinct function for the knee. The job of the ACL is to provide posterior-to-anterior stability, i.e. it helps to prevent your shin bone from translating (sliding) forward on your thigh bone when performing activities such as rapid decelerations or quick changes of direction. There are other structures such as the hamstrings that assist in preventing this motion, but the ACL is the primary restraint.
Once the ACL is ruptured, several things happen nearly instantaneously: your knee starts to swell, your quadriceps muscles become significantly inhibited, and your body’s ability to determine the position of your knee becomes severely impaired. These three things combine to make walking less than fun for a little while. These are also the three main factors that keep you from returning to sports, and they will become the primary focus of your early rehab.
Hopefully, with this brief overview, the “what” and “why” of the injury are a little more clear. Now let’s review how you’re going to manage your knee over the next few weeks.
First and foremost, do not rush into surgery. You’ll want to let your knee calm down a bit before making a decision regarding how you will approach the injury. This means you will need to do everything you can to reduce swelling before beginning to reintroduce movement and muscle activation to your knee.
One note here, swelling shouldn’t be demonized in its entirety, after all, the purpose of swelling is to clean up an injury and bring in the building blocks and nutrients for tissue repair. What we’re looking to do here is to control excessive swelling by helping it move out of the area so that you can get your knee moving again. A swollen joint does not move well.
Swelling management for the knee joint comes in several forms, none of which are ice. You read that right — ice will not help the knee joint itself become less swollen. It may help reduce some post-injury pain, but that’s about the extent of its benefit. The father of the RICE protocol, Dr. Gabe Mirkin, actually recanted his statement on using ice as a first-line treatment post-injury (1). (In fact, it’s now been shown that icing may even slow down the healing process.) Instead, focus on elevation, compression, muscle contraction, and movement as your primary swelling reduction interventions.
Elevation implies that you will use gravity to help push excessive swelling out of your leg — so the closer to vertical that you can get it, the better. I often advise patients to prop their legs up on a 65 cm physio ball when resting. This provides a good amount of elevation, and it puts the legs in a position to actively and gently flex and extend the knee, accomplishing two of our three primary swelling reduction interventions at once. One note of caution when using the ball for rolling into flexion and extension: do not push this to the point of pain or excessive pressure. It’s ok to explore tension at the limits of flexion and extension, just be careful not to push too far.
Compression can come in many formats — from a simple ace bandage all the way up to sophisticated sequential compression devices such as Normatec boots. The benefit of using wraps such as an ace bandage or products such as “voodoo floss” is that you can combine it with active movement and elevation. The danger is in using too much tension in the wrap and actually cutting off circulation in the leg. The benefit of sequential compression boots is that compression is applied from the feet up in a pre-programmed manner with consistent and adjustable compression. The work is done for you and it tends to be very safe. (The downsides are the cost and that you can’t easily combine elevation and movement with these devices.) Regardless of the implement, the goal of compression is to assist the overworked lymphatic system in moving excess fluid out of your leg and back into your circulation. Aim for a 10–30 minute round of compression every 1–3 hours.
Muscle contraction is just as it sounds: contracting the muscles of the upper and lower leg either actively or electrically assisted. The benefits of this are twofold: it helps re-activate the quads, and the muscle contraction actually works like a pump to assist in moving excess fluid out of the leg. Active contractions are easy: just contract your quads, hamstrings, calves, and shin muscles while you’re resting. Quad contractions are often difficult to accomplish post-acl rupture. To make them easier, sit on the edge of a chair with your legs outstretched and knees straight. Place your hands on your quads and try to contract them both as hard as you can. Do this approximately a million times per day

Electrically assisted quad contraction is accomplished by devices such as H-wave, Marc-pro, Compex, or an NMES unit. All but the NMES unit are fairly expensive, but they make the work of muscle contraction easy and automatic. Aim for 10–30 minute sessions several times per day. You can combine this with elevation and movement. (Probably not a good idea however to combine it with compression as this can make the electrical current uncomfortable.)
The process of helping your knee calm down can take several weeks to several months, depending on how your body reacts to trauma. Take the time to let your knee calm down and become “quiet”, i.e. non-painful and non-swollen with most or all of its range of motion restored. It’s important to understand that your ACL rupture can’t get worse, and as long as there’s no meniscus injury preventing you from moving your knee through a full range of motion, there’s likely no need to rush into surgery.
Quiet Knee, Working Knee
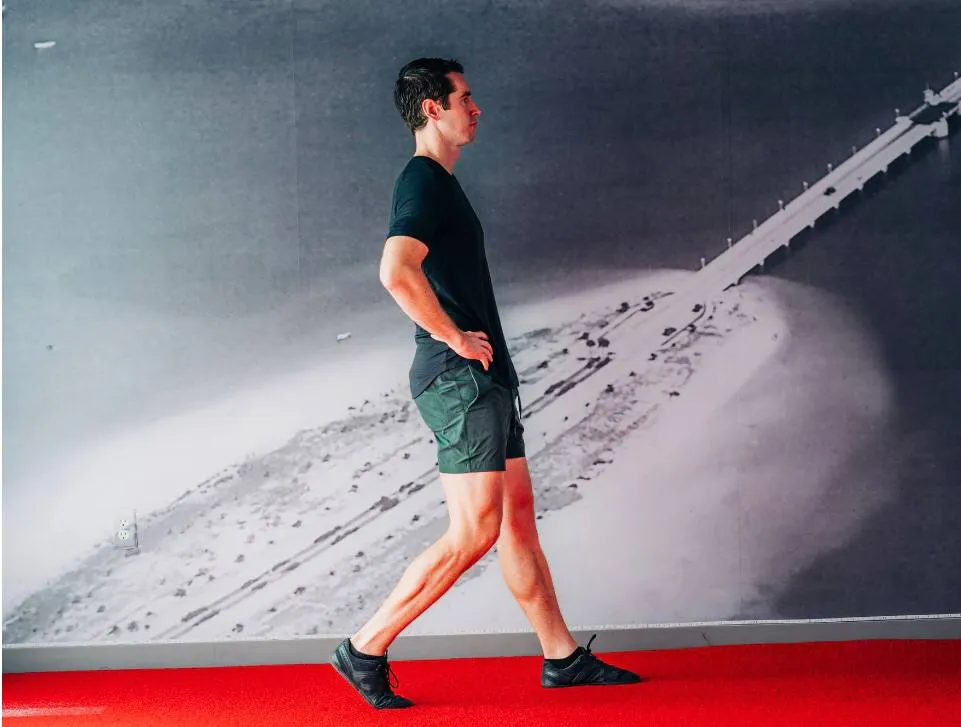
Once you’ve gotten your knee to the point where it’s handling normal movement and some load (such as normal walking) without flaring up with swelling and/or pain, it’s time to start loading it again. In the beginning, this can be as simple as walking backward. (See my previous article on why I think backward walking is better than forward walking for knee rehab.)
In short, walking backward is gentler and provides better quad activation than forward walking. I suggest this as a conservative route to loading because although you’ll need to find the upper limit of load tolerance for your knee, this limit is very likely a lot lower than you can imagine. Try 5 minutes of backward walking first. If this causes no symptoms, work toward 10 minutes in 1–2 minute increments. When tolerated, add resistance.
If you have access to any of the electrical stim units mentioned previously, you can supplement backward walking with daily use of those modalities — often just doing straight leg quad sets or seated, unloaded knee extensions. In my practice, I’m a fan of electrical stim to get a stubborn quad to cooperate. I find that often it makes quad contractions more comfortable, allowing for a greater volume of work without knee irritation.
The next progression for loading the knee is generally some form of quad-dominant squat. I’m very picky about how this gets done because the body tends to be very good at compensating around an injury. In the case of an ACL injury, the quad is significantly inhibited, forcing the body to find better/easier solutions for getting out of a squat. Oftentimes, this is done via the hamstrings, adductors, and glutes. This can be a difficult compensation to see with an untrained eye, and the injured person usually doesn’t even know it’s happening. For this reason, I like to use a modified hack squat with heels, butt, and back up against a wall, feet flat. Keep these free of pressure at the front of the knee, and work up to sets of 25 before progressing with either weight or depth. I prefer to start with increasing load because it’s easier to control and allows for smaller resistance progressions than when depth is increased.
Get Brian Ziegler PT, DPT’s stories in your inbox
Join Medium for free to get updates from this writer.
As soon as it is tolerated, I like to load through to full knee flexion. My preferred method for this is a very regressed ATG Split Squat, oftentimes using elevation and arm assistance to decrease load. I find that when a person’s wall hack squat demonstrates about 8 inches of excursion from start to finish, they’re ready to start incorporating the split squat. I can’t find research to support this, but I think it has to do with improved load tolerance of the connective tissue at the front of the knee, including the patellar tendons and everything associated with the menisci (the cartilage itself, the ligaments attaching it to the tibia, and its capsular investments). ATG split squats are usually done in lower volume sets of 4–8 reps, though the importance of rep volume is secondary to keeping the movement free of pain and pressure at the front of the knee.
The hack squat, split squat, and backward walking form the basic foundational architecture of a program to restore quad strength and improve synovial fluid circulation in the knee. I like to use a simple 3-step process once I get the ATG split squat going: 1. Train your quads. 2. When you finish training your quads, train them some more. 3. When you’re done with that, train the quads again to make sure you didn’t miss anything from the first two steps.
Kidding aside, insufficient focus on the quads early on in ACL injury rehab leads to compensated squatting patterns and poor eccentric control of knee extension. I do address hamstrings, adductors, and glutes, but not until I see that the quads are awake and doing what they’re supposed to do.
To Cut, or Not to Cut, That is the Question
This section is intentionally placed after the knee loading section because I believe that regardless of your decision to have an ACL reconstruction or not, you should first go through the process of calming your knee down and regaining close to normal quad strength.
You likely have a number of factors weighing on you when it comes to deciding how to proceed with your ACL rehab. Personal and professional circumstances, emotions, facts, and opinions can all factor into your decision. This guide is meant to address facts and minimize circumstantial concerns. The rest is up to you.
The first (and perhaps most straightforward) decision to make is whether or not you actually need to consider having your ACL reconstructed at all.
A simple algorithm below may suffice here:
- Is your knee range of motion limited in any way as a result of your ACL injury and after going through at least some initial rehab?
- Related to question #1, do you also have a meniscus injury that requires repair such as a bucket-handle tear that is limiting your knee range of motion?
- Are you currently (or do you anticipate) participating in athletic endeavors that involve sudden changes of direction at speed?
If you answered “no” to all three of those questions, you likely don’t need to worry about an ACL reconstruction. A good, well-rounded rehab program with an initial and intense focus on quad strengthening should get you back to normal and help reduce the risk of accelerated knee arthritis in the future. Even if you could only answer “no” to the first two questions, You may still consider forgoing ACL reconstruction. It is not unheard of for professional athletes to continue their careers with a ruptured ACL.
If you’re an athlete, or someone who requires a high degree of stability from your lower extremities, your next decision is between a surgical or non-surgical approach to achieving an intact ACL. Recent research has shown that contrary to previously held beliefs, the ACL is actually capable of repairing itself up to about 90% of the time when a targeted protocol is followed for specific ACL rupture presentations (2). The downside of this protocol is it requires your knee to be locked in a bent position for a month, then slowly opened to full extension over the next 8 weeks, leading to a total of 12 weeks of some degree of immobilization.
If you do end up taking the surgical route, there’s very little to consider because the type of reconstruction you receive will come down to your age, activity level, and the surgeon’s preference for graft type. Before the surgical discussion goes too far, it may be helpful to have a brief review of exactly what goes on with an ACL Reconstruction. You’ll notice that I keep using the word “reconstruction” and not “repair”. This is because unlike tendon repairs in which a tendon is reattached to bone via screws and stitches, full ACL ruptures must be completely replaced with “new parts”. The reason for this is that the poor blood supply found in ligaments means that any repair will either not heal or heal very slowly.
The “new parts” used in a ligament reconstruction can either come from your body, called an autograft, or from a donor/cadaver, called an allograft. Autografts can come from several sites in the body — the two most common being hamstrings and patellar tendon grafts. Each graft site has its own plusses and minuses. For example, the hamstrings autograft causes a higher risk of developing hamstring tendinopathy and will prolong the recovery of full hamstring strength. Likewise, the patellar tendon graft will increase the risk of patellar tendinopathy and make the job of recovering normal quad function more difficult. Allografts are usually harvested from patellar tendons.
The long-term strength and functional outcomes are generally the same between autograft and allograft, so it’s probably a good idea to just go with the option your surgeon has the most experience with. The choice between auto- and allograft usually comes down to age and anticipated future demands on the ACL. In general, research supports the use of autografts for highly active individuals and for those who are likely to be returning to sport. As with autograft harvest site choice, it’s usually best to leave the decision between auto and allograft up to the surgeon.
If you do end up going down the surgical route, once you’re out of surgery you’ll want to get that knee moving. Scroll back up to the top of this document and start from the section labeled “immediate post-injury”. Because an ACL reconstruction is a very traumatic event, the initial phases of rehab aren’t much different than the post-injury process. You’ll now just have a new incision to keep track of. Keep it clean, and watch for signs of infection, including increased redness, disproportionate pain, and increased swelling,
I hope I’ve helped to provide you a better understanding of the rehab path that awaits you. ACL injuries are scary, but with a good, well-informed plan, the rehab part doesn’t have to be. Have patience, be consistent with your rehab, keep things pain-free, and work hard when the time is right.
Best wishes for your recovery. If you have any questions, please don’t hesitate to reach out in the comments section and I’ll be sure to get back to you.
Links to products I use for ACL Rehab
Amazon (E-stim products, electrodes, compression devices, etc)
ATG Equipment (great floss bands, squat wedges, and lots of other great gear)
ATG Online Programming (The ATG Zero program is a great addition to basic in-clinic PT for mid stage ACL rehab)
Citations:
- Mirkin, G. “Why ice delays recovery.” Dr Gabe Mirkin on Health. Retrieved from www.drmirkin.com/fitness/why-ice-delays-recovery.html, 2015, September
- Filbay, Stephanie R, et al. “Healing of Acute Anterior Cruciate Ligament Rupture on MRI and Outcomes Following Non-Surgical Management with the Cross Bracing Protocol.” British Journal of Sports Medicine, BMJ Publishing Group Ltd and British Association of Sport and Exercise Medicine, 1 Dec. 2023, bjsm.bmj.com/content/57/23/1490. Accessed 13 Feb. 2024.