Genuary 2026

Day 1

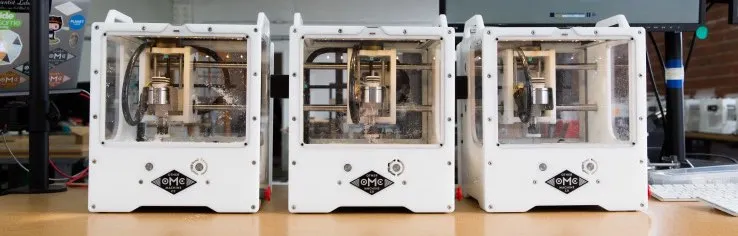
Piter Pasma challenges digital artists with generative art prompts every year with Genuary. This year I decided to give it a go. I’ve spent 2025 making my own programs to make art. I love to imagine a program and get help with ai tools so that I can use to make drawings and paintings with Bantam Tools Art Machines. I watch as the ai tries to write programs and have learned a lot in the last year. Most of the tools I’ve programmed with help have been tools to help me transform images into drawings and paintings. For this month, I’m focused this month on painting my genuary artworks with our super-secret not-launched-yet painting machine.

Challenge 1: One color, one shape. My original idea for this challenge was to figure out the main shape in an image and paint all around it. In the process, I felt like I really wanted to show some details, so I made this artwork by finding outlines of shapes in an image and then dividing the image into the two dominant colors using K-Means Clustering. Then I set it up to draw the outlines of the shapes and hatch fill the shapes with subject color and then fill in the background with the hatches of the background color. So I’m cheating a little by having two colors plus the outline color.
I’m going to try and do one challenge everyday!
Day 2


The Challenge for day two is: Twelve principles of animation. I’ve been wanting to be able to convert videos into drawings for a while and have had some odd projects laying around, so for today I pulled these together to play with different edge finding algorythms and use what I made yesterday for coloring things in. Here is my source video turned into a gif of my son looking out the window of the Shinkansen as we travelled to Tokyo and the output of 54 stacked SVG files compiled into a gif using 6 colors pulled from the file.

I need to then be able to lay these all out to plot them all at once so I made a layout tool. Got it working with registration marks and numbers for ordering them into flipbooks. Need to do research on if there are tools for photographing these to turn the drawings back into a digital movie. I plotted these on a Bantam Tools ArtFrame 2436 but if I had more, I’d employ the super large Bantam Tools Panorama for cranking out film frame drawings.

Because my goal is to really give our super-secret not-launched-yet painting machine a workout this month, I picked the first frame of the movie and made a painting out of it. If I had more than a day, I could paint all the frames and have a whole move like this!
Day 3
The 3rd Genuary challenge is Fibonacci Forever. For this challenge I set out to make a tool for turning portraits into greyscale paintings in the shape of fibonacci phyllotaxis which is the shape in nature of sunflower seeds and other things.

The tool I built in Javascript allows me to choose how many different variations of grey and how many “seeds” would be in the image. Then it assigned each seed a greyscale value.

Painting took a few tries because each stroke is not very long. In normal painting I can dip the pen and get 100–200mm of stroke distance but because the distance for each small stroke is only about 1mm, the brush was running out of paint and I switched the distance from 200mm to 50mm and when that didn’t work, I had to adjust the distance to just 20mm of distance before refilling the brush with paint so it would go refill after only about 20 small strokes.

I’m happy with how this went. There are a few things to note here. The area just to the right of center, the dots blend together. That’s because the paper started to buckle which made the paper get closer to the brush and the brush spread out more.

The dots end up looking like circles because as the drop of paint dries, the pigment seems to go to the edges which may be a thing with these crayoloa paints. I’m going to burn through these paints pretty quickly and then switch over to some watercolors that are a little fancier and come in tubes.
Day 4
Today day 4, I’m revisiting my Peekskill Change-Makers project, I began creating portraits of people who left their mark on Peekskill in a positive way. Inspired by Leon Harmon’s artworks at Bell Labs in the early days of digital art. I choose to work in pixels that I make using the parallel pen on a Bantam Tools ArtFrame.

Going deeper into Leon Harmon’s famous 1970s experiment where he transformed Lincoln’s image into a coarse grid of gray blocks.


For my portrait, I wanted to echo that spirit but take it in my own direction. I found a portrait of Abraham Lincoln and created a JavaScript program that converts images into pixelated files, which I can then send to the Bantam Tools Plotter. Using a Pilot Parallel Pen, I was able to “draw” the pixels directly.

To capture shades of gray, I built a set of custom inks: using a pipette, I precisely diluted Pelican 4001 Dark Blue ink — sourced from our local Retake Remake store — down to 10%, 25%, 45%, 70%, and full strength. These five tones gave me just enough variation to bring depth and life into the portrait.
Where Harmon aimed to reach the threshold of recognition, my goal was to push resolution down to the edge of abstraction while still being able to see the humanity in Lincoln’s eyes. For me, the portrait becomes alive in the moment when a handful of squares and shades resolve into the presence of a person. More about this project will be in my article coming up in issue 3 of Machine Arts Magazine.
Day 5

Snake Text turns words into one continuous line — like a snake slithering across the page.

Each letter is built from a path that can be drawn without lifting the pen, and when you type a whole word it automatically adds the connecting strokes so everything becomes one unbroken stroke.

During the animation, a little snake head (with snake eyes!) follows the route and leaves a trail that forms the text. A smoothing control adds Bezier curves for that more organic, hand-drawn feel.

End result: a satisfying “snake-written” animation and a single-stroke SVG ready for pen plotting.
Day 6
The Genuary Challenge is Lights Out. Before the pandemic, I started this habit of scanning my friends. When the pandemic hit, I started hordeing HP plotters from the 1980s and I developed a practice for turning my 3d models into drawings by finding edges and creases and doing different decimation routines. The result was a bunch of really great drawings and I’m very proud of these portraits. Each one took about 3 hours to transform from a scan to a cleaned up 3D model to a 2D drawing with hatched shading. Then I would run them with different color combos till I found a good one. Here are some of those portraits from 2020:


Fast forward to 2026 and since Genuary prompts dropped I’ve been trying to mature my tool for converting 3D models into drawings. I started with this one of my friend Anthony who is one of the most stylish, powerful, and gentle people on the planet. Here’s the portrait I did of him in 2020.


Because I’m trying to exercise the unreleased super secret Bantam Tools painting machine, I wanted to give a go to make a watercolor version of this portrait. In my tool I can orient the model and position the light to create shadows so the lighting is a little different. (This is how I’m connecting this to the Lights Out challenge.) I ended up creating a hatching style that went over each shade of grey from 3 different directions which gives a diffused but saturated effect and shows off the lighting of the model.


As I was looking for models I was reminded of my time at MakerBot when we did a partnership with the Metropolitan Museum of Art where they let us come in and scan everything and make mashups and play. Later I went and scanned a model of Alexander the Great at the Brooklyn Museum so I’ve been using that as one of the models to make hidden line removal processes cooperate. This has proved non-trivial and I ended up rayhatching the whole thing which ended up being a bit computationally time consuming but gets great results.

I was also reminded of when I was CEO of MakerBot I would often fly around the world giving talks and I would always bring a full size 3D model of a skull in my backpack which somehow always made it through security with no questions asked. I pulled that model up and made a painting of that too!
Get Bre Pettis’s stories in your inbox
Join Medium for free to get updates from this writer.
So far this is my favorite tool I’ve developed this month and it’s definately the one with the most time invested in it.
Day 7
The #Genuary prompt for day 7 is Boolean algebra. I decided to get inspired by the bubbler clusters and made a program to draw them, color them and animate them.

There’s something magical about what happens when two soap bubbles collide. They don’t just bounce off each other or merge into a blob. Instead, they negotiate. A flat wall appears between them — a perfect membrane that minimizes surface tension.
Plateau’s Laws! I didn’t just make this up. Real soap bubbles follow rules discovered by Belgian physicist Joseph Plateau in the 1800s.


In foam: Two bubbles meet at a flat wall if they’re equal size (or a curved one if not). When three bubble films meet, they form 120-degree angles. Where four edges meet at a point, they form tetrahedral angles of about 109.47 degrees. The generator respects these constraints. The result looks right because it’s obeying the same geometric rules nature uses.

And here is an animation. I made my program to be able to output gifs because that’s what Medium likes, but it also outputs all the svgs in a zip file so if I had more time I could plot them all and photograph and animate them. They have registration marks so I may have to build a tool to edit groups of photos to keep registration marks consistent.
Day 8
In the 1970s, my dad was studying with Buckminster Fuller and I had books about Barbapapa, which was a family of blobs that lived in spherical shaped houses that looked like this:

The challenge for #genuary day 8is to build a city so I set out to make a generative Barbapapa Village of spherical homes smooshed together.

There are a few things to know if you are using a painting machine to draw drawings. The first is that brushes are unpredictable and run out of paint quickly so there are supposed to be circular windows, but the circles weren’t large enough to drag the tip of the brush around.

I made a mode where I could make a gif by moving all the UI sliders from the left to the right sequentially so that I could show options. It changes the number of homes in the village, then works through different hatching styles and then moves the light around to simulate the sun going down.
Day 9

The challenge for #genuary day 9 is cellular automata. I am a huge fan of Conway’s game of life and I spent some time thinking about how to make a program to react to photos and make line drawings and what I came up with was a program that I call “Hungry Line” where lines start all over the page and if they are darker, they grow longer. If they hit contours they have to follow them. In places where the image is lighter, the lline doesn’t have as much to eat so the lines are shorter. I created a mode that split out CMYK (Cyan, Magenta, Yellow, and Key Black) and dug around for a good color image.

I found this photograph I took in 2003 or so where I was shooting plastic horses in nature wth an extreme close up lense and then aggregating the photos.

Put into my program it looks like this. Definately not an accurate representation of the image, but I liked it enough to think there is something going on here.

Because Medium likes gifs and because Instagram optimizes for video, I made some videos of the process. I’ve been trying to level up my skills with each project so for this one, I set it up so that if you get an output you like, you can save your settings which is helpful because the user interface for this one is like 100 sliders.
Day 10
Polar coordinates is today’s challenge and I had an idea inspired by Vincent Pidone who is the king of moiré pattern plotting and James Nolan Gandy who makes contraptions to make rotary designs.
For my rotary project, I set up a number of modes in my program inspired by different rotary machining techniques, but decided to plot a circular moiré pattern. Here is what my design hoped to look like.

And here’s what it looked like plotted: COMING SOON
Day 11
The challenge for day 11 is Quine which is a program that when run, writes it’s own program. Definitely a palindrome style code approach. I used the font created earlier this month with snake text to render this. If you create this program it will write itself out in svg format without text. I didn’t find this visually compelling so I didn’t plot it, but it was a pain in the butt to create so here it is.

Day 12
“Boxes Only” is the prompt for #genuary day 12. I added a voxel mode to my STL2SVG program. Here’s a museum piece of Athena “voxelized” with strong minecraft vibes. I set it up so that I can color it with parallel pens.


Here’s a gif I made to animate the model. I added wireframes which seem to help it look voxelized. Getting the text spaced right is on the todo list.

Plot: Coming soon
Day 13
For Genuary Day 13 the challenge is: Self Portrait. I’ve had it on my todo list to create a way of organizing photos of animation frames with registration marks for reference. That’s still on the todo list, but I made something that will make that easier later on. I created an image composite tool to layer lots of photos on top of photos.

This photo was taken a long time ago for an Inc Magazine Article and I use it as a demo file when I am trying to make programs that make portraits which took up a bunch of 2025.


I decided to figure out a way to composite all the photo derivatives I’ve made of this image into a video and a overlay.

To do this, the program automatically looks for eyes, but it does a bad job so I built a manual eye placer. If they don’t seem to line up in the animation, that’s probably my bad eye placement decision.