VulnHub Mr-Robot :1 Walkthrough
Introduction:
In this article, I will share my experience completing the Mr-Robot: 1 CTF machine from VulnHub.
Mr-Robot: 1 is a beginner-to-intermediate-level vulnerable machine designed to improve practical penetration testing skills. The main goal of this challenge is to find three hidden keys by identifying and exploiting vulnerabilities.
During this lab, I practiced different cybersecurity techniques, including network scanning, enumeration, web application testing, password cracking, reverse shells, and privilege escalation.
In this walkthrough, I will explain the tools, commands, and steps I used to complete the challenge.
Step 1: Download and Import Mr-Robot: 1 into VirtualBox
First, I visited the official VulnHub website and searched for the Mr-Robot: 1 vulnerable machine.
Download Link: https://www.vulnhub.com/entry/mr-robot-1,151/
After downloading the machine, I followed these steps:
- Opened Oracle VirtualBox on my computer.
- Extracted the downloaded file if it was compressed.
- Imported the virtual machine into VirtualBox using File → Import Appliance if the download contained an OVA file.
- Configured the virtual machine’s network adapter to Host-Only Adapter to create an isolated lab environment.
- Started the Mr-Robot: 1 target machine.
I also started my Kali Linux virtual machine, which I used as the attacking machine.
Both Kali Linux and Mr-Robot: 1 were connected to the same Host-Only network and so they could communicate with each other.
Step 2: Checking the Kali Linux IP Address
After starting both the Kali Linux and Mr-Robot: 1 virtual machines, I opened the Kali Linux terminal.
First, I checked my Kali Linux IP address using the following command:
ip addrThis command displays the network interfaces and their assigned IP addresses.
I identified the IP address of my Kali Linux machine under the eth0 network interface (or the interface connected to the Host-Only network).
Since both Kali Linux and Mr-Robot: 1 were connected to the same Host-Only network, they could communicate with each other.

Step 3: Identifying the Target Machine IP Address
After checking the Kali Linux IP address, I used the arp-scan tool to identify the Mr-Robot: 1 target machine’s IP address.
I opened the Kali Linux terminal and executed the following command:
sudo arp-scan -I eth0 -l
Step 4: Verifying the Target Machine Using Ping
After identifying the possible Mr-Robot: 1 target IP address using arp-scan, I used the ping command to check whether the target machine was active and reachable.
I executed the following command in the Kali Linux terminal:
ping 192.168.43.4Nmap Scanning and Service Enumeration
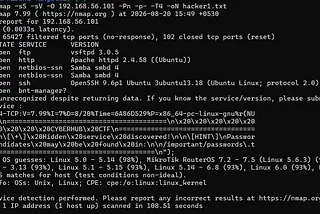
After confirming the target machine’s IP address, I used Nmap to identify the open ports and services running on the Mr-Robot: 1 machine.
I executed the following command:
sudo nmap -sV -sS 192.168.43.4
Web Application Enumeration
After completing the Nmap scan, I found that port 80 (HTTP) was open. So, I opened the target IP address in my web browser.
URL: http://192.168.43.4

The browser displayed the Mr-Robot: 1 website, which had an interactive terminal-style interface.
I explored the website to find useful information, but I couldn't find any clear clues or useful information to proceed further.
So, I decided to perform directory and file enumeration to discover hidden files and directories on the web server.
Hidden Directory Enumeration Using Gobuster
After exploring the website, I couldn’t find any useful information to proceed further. So, I decided to use Gobuster to discover hidden directories and files on the target web server.
I executed the following command in the Kali Linux terminal:
gobuster dir -u http://192.168.43.4 -w /usr/share/wordlists/dirb/common.txt
WordPress Website Identification
After discovering the hidden directories using Gobuster, I noticed some WordPress-related paths, such as wp-admin and wp-login.php.
These directories indicated that the target website was running on WordPress, a popular Content Management System (CMS).
This was an important finding because I could now focus on WordPress enumeration to identify possible usernames, plugins, themes, and security vulnerabilities.
So, I decided to investigate the WordPress login page and continue with further enumeration.
WordPress Enumeration Using WPScan
After confirming that the target website was running on WordPress, I decided to use WPScan to gather more information about the website.
WPScan is a WordPress security scanning tool used to identify WordPress users, installed plugins, themes, and potential vulnerabilities.
I executed the following command in my Kali Linux terminal:
wpscan --url http://192.168.43.4 -e u

Exploring the robots.txt File
After running Gobuster, I discovered several hidden directories and files on the target web server.
While checking the results, I noticed that the robots.txt file returned an HTTP status code 200 (OK), indicating that the file was accessible.
I opened the following URL in my web browser:
http://192.168.43.4/robots.txt
After discovering two interesting entries in the robots.txt file, I first decided to investigate fsocity.dic.
I opened the following URL in my web browser:
http://192.168.43.4/fsocity.dic
After opening the fsocity.dic file in my web browser, I noticed that it contained a large collection of words that could potentially be usernames or passwords.
Since this file might be useful for further enumeration and password cracking, I decided to download it to my Kali Linux machine.
I used the wget command to download the dictionary file directly from the target web server.
wget http://192.168.43.4/fsocity.dicAfter downloading the fsocity.dic wordlist, I decided to remove duplicate words to make the file more efficient for further password testing.
The original dictionary file contained many repeated words, which could increase the time required for password cracking.
I used the following command to sort the wordlist and remove duplicate entries:
sort -u fsocity.dic -o robots.txt
After exploring the fsocity.dic file, I decided to investigate the second entry found in the robots.txt file, which was key-1-of-3.txt.
I opened the following URL in my web browser:
http://192.168.43.4/key-1-of-3.txtAfter accessing the URL, the webpage displayed the first hidden key (Flag 1) of the Mr-Robot: 1 CTF challenge.

During the earlier directory enumeration, I discovered the wp-login.php file, which is commonly used as the login page for WordPress websites.
I opened the following URL in my web browser:
http://192.168.43.4/wp-login.phpWhen I submitted the random credentials, the website displayed a login error message, indicating that the authentication attempt had failed by displaying “invalid username”.

After entering random credentials on the WordPress login page, I decided to use Burp Suite to capture and analyze the login request.

After capturing the WordPress login request using Burp Suite, I analyzed the HTTP POST request to identify the username and password parameters.
I observed that the WordPress login form sends credentials using the following parameters:
log– Represents the username.pwd– Represents the password.
Using this information, I prepared a Hydra command to test the WordPress login credentials with the previously downloaded wordlist.
hydra -L robots.txt -p test 192.168.43.4 http-post-form "/wp-login.php:log=^USER^&pwd=^PASS^:F=Invalid username" -t 30
After executing the Hydra command with the prepared wordlist and a random password, I analyzed the results.
Hydra helped me identify a valid WordPress username by checking the login responses.
Although the username was valid, the password used during test was incorrect.
This confirmed that the username existed in the WordPress authentication system.

After identifying the valid WordPress username elliot, I decided to use Hydra again to find the correct password.
This time, I used the valid username along with the previously prepared wordlist (robots.txt) to test possible passwords.
Get Harsha Tangella’s stories in your inbox
Join Medium for free to get updates from this writer.
I used the following command:
hydra -l elliot -P robots.txt 192.168.43.4 http-post-form "/wp-login.php:log=^USER^&pwd=^PASS^:incorrect" -t 30After running the Hydra command with the valid username elliot and the prepared password wordlist (robots.txt), Hydra started testing different password combinations.
After some time, Hydra successfully identified the correct password for the WordPress user elliot.

I opened the WordPress login page in my web browser:
http://192.168.43.4/wp-login.phpThen, I entered the valid credentials:
- Username:
elliot - Password:
ER28–0652

After successfully cracking the password using Hydra, I obtained the valid WordPress login credentials.
After successfully logging in with the valid credentials, I was redirected to the WordPress Dashboard.

The dashboard displayed different options, such as Posts, Pages, Appearance, Plugins, Users, and Settings.
After navigating to the Appearance section, I opened the Theme Editor and selected the 404 Template (404.php) file.
The 404.php file is a WordPress theme file used to display an error page when a requested webpage is not found.
I examined the PHP code inside the 404 template to understand its functionality.

After selecting the 404 Template (404.php) in the WordPress Theme Editor, I identified a possible way to gain a reverse shell on the target machine.
Since the WordPress dashboard allowed me to modify the PHP template files, I decided to use the Monkey PHP Reverse Shell script.
The main idea was to replace the existing 404.php template code with the PHP reverse shell script and save the changes using the Update File button.
A reverse shell allows the target machine to establish a connection back to the attacking machine, providing command-line access.
After identifying the possibility of gaining reverse shell access through the WordPress 404.php template, I decided to download the Monkey PHP Reverse Shell script from GitHub.
I opened the GitHub repository and downloaded the raw php-reverse-shell.php file to my Kali Linux machine.
This PHP script is designed to establish a reverse connection from the target server to the attacking machine
nano php-reverse-shell.php
I planned to configure it with my Kali Linux IP address and a listening port before using it in the WordPress 404 template.

After updating the Kali Linux IP address and port number in the PHP reverse shell script, I saved the changes using the following keyboard shortcuts:
Ctrl + O– Saves the modified file.Enter– Confirms the filename.Ctrl + X– Exits the nano text editor
After configuring and saving the PHP Reverse Shell script, I copied the complete PHP code from the downloaded file.
Then, I returned to the WordPress Dashboard → Appearance → Theme Editor and selected the 404 Template (404.php).
I replaced the existing 404.php code with the configured PHP reverse shell code.

After pasting the code, I clicked the Update File button to save the changes
After updating the 404.php template with the PHP reverse shell code, I opened a new terminal in Kali Linux to set up a listener using Netcat.
I executed the following command:
nc -lvnp 1234
After setting up the Netcat listener on port 1234, I returned to the web browser to trigger the modified WordPress 404.php template.
http://192.168.43.4/wp-admin/404.php
After triggering the modified 404.php file in the web browser, I returned to my Kali Linux terminal where the Netcat listener was running on port 1234.
I observed that the target machine successfully established a connection to my Kali Linux machine.
The reverse shell was successfully established.

After successfully gaining reverse shell access, I checked the current user and found that I was logged in as daemon, a low-privileged system user.
Next, I navigated to the /home directory using the following command:
cd /home
ls
I found another user directory named robot. I navigated into that directory and listed the available files.
cd robot
ls -la
I discovered two important files:
- key-2-of-3.txt — Contains the second flag of the Mr-Robot: 1 challenge.
- password.raw-md5 — Contains the robot user’s password in MD5 hash format.
First, I tried to access the key-2-of-3.txt file, but I received a Permission Denied error because the daemon user did not have sufficient permissions to read it.
However, I was able to read the password.raw-md5 file, which contained an MD5 password hash associated with the robot user.
c3fcd3d76192e4007dfb496cca67e13bAfter identifying the MD5 hash in the password.raw-md5 file, I decided to crack it using John the Ripper, a password-cracking tool.
First, I saved the MD5 hash into a text file named hash.txt on my Kali Linux machine.

Then, I executed the following command:
john --format=raw-md5=--wordlist=/usr/share/wordlists/rockyou.txt hash.txt
After successfully cracking the MD5 hash using John the Ripper, I obtained the password for the robot user.
Before switching to the new user, I needed to upgrade my existing reverse shell into a proper interactive shell.
I referred to the Python TTY shell command commonly found in HackTools:
python -c 'import pty; pty.spawn("/bin/bash")'
After upgrading the reverse shell using the Python TTY command, I successfully obtained a proper interactive shell.
Next, I switched from the daemon user to the robot user using the following command:
su robotThe system asked for a password. I entered the password that I had previously cracked using John the Ripper.
After entering the correct password, I successfully logged in as the robot user.
Then, I navigated to the home directory and listed the available files:
cd /home
ls
I found the robot directory and navigated into it:
cd robot
ls -la
Now that I had logged in as the robot user, I had permission to access the second flag.
I executed the following command:
cat key-2-of-3.txt322c73956184f694993bede3eb39f959
After successfully capturing the second flag, my next objective was to gain root access to the Mr-Robot: 1 target machine.
First, I checked the current user’s sudo permissions using the following command:
sudo -lHowever, I couldn’t identify any useful sudo permissions that would allow me to execute commands as root.
Next, I referred to HackTools to find Linux privilege escalation techniques. I decided to check for files with SUID (Set User ID) permissions.
I executed the following command:
find / -user root -perm /4000 2>/dev/null

After identifying the root-owned SUID files, I noticed that Nmap was one of the available executables.
To investigate whether Nmap could be used for privilege escalation, I visited the Wayback Machine and accessed an archived version of the GTFOBins website from 2020.
Websites:
- Wayback Machine: https://web.archive.org/
- GTFOBins: https://gtfobins.github.io/
GTFOBins is a collection of Unix/Linux binaries that can potentially be used to bypass security restrictions or escalate privileges when certain permissions or configurations are present.
After opening the archived GTFOBins website, I searched for nmap using the filter option.

I checked the available Nmap techniques to understand how an older version of Nmap with SUID permissions could potentially be used for privilege escalation.

After executing the command, I successfully gained root-level access to the Mr-Robot: 1 target machine.

then successfully completed the Mr-Robot: 1 VulnHub CTF challenge by identifying vulnerabilities, gaining access to the target machine, and escalating my privileges to root.