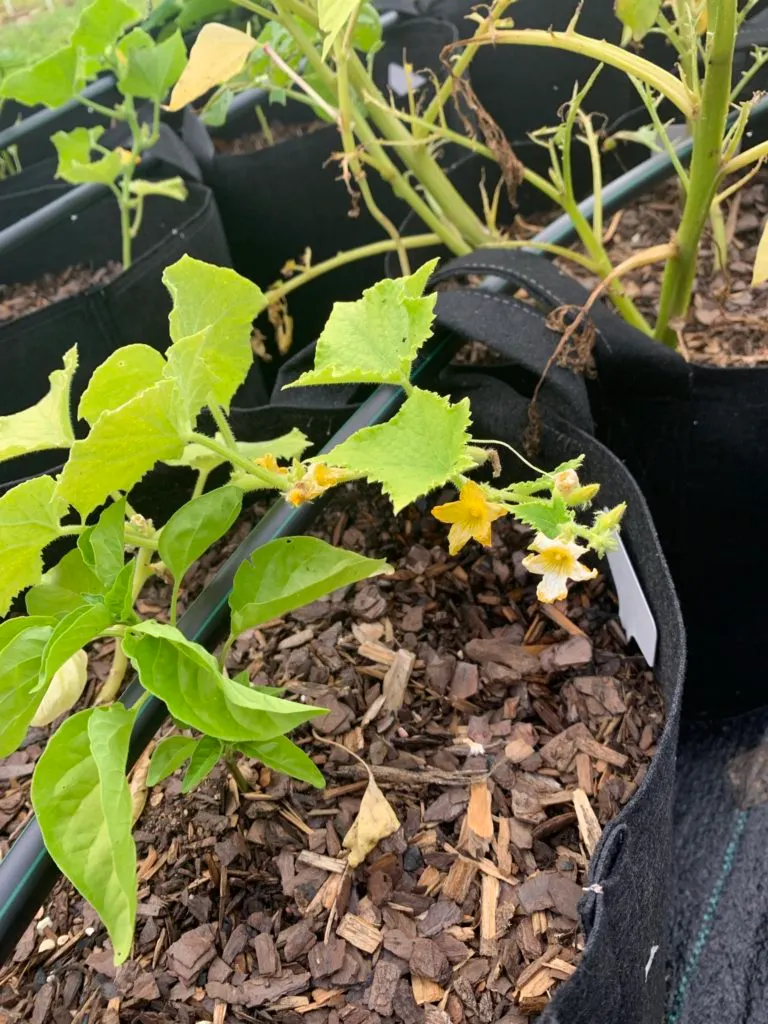
Grow a Pasta Grow Bag!

Really! We are not going to grow pasta in our grow bag and we are not growing any type of wheat. But we are growing nearly everything else!
Think about a Pasta Salad…what do you put in one?
Bell Pepper, Cucumber, Zucchini, Cherry tomatoes, Green Onions, Parsley, Basil and Oregano. Some other stuff too…olives, cheese…not stuff we are going to add to our grow bag…but good to have on hand for later…or really all the time.
So, we are going to plant the above vegetables in one bag and call it our Pasta grow bag.
What We Need to Get Started
First, we have to make sure that everything we put in the bag will grow together…need the same fertilizer, water and care and that they will fit into one bag together.
To decide what size grow bag we need we have to find out how much room is needed for each plant. We can squeeze some plants into tighter spaces, but not all will like that.
Bell Pepper and Tomatoes need room! Let’s make sure they have it.
Let’s begin.
Both bell pepper and tomatoes belong to the nightshade family and have fairly shallow roots. When planting either of these in a grow bag we could use a grow bag that is 12 inches deep. All the other plants will grow within those 12 inches as well.
Keep in mind that we cannot shove either plant against the side of the bag…don’t forget how well grow bags handle root pruning when roots reach the side of the bag. We don’t want half the root system of either plant to be cut off. However, we can put them a few inches from the side of the bag.
What the Experts Say
Common gardening advice dictates that bell pepper and tomato plants need about 12 inches width each. If we give them each another six inches…to keep them from hitting the sides of the bag, we are looking at a grow bag at least 30 inches in width. We still have a lot to go though.
Let’s leave the vining plants, cucumbers and zucchini, till last since we can manage them with trellis.
That leaves Parsley, Basil, Oregano and Green Onion. Basil is the largest and can grow in a 10–12-inch space. Oregano needs at least 6 inches to do well. Parsley will grow well in a 6-inch space and green onions can grow in a 1–2-inch space.
Let’s add it up. Bell Pepper and Tomato — 30 inches, Basil — 12 inches, Parsley and Oregano — 12 inches and green onions can be fit in between everything else. We are looking at a total of 54 inches in width and at least 12 inches deep.
A grow bag with a 54-inch width would require a 300 gallon grow bag. Not doable for me, how about you?
What We are Going to Do
Let’s talk reality. I plant a cherry tomato in a 5–7 gallon grow bag. I plant a bell pepper in the same size bag. In each of those bags I plant at least one companion plant…basil, parsley or oregano. I also try and plant something that acts as a pollinator attractant. Lots of stuff in a 5–7 gallon grow bag.
Let’s try and get everything into a 45 gallon grow bag…because that is what I have. It has a 30” width and is 12” deep.
That is not all we have to think about, we need to know if all the plants need the same care.
Setting Our Grow Bag up for Success
Tomatoes and Bell Peppers can be treated very much alike since they both belong to the nightshade family. At planting time, both need a slow-release fertilizer added to the soil. After flowering, they both need a liquid fertilizer applied every two weeks.
In fact, all the plants that we are going to put in this bag need a slow-release fertilizer applied at planting time. Zucchini, Green Onion and the herbs all need a liquid fertilizer applied every two weeks as well.
Cucumbers are what causes the problem…but it is easily fixed. Gardeners, online and sometimes in real life, frequently recommend the use of liquid fish emulsion applied every two weeks after flowering. Fish emulsion is expensive…and does it really help?
Fertilizer Controversy
The Spruce website stated that “Because fish emulsion works quickly, you may want to apply it more frequently. In fact, North Carolina State University researchers report that applying it twice a week gives plants the most significant growth compared to other frequencies.” You can read that article here.
The Spruce stated this in reliance on a study done by North Carolina State University. However, The Spruce did not include that the North Carolina study used fish emulsion on plant starts only when they recorded that growth rate. When used as a foliar feed there was no increase in growth rate. You can read that study here.
I know…TMI; however, I am not against using fish emulsion…just not to keep my plants growing.
Any time I buy something from a website I always read the comments…anytime I am researching information on the internet I do the same. You get real life information in the comments.
I found some very interesting information when researching fish emulsion besides the article from The Spruce. The article here from Garden Myths, is not the interesting part…the interesting part is in the comment by Yusef on March 23, 2022 @ 8:58 am. Yusef is a commercial organic blueberry farmer…scroll down to his argument for why he uses fish emulsion.
Yes, this is one person’s thoughts; however, it is from someone actually on the ground with hands-on experience.
So, after reading all those articles, assuming you did, we can make an argument that any organic liquid fertilizer will work for our Pasta Grow Bag.
After all, that’s why we are here…to get the best growth from all the work we put in planting this bag.
Get Peggy Evans Esq.’s stories in your inbox
Join Medium for free to get updates from this writer.
See, cucumber problem fixed!
Companion Planting on Steroids
One thing we haven’t really talked about is companion planting…this is that on steroids. Anyone that gardens knows some information about companion planting.
Companion planting allows plants to benefit each other — it may involve deterring pests, enhancing growth, boosting vegetable production, attracting pollinators, or preventing disease.
Everything we are planting in our grow bag will help the others…or at least not hurt them. For example, onions will cover the smell of tomatoes so that pests have a harder time finding them. Onions also help the other plants in our grow bag the same way.
However, don’t plant your green onions in a clump…spread them around in the bag to get the best benefits.
Let’s Get Ready to Plant!
It takes 1 cubic foot of soil to fill a 7 gallon grow bag to the top. So, it will take 6 ½ bags of soil to fill our 45 gallon grow bag.
I order bagged soil from my local Home Depot. I usually get the compost/manure combination and the last time I ordered soil it was $2.97/bag.
To get this price I had to order at least 35 bags and I had to pay a delivery charge. So, when I order, I order a lot of things at once including my fertilizer pictured below.
Fertilizer Questions
Before we add slow-release fertilizer to the soil, there is a calculator that can tell you how much fertilizer you need. You need to know the Nitrogen number on your bag of fertilizer and the width and height of your grow bag. The calculator is here. You can use this calculator for any container you plant.
I have three different slow-release fertilizers in my arsenal; Tomato-Tone (3–4–6) which is organic, Vigoro (12–10–5) which is not organic and Garden-Tone (3–4–4) which is organic.
When put through the above calculator both Tomato-Tone and Garden-Tone require 564 teaspoons and Vigoro requires 141 teaspoons. There are 48 teaspoons to a cup…but you knew that right?
If you are sticking with organic fertilizers, we need 12 cups of fertilizer for the entire 45 gallon grow bag mixed with the soil prior to planting. It sounds like a lot; however, you have a lot of soil and a lot of plants…you need to feed them.
If you prefer to use an inorganic fertilizer, you need 3 cups of the Vigoro fertilizer for the 45 gallon grow bag.
Pour three bags of soil into the grow bag, pour half the fertilizer over that and mix well. Then pour three more bags of soil in and the rest of the fertilizer…mix well.
Ready to plant!
Finally Planting!
Plant the tomato and bell pepper first, then the cucumber and zucchini…they are all going to be site specific. Plant the tomato and bell pepper toward the middle and to the sides…look at the graphic above.
Plant the cucumber and zucchini towards the back of the bag, that is where you will place the bag by the trellis…your gonna need a trellis…or some sort of support to keep them both off the ground.
Plant the Basil in the middle of the bag and the oregano in front of that. Then place the parsley towards the front in the middle and to both sides in the back.
Then, plant the green onions wherever you can fit them. Remember, put them all around everything so that they can protect our plants.
Water the bag until you see water coming out around the bottom of the bag. If you see water just running down the side of the bag…keep watering until it comes out of the bottom. You are done planting your pasta grow bag!
Well done!
Now What?
You should be done…except for watering…until you start to see flowers on your plants. Remember, not everything will begin flowering at the same time.
When you start to see flowers on one of the larger plants you can start with the liquid feed for them all. Give the bag liquid fertilizer every two weeks through harvest.
I set a reminder on my phone for each grow bag I fertilize…or you can geek out and keep a spreadsheet for your grow bags.
I love Pasta Salad in the summer and cannot wait to make some!
If you decide to challenge yourself with this planting plan, leave me a comment and send me a picture! I would love to see yours.