Basic Pentesting (CTF Walkthrough)

Step 1: Reconnaissance
Before jumping straight into the technical scanning, we first need to spin up the target machine on the TryHackMe platform. Once the machine is up and running, we receive our target IP address (e.g., 10.48.184.213).
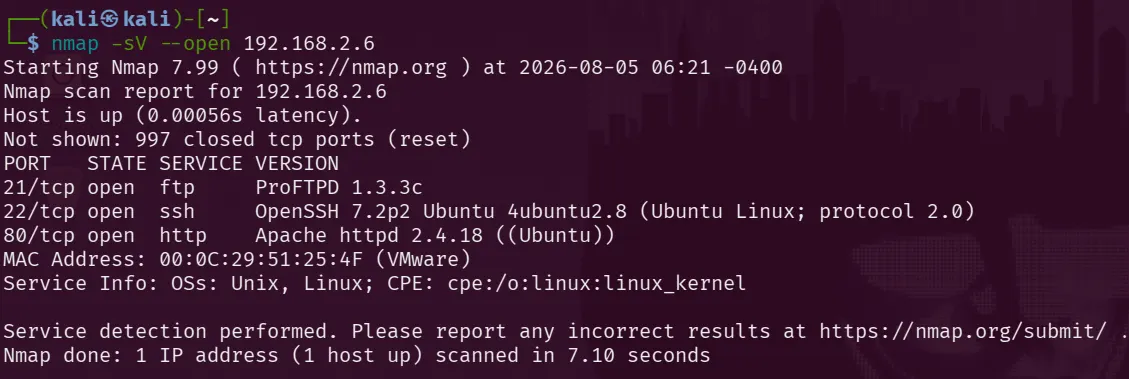
With the target live, our first operational step is reconnaissance. We use Nmap to probe the target IP address, map out open ports, and identify the active services running behind them.
Nmap Command Used
nmap -sC -sV -p- 10.48.184.213
Scan Results & Analysis
Based on the terminal output, here are the open ports and services discovered on the target machine:
- Port 22/tcp (Open): Runs
OpenSSH 8.2p1 Ubuntu, indicating a remote login vector. - Port 80/tcp (Open): Runs an
Apache httpd 2.4.41web server, serving as the main entry point for web enumeration. - Ports 139/445/tcp (Open): Runs
netbios-ssn Samba smbd 4, showing active SMB file sharing services.
Step 2: Web Enumeration & Source Code Analysis
When we browse directly to the target IP address ([http://10.48.184.213] the main page shows a default message saying "Undergoing maintenance".
However, inspecting the page source reveals a hidden HTML comment left by the developers:

Next Action: Directory Enumeration
Since the source code hints at a developer note or hidden section, we can use a tool like Gobuster or Dirb to search for hidden directories or files (like a /development or similar path) on the web server.
gobuster dir -u http://10.48.184.213/ -w /usr/share/wordlists/dirb/common.txt
Scan Results & Analysis
As seen in the terminal screenshot, the directory brute-force scan successfully discovered a hidden path matching the developer note clue:
/development(Status:301 Moved Permanently) — This points us directly to a hidden folder on the web server that we can now explore in our browser.
Step 3: Analyzing the /development Directory Contents
Navigating to [http://10.48.184.213/development/](http://10.48.184.213/development/) in the browser reveals a directory listing with two text files:

dev.txt— Contains developer notes or logs.j.txt— Contains notes or initials potentially pointing to a system user (likej).
Step 4: Discovering Users via enum4linux
Before launching a brute-force attack using Hydra, it is essential to enumerate the target machine thoroughly to confirm usernames and check for open SMB shares. Since ports 139 and 445 were open, running enum4linux is the correct workflow.
Execution
Run the following command against the target machine:
enum4linux -a <TARGET_IP> | tee enum4linux.logKey Findings
- SMB Enumeration: Checks for open shares and configurations.
- RID Cycling: Towards the end of the scan report, look for the section:
( Users on <TARGET_IP> via RID cycling (RIDS: 500–550, 1000–1050)- This section reveals valid system usernames (confirming users like ‘J’ and ‘K’ found in the developer notes).
Once you have the exact username confirmed through enum4linux, you proceed to use Hydra to target the SSH service with a wordlist like rockyou.txt.
Step 5: Brute-Forcing SSH Credentials with Hydra
After enumerating the target system and identifying valid usernames (such as user ‘J’) via enum4linux and directory analysis, the next step is to perform a credential brute-force attack against the SSH service using Hydra.Execution
Run the following Hydra command targeting the SSH port with a standard wordlist like rockyou.txt:
hydra -l jan -P /usr/share/wordlists/rockyou.txt ssh://<TARGET_IP> -VV
Once Hydra successfully tests the combinations against the target, it will output the correct matching password, allowing you to establish an interactive SSH session.
Get Muhammadswalih’s stories in your inbox
Join Medium for free to get updates from this writer.
After running the Hydra brute-force attack, the tool successfully identified the correct password matching the username jan from the rockyou.txt wordlist.

Results
- Service: SSH (
port 22) - Username:
jan - Password:
armando
Step 6: Logging into the Target via SSH
Using the credentials discovered via Hydra, establish an interactive remote shell session on the target machine.
Execution
Run the following command in your terminal:
ssh jan@10.48.184.213
Once logged into the target via SSH, the next phase involves exploring the system to find sensitive files, user configurations, or potential vectors for privilege escalation.
Post-login enumeration was conducted to explore the system environment, check user privileges, and inspect other user home directories under /home/.
Commands Executed:
Bash
whoami
cd /home/
ls -la
cd kay
ls -la
Findings:
- Confirmed current execution as user
jan. - Discovered multiple user home directories:
jan,kay, andubuntu. - Inside user
kay's directory, sensitive files were located, including.bash_history,pass.bak, and a.sshdirectory.
To investigate potential lateral movement vectors, the .ssh directory of user kay was accessed to check for cryptographic keys or configuration files.
Commands Executed:
cd .ssh
ls -la
cat id_rsa
Findings: The command successfully outputted an RSA private key (id_rsa). The header Proc-Type: 4, ENCRYPTED indicates that the private key is passphrase-protected, marking it as a prime target for hash extraction and cracking. This outputs a long, encrypted private key:
Step 7: Creating the Private Key File & Extracting the Hash
Since we retrieved the encrypted RSA private key content (id_rsa) from user kay's .ssh directory, we need to save it locally on our attacking machine, secure its permissions, and extract its hash for cracking.
Execution
- Create and edit a new file named
id_rsausingnano, then paste the private key contents into it:
nano id_rsa2 .Set secure permissions on the private key file (mandatory for SSH keys):
chmod 600 id_rsa3 .Extract the hash from the private key using ssh2john and output it to a hash file:
ssh2john id_rsa > id_rsa.hash
Findings
John successfully cracked the hash and revealed the plaintext passphrase:
Passphrase: beeswax
Step 9: Lateral Movement & Logging in as User kay
Using the cracked passphrase (beeswax), we successfully authenticated using the id_rsa private key and established an interactive shell session as user 'kay' on the target machine.
Execution
ssh -i id_rsa kay@10.48.184.213
Passphrase entered when prompted: beeswax
After successfully logging in as user ‘kay’, we listed the home directory contents again to check for any local files, backups, or hints that could assist in privilege escalation.
Execution
ls -la
Findings
- Listing the directory revealed the
pass.bakfile we spotted earlier during initial enumeration. - Reading the file using
catexposed a strong plaintext password string: - Password Found: