Data to Azure IoT Central with Sigfox
Here is everything you need to integrate Azure IoT Central with Sigfox

Prerequisites
This tutorial assumes you already:
- Have a Warefab Konnect or Sigfox devkit
- Have Azure account
- Have Azure IoT Central application created by these instructions
- Have a Sigfox backend account and that you have activated device(s) within your account.
Sigfox & 0G
SIGFOX is a leading provider of dedicated connectivity for the Internet of Things. They provide a two-way communication service through a global radio network.
It is the first global 0G network — a low-power wide area network (LPWAN), which interconnects low-bandwidth, battery powered devices with low bit rates over long ranges.
Liquid Telecom, a leading communications and solutions provider in 13 African Countries, operates the network in Kenya.

Warefab
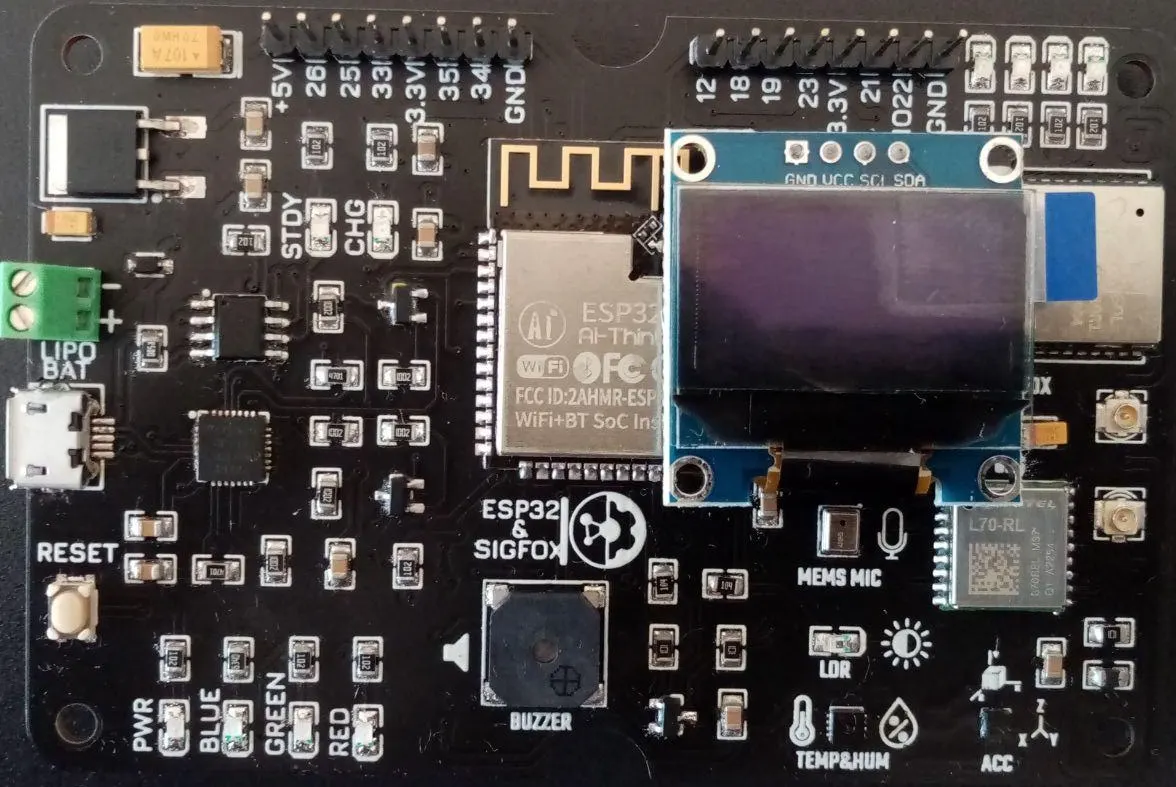
Warefab Konnect is the first Kenyan designed Sigfox developer kit that offers a practical and cost effective solution for makers seeking to add SigFox connectivity to their projects with minimal previous experience in networking.

The kit has multiple sensors onboard including a GPS receiver and an extension port that allows users to extend the capability of the kit e.g adding more sensors or actuators.
Azure IoT Central
Azure functions & IoT Central application
Microsoft IoT Central is a fully managed, highly scalable IoT SaaS solution. It addresses all the obstacles to build enterprise-grade IoT applications quickly. Microsoft IoT Central offers top-notch security along with regional availability, reliability and global scale of Azure. It also offers support for IoT best practices, allowing every organization to benefit from transformational IoT.
In this section, we will be deploying an Azure Function into our subscription and set up the device bridge.
This parts assumes that you have created Azure IoT Central application by these instructions

To do this, we need to get some information from IoT Central application. Go to your IoT Central application, and navigate to the Administration > Device Connection area. Take note of the ID Scope and Keys, we are going to use them in the next step.

3. Navigate to Home > Resource groups > Create a resource group area, and create a new resource group.

The resource group is going to act as a container that holds all related resources for our warefab solution.
After that, create a custom deployment by clicking HERE. This opens up a custom ARM template in the Azure Portal to deploy the Azure Function.

Select a subscription and the resource group that you created. In my case, I will select warefab. Also, copy the ID Scope and paste it into the Scope ID field the custom template, SETTINGS section. In the same page, under the Devices tab, click View Keys. Copy either the Primary key or the Secondary key and paste it into the Iot Central SAS Key field. (this key will be stored in a Key Vault provisioned with the function).
Check on the notification to confirm that deployment has succeeded. Once deployment ‘Microsoft.Template’ to resource group ‘warefab’ is successful, install the required NPM packages in the function.
To do this, go to the Function App that was deployed to your subscription in the Functions > IoTCIntegration > Console tab.

In the console, run the command npm install

After the package installation finishes, the Function App needs to be restarted by clicking the Restart button in Overview page.

After the restart, we can check on the end point at the newly created function App in Functions > IoTCIntegration > Get function URL
Get Ngesa Marvin 10x’s stories in your inbox
Join Medium for free to get updates from this writer.
We will add this endpoint URL to Sigfox backend so that when we receive data from warefab device, Sigfox backend can make HTTP POST requests to the function URL feeding device data through device bridge and into the IoT Central app you created.
You may also check on the files structures of the created function App

Parse the Sigfox Payload
SIGFOX does not understand or transform the payload being transmitted through the network. Manufacturers pack messages, payload in different ways/data formats and it is only them who knows how it is structured. Here is guide on the warfab v1 devkit payload structure.
To manage messages that will be coming from Sigfox webhook integration, go toIoTCIntegration/index.js file of the Function App and replace code in the trytry block with the following
Configure sigfox backend to trigger HTTP function URL
The configuration of callbacks is done in the Sigfox backend device type page.
The callbacks are triggered when a new device message is received or when a device communication loss has been detected.
Ensure that you can see messages sent by your device in your Sigfox backend, in Device > Messages.
Sigfox messages example


Ensure that the Payload parsing is custom grammar and the custom configuration is done according to the payload definition. Here is guide on the warfab v1 devkit payload structure.
If you can see messages sent by your device, you can proceed to the next step.

Click on “callbacks” and then “New”

Choose the “custom callback”

Change the “Data Type ” and “Channel” as indicated then add your cloud Function URL endpoint at the “URL Pattern”.

Testing the integration
Sending data from a Warefab Sigfox device to Azure
The integration should now be configured in both Azure functions and the Sigfox backend.

Device Template
Create a device template and add interfaces together with views

Go to devices and select the ID of your device. Migrate the device to your Device Template

Create a dashboard, add your device template and instance and save


If you found this helpful, click the 👏. Follow this publication for more tutorials on The Internet of Things.
NB-If you have any IoT concepts you’d like explained in a post, any question, comment, or suggestions, please let me know. I’ll get back to as many as I can.