Phase 2: Prototyping & Development

This blog captures my hands-on process, design decisions, challenges, and progress as the concept begins to take shape.
Phase 2.0
Before starting the development phase, I’ve done a Gantt chart to help me stay on track and make sure everything was properly planned out.
Link to Gantt Chart (Figjam)

Further Research
At this stage, the storyboard still feels weak and lacks solid content. After the previous consultation session, I realized that I need to conduct another round of user testing to gather more meaningful stories and insights to strengthen the narrative. Therefore I do a new Google survey.

Based on the responses from the Google Form, I found that people tend to overthink the most when receiving text messages from their partner, friends, classmates, or lecturer/boss. This insight gave me a solid foundation to build my stories around, as it reflects common and relatable scenarios. Moving forward, I plan to develop a series of short narratives focused on these interactions, using them to structure a stronger and more emotionally engaging storyboard.
Lecturer’s Feedback
From the Google Form findings, Jeremy suggested that I narrow it down to just three main character types for the animation and storyboard planning, given the time constraints of the FYP. Based on this advice, I chose to focus on the partner, friend, and lecturer story loops. I decided not to include ‘classmate’ as one of the categories because I felt it overlaps too much with ‘friend’ — and friendships tend to be more emotionally connected, making them more relatable and more likely to trigger overthinking.
Storyboard Refinement 4.0
I began by focusing on drawing just one storyboard — the lecturer story. However, I got stuck midway through and wasn’t able to finish it, partly because I was unsure how to develop the middle section, and also due to time constraints as I was rushing to complete other projects.

Lecturer Feedback
Jeremy gave me some feedback on how to strengthen the storyboard:
- Build up the overthinking gradually — start from something small and seemingly harmless, then slowly get it into something more serious and overwhelming.
- After the climax, consider breaking out of the “bubble thoughts” mapping — this would visually represent how the character’s mind has become overloaded, and that the overthinking has spiraled beyond control.
These suggestions helped me rethink the pacing and structure of the animation. I now plan to revise the storyboard to reflect this emotional buildup more clearly, and experiment with visual transitions that break the boundaries of the thought bubbles to represent mental overflow.
Storyboard Refinement 5.0
Based on my previous experience, I decided to start by writing the script first this time. I began by planning out which stories to include and structuring the overall flow before moving into visuals. This approach helped me organize my ideas more clearly and gave me a stronger foundation to build the storyboard.
After that, I focused on drawing one storyboard at a time, rather than trying to work on all three. This approach not only helped me concentrate better on the narrative flow of each story, but also made it more manageable given the time constraints I was facing.


After consulting Jeremy with this version of the storyboard, he mentioned that the story still needs some refinement — especially the content in the ‘friend’ storyline. However, he suggested that I can begin testing the anamorphic effect and projection setup while continuing to polish the narrative. At the same time, I can also start working on the design and development phase.
Design Development 1.0
Before I started modeling the scene, I had to learn how anamorphic projection works since it was my first time trying it. I began by exploring tutorials on YouTube to understand how the mapping and rendering process is done. I came across a tutorial that explained it in a clear and simple way (link to YouTube tutorial), so I decided to follow it for testing and modeling.
Following the tutorial, I modeled all the assets at specific angles to fit the anamorphic screen correctly. Some of the assets were sourced from Fab and Polyhaven, while others were reused from previous assignment project.


After model I added texture and lighting as well, some texture and HDRI also come from the source of Polyhaven. Due to time issue, I need to do testing first, therefore I just do it as rough testing version.

The main focus of my project is the character, so I started modeling it early on. Character modeling was definitely one of the most challenging parts. For the skin texture, I followed a YouTube tutorial to create a more realistic look instead of just using a flat color.


The same goes for the clothing texture — I wanted it to look more realistic, so I applied a fabric texture to give it more depth and detail, rather than leaving it flat or plain. For testing purposes, I rotated the character’s arm manually instead of setting up a full rig, mainly due to time constraints. As a result, the movement isn’t perfectly smooth, but it was enough to visualize how the texture behaves and check if the model holds up in the final composition.


Animation Development 1.0
After completing a simple animation of the character, I rendered it as a PNG sequence and applied it back onto the screen texture. Then, to achieve the anamorphic effect, I stretched the screen into a rectangular shape, which distorts the scene in 3D but appears correctly from the intended viewing angle.


Technical Development 1.0
Once I had the animation ready, I started testing it with a projector. Before that, I needed a small-scale screen to project onto, so I built a simple box using cardboard. The box measured 30cm x 30cm x 20cm and served as a prototype for my anamorphic projection test.


Once the box was ready, I set up the projector and aligned it with the correct viewing angle by using Resolume to see if the anamorphic illusion worked. Unfortunately, the anamorphic effect didn’t work as expected. The projection looked distorted, but not in the way I intended — it didn’t form a coherent image from the viewing angle. I realized that the proportions and alignment were slightly off, and I think the mapping also not accurate.


Lecturer Feedback
Feedback from Jeremy after the first test:
- Suggested that I revisit how anamorphic projection works, especially checking if the mapping was done correctly or if any key steps were missed.
- Recommended considering a nighttime scene, as it may suit my target audience (students) better — since students often work or stay active at night.
- Noted that the color textures in the current scene look too similar, and suggested adding more contrast to make the visuals stand out.
Action Plan
Based on Jeremy’s feedback, I decided to change the entire scene mood, as his suggestions made a lot of sense to me. For the texture, I also chose to redo it — not just because of the feedback, but also because I personally wasn’t satisfied with how it looked. As for the mapping, I realized that in my first test, I had dragged the wrong point in Resolume, which caused the distortion to fail. Moving forward, I plan to experiment more with the mapping process to get it right.
Design Development 2.0
I reworked the overall mood of the scene and made changes to some models that I wasn’t satisfied with. I also adjusted the lighting and completely redid the textures to better match the new atmosphere. For now, I’ve kept the character model as it is and focused mainly on improving the environment first.
The most significant change I made was adding a bloom effect, which gives the lighting a soft glow — especially in the night setting. This helped enhance the overall atmosphere and made the scene visually richer and more appealing.


Animation Development 2.0
This time, I added more animation to the overall scene, not just the character. After completing the animation, I followed the same process as before — rendering it as a PNG sequence, placing it back onto the screen texture, and stretching it into a rectangle to create the anamorphic effect.


After rendering everything out, I realized I had made a pretty silly mistake — the bloom effect’s emission strength was set way too high. In the newer version of Blender, the bloom effect doesn’t show in real time, which led to me overlooking it during the setup. This experience made me realize I need more practice with the updated settings and should always double-check before rendering.
Technical Development 2.0
Even though the render wasn’t perfect, I still went ahead and tested it with the projector. I wanted to see how it would look in a real-world setup and learn from any unexpected results. It was a useful step in understanding how the projection reacts to lighting and bloom in a physical environment.


As seen in the video and based on the mistake I made, the bloom effect in the projection turned out to be too intense — so much so that it overpowered the visuals and made some parts difficult to see. It was definitely beyond what I had estimated.
To fix this, my next step is to reduce the emission strength and run a few smaller test renders before committing to a full render. I’ll also test the bloom visibility in different lighting conditions and angles to make sure it works well in a real projection environment. This way, I can fine-tune the balance between glow and clarity for a better result in the next round.
Design Development 3.0
The first thing I plan to change is, of course, the bloom emission — I’ll tone it down to avoid overpowering the scene. In addition to that, I’ve started adding light rays to introduce more depth and atmosphere. The goal is to make the environment feel more immersive and visually engaging, especially in a night setting.


For the character, I redesigned the hair with more detailed modeling to enhance its overall look. In addition, I created a custom text-based texture for the clothing to add more personality and visual interest.

Animation Development 3.0
Now it’s time to rig the character, which is something I’m still learning. Since this is my first time rigging a full character, I followed a YouTube tutorial (link) to help guide me through the process. It was really helpful to me in understanding the basics and getting everything set up properly.


After completing the testing, I placed the character back into the updated scene and animated the current starting scene of it.


Some parts of the rigging weren’t working correctly and caused issues with the model deforming or crashing during animation. To fix this, I went back and refined certain areas of the weight painting to ensure smoother movement and better control. This step helped stabilize the rig and improved the overall animation quality.
Get Tanning’s stories in your inbox
Join Medium for free to get updates from this writer.
However, despite the adjustments, certain areas of the mesh still crashed — even after reweighting — possibly due to mistakes I overlooked. Since time was limited, I decided to move forward with the animation and carefully avoided camera angles or movements that would expose the crash areas.


Once again, I rendered out the stretched version of the animation for projection mapping testing.


Technical Development 3.0
I tested the projection again and mapped it using Resolume, but I still couldn’t achieve the correct aspect ratio. However, the result was an improvement compared to the previous version.


Lecturer Feedback
Based on Jeremy’s feedback, he pointed out that the lighting still needs some adjustments, specifically when the notification appears, the light should reflect on the character’s face rather than just the environment. In addition, the facial rigging looked off, and some of the character’s movements were causing mesh distortion. Because of these issues, I’ve decided that it’s necessary to redo the rigging to ensure smoother and more accurate animation.
Phase 2.1
I refined the main scene based on the feedback by adjusting the lighting and character movement, then continued animating the rest of the scene. I also tested projecting the anamorphic video on a large wall, and the big scale display turned out quite nice


Lecturer Feedback
Based on my adjusted version, Jeremy pointed out that the lighting still wasn’t quite right, as the blue light should come from the window direction, but I had it the opposite way. Therefore, I need to reposition the lamp to the left side so the lighting feels more natural. Besides adjusting the lighting, I also added a cat into the scene to make it feel more lively.

After finalizing the main scene without major issues, I began planning the storyboard for the other bubble thoughts scenes. The lecturer’s bubble thought story flows from a missing file, to a slide problem, to classmates laughing, to being thrown out of the house, and finally to chaos.

I’m working through the scenes in order, starting with the ‘missing file’ scene, where I modeled and animated a ‘brain thought’ to represent the character’s overthinking mind. My first version looked too realistic, and the fur made the animation run very laggy. To improve it, I redesigned the brain with a clay-like texture, using materials from Blenderkit.


Thoughts 1 Process
I wanted to visualize the overwhelming feeling of ‘digging through files’ as a tunnel journey, ending with an explosive moment when the file bursts apart. To experiment with this idea, I first created the tunnel animation using multiple planes, animating their scaling and rotation to form a dynamic passage. I also modeled several file folders and animated papers flying through the tunnel to enhance the chaotic atmosphere.

Based on the quick render, the result was acceptable, so I proceeded to add lighting and textures to the scene. For the explosion at the end, I used Blender’s Cell Fracture modifier to break the file into pieces and applied rigid body physics to simulate their movement.


Based on the first version, I received feedback from my lecturer that the tunnel was too short and that the animation should extend further, gradually increasing in speed instead of following a linear motion. In addition, the tunnel did not really look like a tunnel. After considering this feedback, I decided to try using a cylinder with a displacement map to create the illusion of depth, while also extending the length to improve the pacing of the file animation.
To create a more dynamic animation, I experimented with adding proximity to the papers using the Geometry Nodes modifier, so they would react when the character’s brain passes through. However, the proximity effect currently looks too harsh and not smooth enough. I plan to refine and soften this interaction in the future.
By learning this proximity has also helped me apply it in other scenes, as it can create some really interesting animation effects that I’m eager to explore further.


Thoughts 2 Process
For the second thought scene, I initially felt a bit lost, as I wasn’t sure how to begin and the overall look and feeling weren’t working. At first, I used the character’s brain as the main animation point in the slide world, but I realized this approach was incorrect since the issue comes from the slides, not the character. Therefore, I shifted the perspective to a searching point of view from the character instead. In the first version, I also overused the bloom effect, which made the scene look quite poor and unsatisfying, so I began developing a second version to improve it.
To give a stronger impact of the character’s brain entering the slides world, I added a ripple effect so that when the brain passes through, it creates circular ripples that spread outward, emphasizing the transition and making the scene feel more immersive.


I plan to focus more on this scene in the future, as I don’t think it is working well at the moment and the message I want to deliver isn’t strong enough yet. I will probably need to gather more references and study other animations to improve and further enhance this scene.
Thoughts 3 Process
For the third thought scene, this scene is quite simple scene and I start by modeled a rough version of the TOA lab classroom to create a stronger connection with my target audience at TOA. I kept the lighting in this scene dark to create strong contrast, so when the character’s brain appears it glows, and the spotlight shining on it delivers a stronger impact.


I did a quick render to test the animation speed and camera movement, to create a stronger impact that shows the character’s brain becoming increasingly anxious.


Thoughts 4 Process
For the last thought, I didn’t have enough time to model and animate it from scratch. Instead, I used an online house asset as a temporary placeholder to test the overall feeling and pacing of the animation. This scene will need to be redone in the future.
For the current progress, I animated the staircase using an array to give the feeling that home is far away, and when the character gets closer, he is not allowed to enter and gets thrown out. At this stage, the character animation is still missing, which I will work on later.

Main Scene Process
To make the overall flow clearer, I finished a rough animation of the character’s movement. I plan to rerig the character in the future because the mesh and movements are currently broken and not looking good, but for testing purposes this version works fine.


Set Up Structure Refine
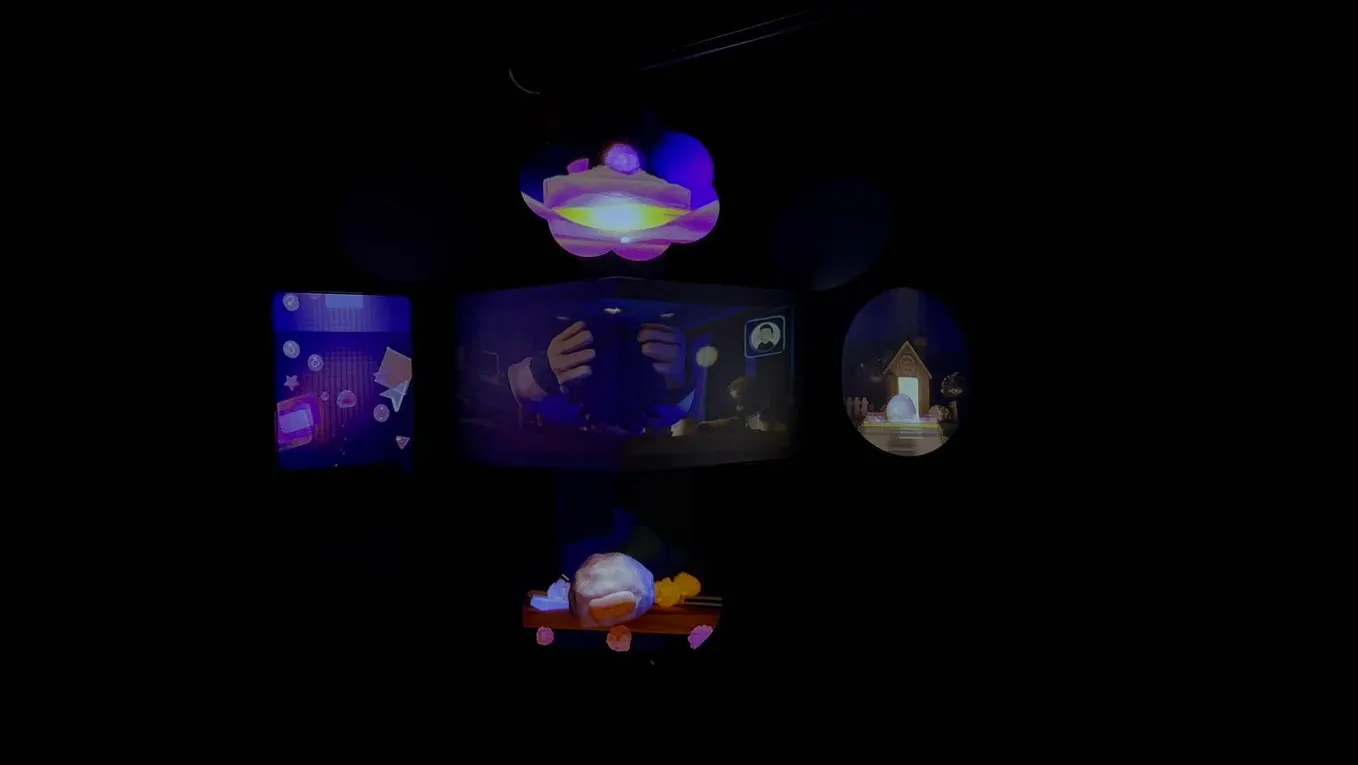
To create a rough mock-up of the overall experience, I replanned the structure of the projection mapping. I kept it simple and easier to map compared to the previous version.

Compositing Testing Process
After completing all the rough animations, I compiled them in After Effects and edited the overall flow into a mock-up to present to the industry guests. This step helped me see how the different scenes connect as a whole and gave me a clearer idea of the pacing and transitions. Although the animations are still rough, putting them together at this stage was useful to identify areas that need more work and to prepare for feedback.
In addition, to create a more immersive experience, I also added some rough sound effects. Even though they are only temporary, they help set the mood and give me a better sense of how the final animation might feel.


WIP Video
Pitch Presentation Deck
Presentation Feedback and Reflection
For this presentation, I feel I didn’t perform well. Because of time constraints, I didn’t check the animatic pacing, so it played too fast and I didn’t leave enough time to explain. I was also too nervous and forgot I could pause it to clarify. This taught me that preparation and pacing checks are just as important as the visuals. In the future, I’ll rehearse with the actual timing, practice more and more, and prepare key points to stay clear and confident that I can still deliver my message effectively.
Overall, the feedback I received was quite positive. The industry guests were impressed with the progress I had made, and that really encouraged me. However, I feel that positive feedback alone isn’t enough, because I know there are still many areas I can improve. This made me realize that even if others see the work as good, I should still keep pushing myself to refine the details and deliver a stronger experience. Some key points I noted for improvement are:
- Be clearer about who is sending the messages
- Adjust the pacing, as the messages disappear too quickly
- Make the scene feel more chaotic and nervous
- Push the character’s movement to be more exaggerated and expressive
Based on the feedback above, I will revisit my work to find ways to enhance the overall experience while also polishing the existing content and completing the remaining two scenarios. To avoid repeating the same mistakes, I’ve planned out my work schedule for the semester break and through to the end of the next semester. This planning will help me stay on track, reduce last-minute rushing, and give me enough space to refine details.

Risk Assessment
This risk assessment is about setup and exhibition of my project using projectors, speakers, and cabling. The activity involves mounting and securing projectors, managing electrical equipment, running cables safely, and allowing public viewing of the installation.
Link to Full Risk Assessment PDF

Self Reflection
For this semester overall, I’ve really enjoyed the process of creating my project. Even though certain tasks, like rigging and animating the character, were intense and sometimes challenging, I found myself fully immersed in them. Seeing the final outcome come together was incredibly rewarding and made all the effort worthwhile.
The major challenge I faced this semester was time management. I started animating and progressing on my work quite late, which made me anxious about keeping up with my classmates. This was a significant source of stress, as I constantly worried about whether I could complete everything on time and meet the expected standards.
In terms of the project itself, I feel that the scene I have now is not completely satisfying. While I’ve done my best with the time and skills I had, I recognize that there’s still room for improvement. I plan to continue refining it during the semester break and into next semester, exploring new ideas and polishing the details and also keep learning. This experience has taught me that it’s okay to acknowledge imperfection, as long as I stay committed to continuous improvement.
Reflecting on this semester, I feel that I’ve grown not only in my technical skills, such as animation and rigging, but also in perseverance, self-discipline, and the ability to manage challenges under pressure. Moving forward, I plan to start projects earlier and set clearer milestones, so I can reduce stress and allow more time for creativity and refinement. Overall, this semester has been a valuable learning experience, and I’m proud of the progress I’ve made while remaining motivated to improve further.
Annotated Bibliography
- CGi Jutsu (2022) Create 3D BILLBOARD VIDEOS for Curved Screens | Blender Tutorial. YouTube. Available at: https://youtu.be/xK3q641dd2c (Accessed: 5 August 2025).
This tutorial by CGi Jutsu covers how to design and animate stylized billboard content for curved LED displays using Blender. I referred to it to understand compositing and layout techniques suitable for immersive presentation formats, which influenced how I approached camera angles and motion in my project.
- Ducky 3D (2024) You Should Be Using Proximity In Your Animation (Blender). Youtube. Available at: https://youtu.be/XytiZObyYAA?si=dhY7XpyqN1DvBVna (Accessed: 16 September 2025).
This Blender tutorial on Proximity demonstrates how objects can interact or trigger effects based on their distance from each other by using Geometry nodes. It guided me step by step through setting up the feature, which helped me understand its practical applications in animation and scene interactions. Following the tutorial improved my workflow and gave me ideas for using Proximity creatively in my own projects.
- Fab (n.d.) Design curated daily. Available at: https://www.fab.com (Accessed: 5 August 2025).
I used it as a reference for object styling, and 3D product form ideas. Several elements, such as product shapes and presentation arrangements, informed the design direction of my props and in-scene assets.
- KennysArts (2024) Character Texturing Is EASY | Blender Tutorial. YouTube. Available at: https://youtu.be/IEQ7IVPwwQk (Accessed: 5 August 2025).
In this tutorial, KennysArts explains how to approach character texturing in Blender using simple and efficient techniques. I applied the methods shown, such as adjusting materials in the shader editor, improve the appearance of my 3D characters.
- McK (2023) Rigify Made Easy: Beginner’s Guide to Effortless Character Rigging. YouTube. Available at: https://youtu.be/PKPo0-leJmU (Accessed: 5 August 2025).
This video provides a beginner-friendly overview of Blender’s Rigify system, showing how to rig a character quickly without complex node setups. I followed this guide to set up functional rigs for animation, helping streamline my workflow and improve character motion in my project.
- Poly Haven (n.d.) Free textures, HDRIs and 3D models. Available at: https://polyhaven.com (Accessed: 5 August 2025).
I used multiple assets from this site, such as realistic surface textures and environmental lighting maps, to improve the visual realism of my scenes and objects in Blender. Its free and open license made it ideal for both personal and academic use.