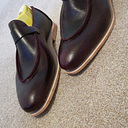
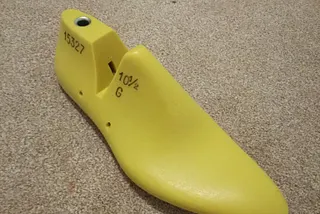
Cemented Penny Loafer Part #2

I have already failed my goal of doing these blogs weekly. From now on, let’s say fortnightly, and weekly as an occasional treat.
So, 3D shape to 2D pattern. Once you’ve drawn the pattern of the shoe onto the masking tape, cut the excess off both the sole portion of the shoe, and along the topline (the part of the shoe that will sit highest on your ankle).
Now you should be left with the pattern of the shoe, with no ‘blank’ masking tape. Carefully cut along the lines you’ve drawn, so that each piece can be peeled off as one… This may be where you realise that you should have made the shoe out of more pieces (i.e. with more stitch lines), but wholecuts (shoes where the entire upper is made of one piece of leather) exist so don’t give up if you’re set on a design.
Once you’ve peeled the pieces off, stick them down on a piece of paper. Try and make sure that your topline is stuck down first, allowing the pattern to guide you with regards to where it should sit (don’t stretch or compress it), and then try and stick the rest down.

Hopefully you can see in this picture that the vamp/quarter pieces curve inwards slightly towards the back. This is the shape that the tape dictated as it was laid down, so I believe that following that allows the leather to conform to the shape of the last more closely (once the patterns are cut).
So, on the right you’ve got the masking tape version of my shoe. You may note small snips in the toe portion. This is because the tape has a 3D shape when it comes off the last and may not sit flat without these snips. I should point out that I loosely taped these pieces together in order to get a pattern for my lining, but they are all individual parts. Looking at the tape you have the vamp and quarter section (the long C shaped part), the penny strap (the little strap on top), and the apron front.
Get Shoemaking: Unstitched’s stories in your inbox
Join Medium for free to get updates from this writer.
Once these pieces are flat on your paper, mark around them with your pencil. You can now remove the tape if you wish.
Now, if you bring your attention to the left of the image. You’ll note that around the long vamp/quarter section, there’s a line marked at the topline, and at the feather edge (the bottom edge of your last). The mark at the topline dictates stitching allowance (the mark beyond the apron front was for a rolled edge but I didn’t give myself enough of an allowance, nor did I skive it sufficiently — more on this in the next series!). This is personal preference, if handstitching I’d give it a few mm at least, if using a machine you can get pretty close to the edge of your pieces.
The mark at the feather edge is your lasting allowance. For beginners it’s generally around 25–30mm wide. As you get better at lasting, this can be reduced (or so I am told!).
So, for each piece, mark out your stitching lines (if you mark where you want your stitches to be on the last, then you just need to mark that plus a few mms, on the piece that will be stitched underneath the other), your lasting allowance, and if you’re doing them, rolled edge allowances.
Then, you’re good to go. Cut those pieces out of paper, then tape/weight/secure them down to your leather. I generally reverse the pattern and cut off the backside of the leather, but this can be confusing so make sure you mark which is which. I always make my patterns on the left shoe, so if I reverse my leather and place the pattern down normally, I would end up with a piece for the right shoe. Therefore, I flip my pattern and the leather, then mark on the back that it’s for the left shoe.
Get yourself a really very sharp knife, and cut around your patterns. As I said above, make sure that you have a system of some sort so that you know which pieces are for which shoe. My lasts are quite wide so my patterns generally are quite asymmetrical, therefore I make sure I know which is left and which is right.

And there you have it, you have all the bits you need to make your shoes. Mark your stitching lines onto the leather and if you’re handstitching, you can put your holes in the leather now.
That’ll do for this one. Next up is stitching the pieces together and preparing your lining… Maybe some lasting, but I don’t want these getting too long. Speak to you soon.