A checkbox in Microsoft Word is a symbol or interactive control used to mark items as selected or completed. It is commonly used in checklists, forms, and surveys. Word allows you to insert checkboxes using symbols, bullet styles, or interactive controls from the Developer tab.
Method 1: Insert Checkboxes using Bullet Library
This method is ideal for creating checklists that will be printed and filled out manually. Here are the following steps to insert checkboxes for printed documents
Step 1: Open Your Word Document
Launch Microsoft Word and open the document where you want to insert checkboxes.

Step 2: Access the Bullet List Tool
Go to the Home tab in the toolbar. In the Paragraph section, click the dropdown arrow next to the Bullets button.

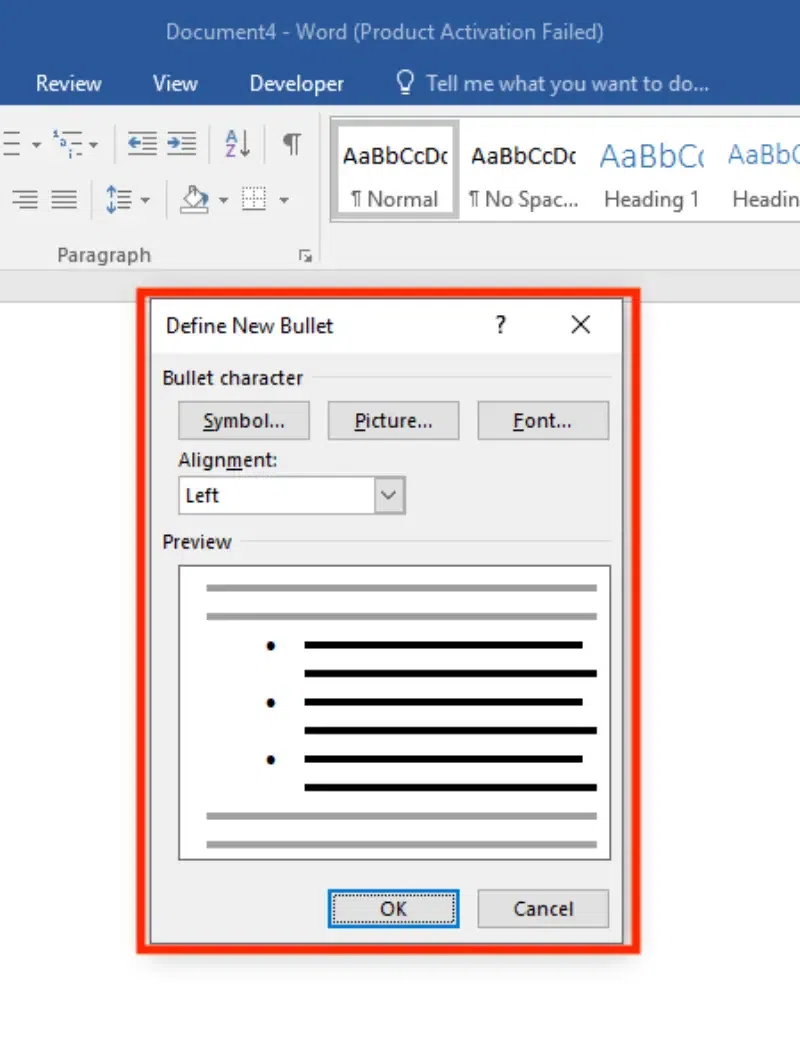
Step 3: Customize the Bullet Style
Select Define New Bullet from the dropdown menu. In the Define New Bullet window, click on Symbol. Choose a checkbox symbol (e.g., a square or tick box) from the symbol library and click OK. Click OK again to apply the checkbox as the bullet style.
Step 4: Select your Checkbox Style
Click on your style of checkbox, which will show on your list.
Step 5: Add Checkboxes to Your List
Type your list items, and each will automatically include a checkbox as the bullet.

Method 2: Add Checkboxes using Developer Tools
Interactive checkboxes in Word allow users to digitally confirm or approve sections of a document, including signatures. Here's how to add checkboxes in Word:
Step 1: Enable the Developer Tab
If the Developer tab is not visible. Click File and go to Options. Select Customize Ribbon. In the right-hand column, check the box for Developer and click OK.

Step 2: Insert an Interactive Checkbox
Place your cursor where you want the checkbox. Go to the Developer tab and click on the Check Box Content Control button (a square with a checkmark inside).
Step 3: Format the Checkbox
Right-click on the checkbox and select Properties. In the properties window, you can:
- Change the checkbox symbol.
- Customize its size and appearance.
Click OK to save your settings.
Method 3: Use Symbols to Insert Checkboxes
If you need a quick way to add checkboxes without making them interactive, using symbols is an easy solution. This method works well for creating non-interactive checklists in Word. Here are the following steps to insert symbol checkboxes in Word:
Step 1: Place the Cursor
Click where you want to insert the checkbox.
Step 2: Access the Symbol Tool
Go to the Insert tab and click on Symbol. Select More Symbols from the dropdown menu.

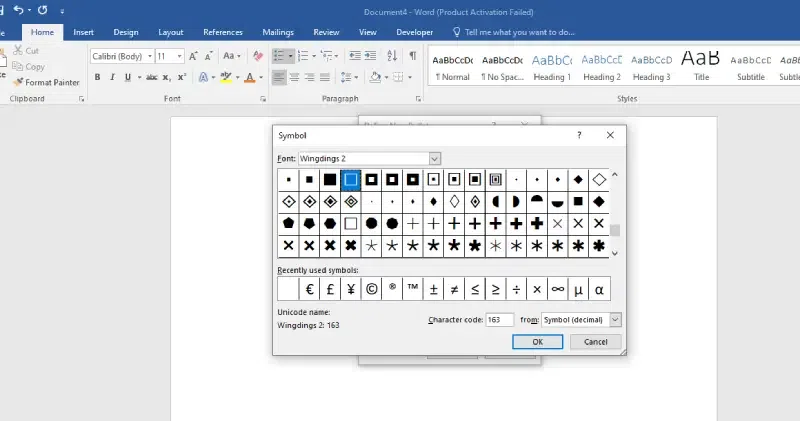
Step 3: Insert a Checkbox Symbol
In the Symbol window:
- Choose a font like Wingdings or Segoe UI Symbol.

- Scroll to find a checkbox symbol and click Insert.

Repeat as needed to add more checkboxes.