Microsoft Word’s spell check automatically detects spelling and grammar mistakes as you type, marking them with color-coded underlines, red for spelling, green for grammar, and blue for contextual errors—helping you correct and refine your document easily.

Steps to enable Spell Checker in MS Word
Step 1: On the navigation menu bar click on the File option.
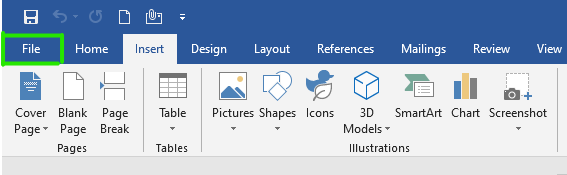
Step 2: Next click on the option button as shown in the figure:

Step 3: A word option dialog box will appear on the screen.

Step 4: Now select the Proofing option from the left menu as shown in the figure:

Step 5: Check all boxes as shown in the figure:
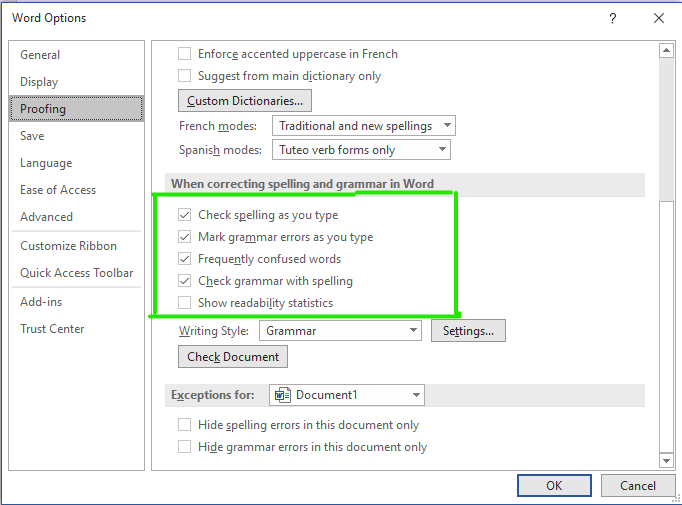
Step 6: Next click on the OK button.

Finally, Spell Check is enabled in MS Word.
Steps to Manually Check Spellings
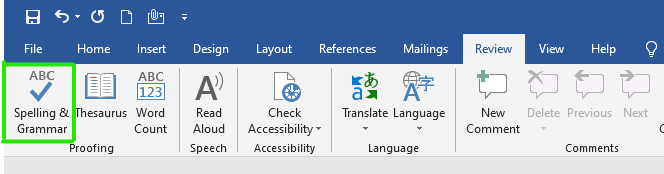
Step 1: On the navigation menu bar click on the Review option.
Step 2: Next click on the spellings & grammar option as shown in the figure:

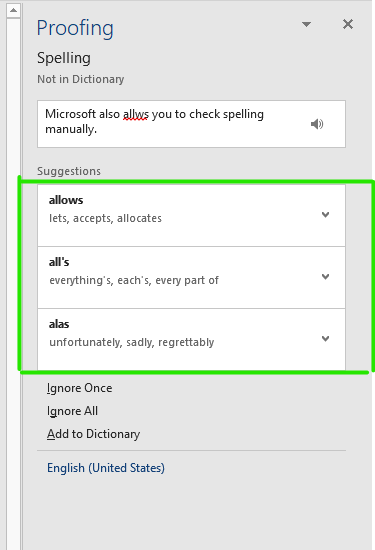
Note - If there is any spelling or grammatical mistake in your Word document, then the following dialog box appears with misspelled words present in the red underlined text.

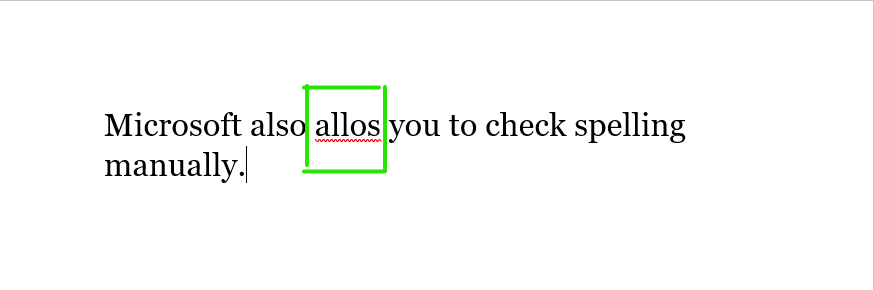
Step 3: If there is a spelling mistake in the document then it will appear in the red underline text as shown in the figure:

Step 4: Select the correct spelling from the suggestion menu.
Step 5: Next click on the YES option.

Note: If all spellings are correct in your Word document, then the following pop-up window will appear on the screen.
Step 6: Click on the OK option.

Finally, all the spellings and grammars are manually checked.
Shortcut Method to Check Spellings
Step 1: Right-click on the red-underlined word.
A menu with correctly spelled options will appear in which you can select the correct word or you can ignore it.
Step 2: Now choose the correct spelling from the menu as shown in the figure:

These are some of the ways to enable the spell check feature in MS Word.