In Microsoft Word, horizontal and vertical lines are formatting tools used to separate sections, organize content, and improve document readability. They can be inserted through the Ribbon, Shapes, Borders, or keyboard shortcuts, and customized in style, color, and thickness for a professional look.
Steps to Create a Horizontal Line in Word Using the Ribbon
If you want to insert a horizontal line in Word, the Ribbon provides a simple and effective method. Here’s how:
Step 1: Use the Borders Option
Place your cursor where you want to insert the horizontal line. Go to the Home tab on the menu bar. In the Paragraph group, click the Borders dropdown arrow. Select Horizontal Line from the dropdown menu.

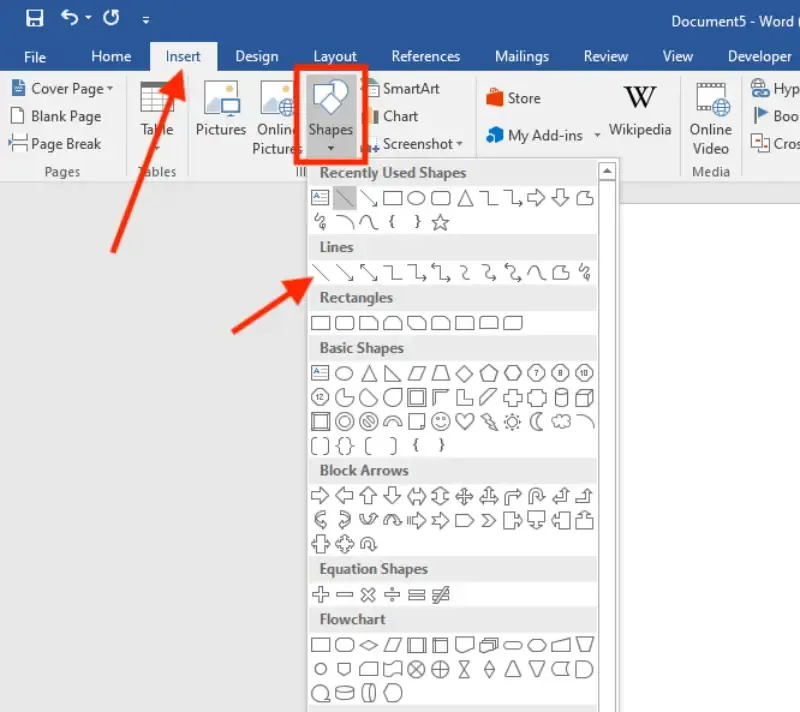
Step 2: Insert a Line Using Shapes
Go to the Insert tab. Click on Shapes in the Illustrations group. Select the Line shape from the Lines section. Click and drag your mouse on the page to draw a horizontal line.

Step 3: Format the Horizontal Line
After inserting the line, click on it to select it. Use the formatting options under the Shape Format tab to:
- Change the color of the line.
- Adjust the line thickness.
- Apply dashed or solid styles.
Steps to Insert a Horizontal Line in Word Using the Keyboard (Fastest Way)
Inserting a horizontal line in Word using the keyboard is quick and simple. Follow these steps to add a line effortlessly:
Step 1: Open a New Line
- Place your cursor where you want to insert the horizontal line.
- Make sure the line has its own space by pressing Enter to move to a blank line.
Step 2: Type the Shortcut Characters
You can create different styles of horizontal lines. By typing specific characters on the blank line:
1. Dashes (---):
- Type three consecutive dashes (
---) and press Enter. - Result: A thin horizontal line.
2. Underscores (___):
- Type three underscores (
___) and press Enter. - Result: A thicker horizontal line.
3. Equal Signs (===):
- Type three equal signs (
===) and press Enter. - Result: A double horizontal line.
Each of these shortcuts automatically converts the characters into a formatted horizontal line.
Step 3: Adjust the Line (Optional)
After the line appears, you can customize it:
- Move the Line: Drag the line to reposition it within the document.
- Resize the Line: Adjust the width or height using Word’s ruler or drag handles.
- Format the Line: Right-click on the line, select Borders and Shading, and choose a new style or color.
This method is a fast way to insert horizontal line in Word, ideal for separating sections or improving document layout.
Steps to Insert Vertical Line in Word
Adding a vertical line in Microsoft Word is a great way to visually separate content or enhance document layout. Follow these simple methods:
Step 1: Use the Shapes Tool
Go to the Insert tab. Click Shapes in the Illustrations group. Select the Line shape from the dropdown. Click and drag your mouse to draw a vertical line on the page. To ensure the line is perfectly vertical, hold down the Shift key while dragging.
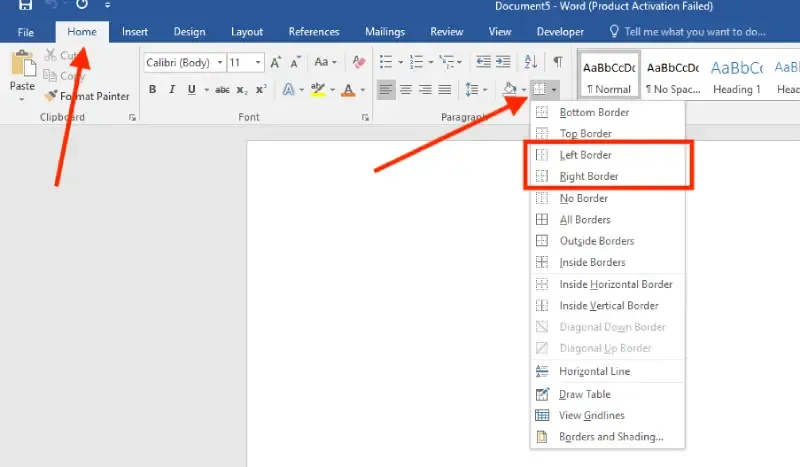
Step 2: Insert a Vertical Line Using Borders
Highlight the text or content area where you want the vertical line. Go to the Home tab and click the Borders dropdown arrow in the Paragraph group. Select Left Border or Right Border to create a vertical line next to the content.
Step 3: Add a Vertical Line in a Table
Insert a table by going to the Insert tab and selecting Table. Adjust the borders of the table to add vertical lines between columns. Use the Design tab under Table Tools to customize the line style and color.
Customizing Lines in Word
When inserting horizontal or vertical lines in Word, you can adjust their appearance to match your document’s style. Follow these Word document formatting tips for better customization:
Adjust Line Properties
- Line Color: Select the line and choose a color from the Shape Format tab.
- Line Thickness: Increase or decrease the thickness using the Weight option in the Shape Format tab.
- Line Style: Choose between solid, dashed, or dotted lines from the Shape Outline menu.
Move and Resize Lines
- Click on the line to select it.
- Drag the corners to resize or reposition the line as needed.
Best Practices for Using Lines in Word
- Keep It Clean: Use lines sparingly to avoid cluttering the document.
- Align Consistently: Ensure lines are properly aligned for a professional look.
- Pair With Content: Use lines to complement, not distract from, your document’s content.
By following these steps, you can effortlessly add horizontal and vertical lines to your Word documents, improving layout and readability while maintaining a polished appearance.