Fly.io Django Deployment Guide
Fly.io is a fantastic deployment method for web developement for when you need to deploy a project quickly. But also need a back end. We're switching to fly.io due to Heroku ending their free tier in November of 2022. This guide also assumes you have Docker Destop installed.
- Go to The Fly.io signup page.
- Creating an account/Signing Up:
- Click on either the Github or the Email signup
- Check the email you provided to log in and verify your email.
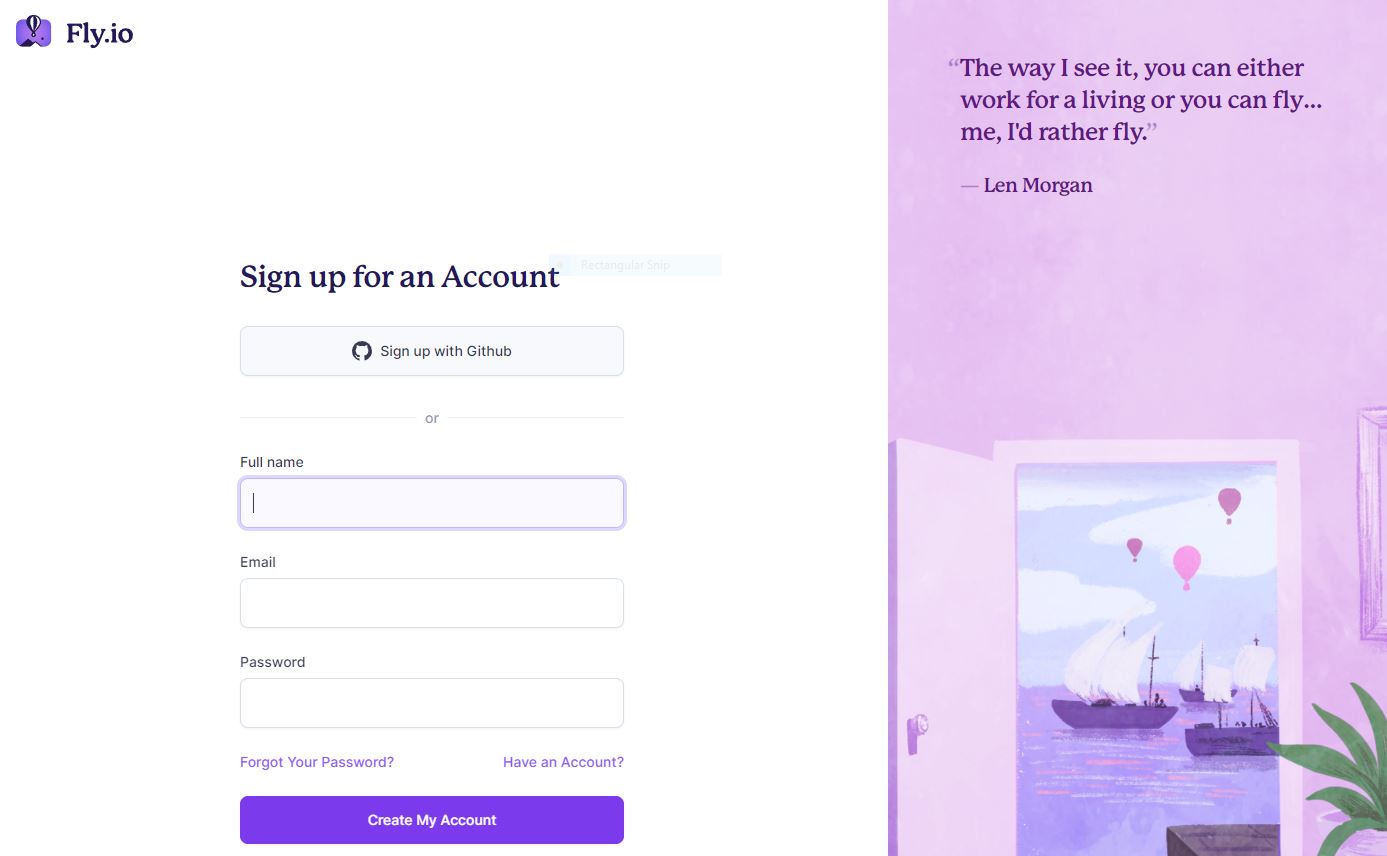
- Once you've opened the email verification link you'll come to the "Dashboard" page (image below).
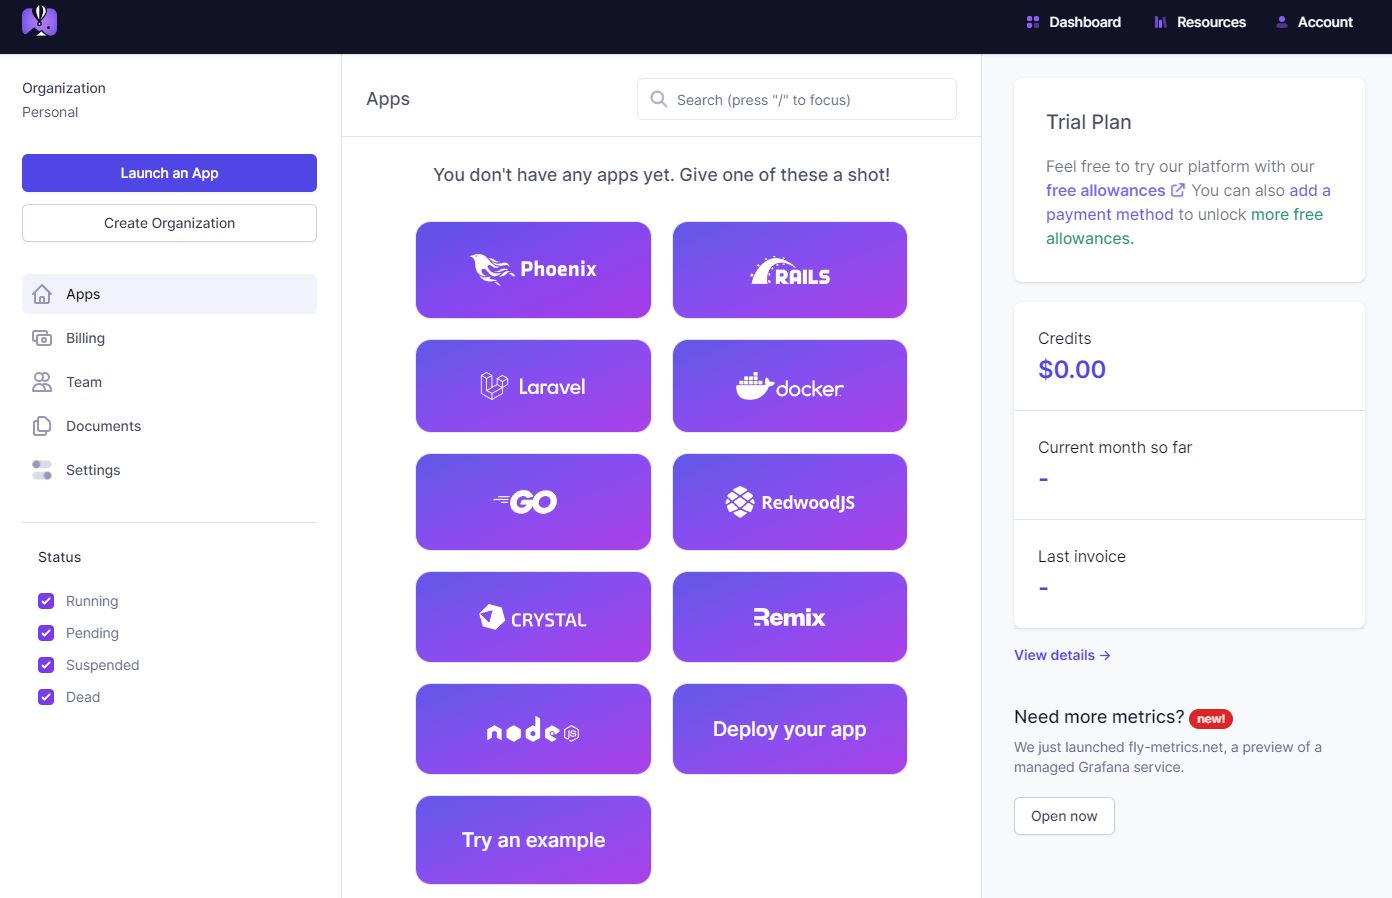
- Finally we can start deploying out first Project! Click on "Deploy your app".
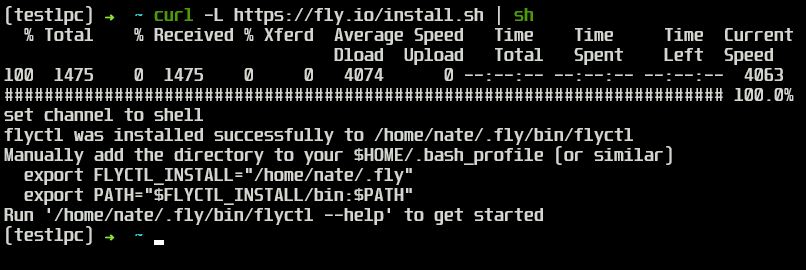
- You will need to install the flyctl, so click on the link to take you there.
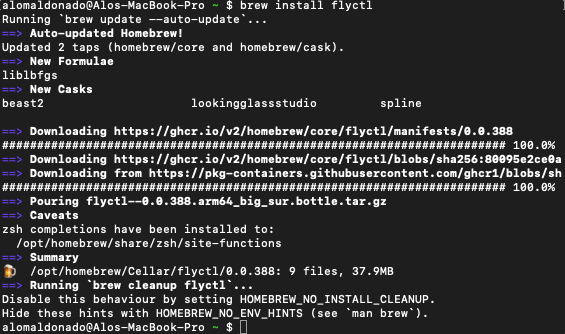
- If you're on macOS run the command:
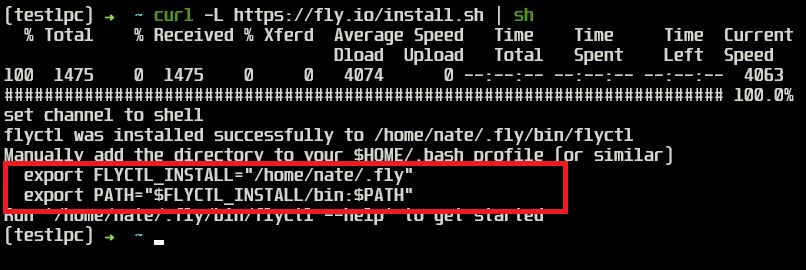
brew install flyctl - If you're on windows running a WSL or on Linux run:
curl -L https://fly.io/install.sh | sh - A successful install looks like this:
- We might have to add the flyctl to our path. It will prompt you with two commands you need to run one after the other. If you're on mac, add it to your bash profile, and if you're on windows it will be your
.zprofileby running:code ~/.zprofile
- Now we have to sign in with the our account using:
flyctl auth login - You'll see these screen and follow the prompts. If you'd like to use Privacy.com to make a virtual card with a $0 limit, that is a nice way to get these extra features.


- And now you're all set!
- We need to add whitenoise to deal with our static files. So run
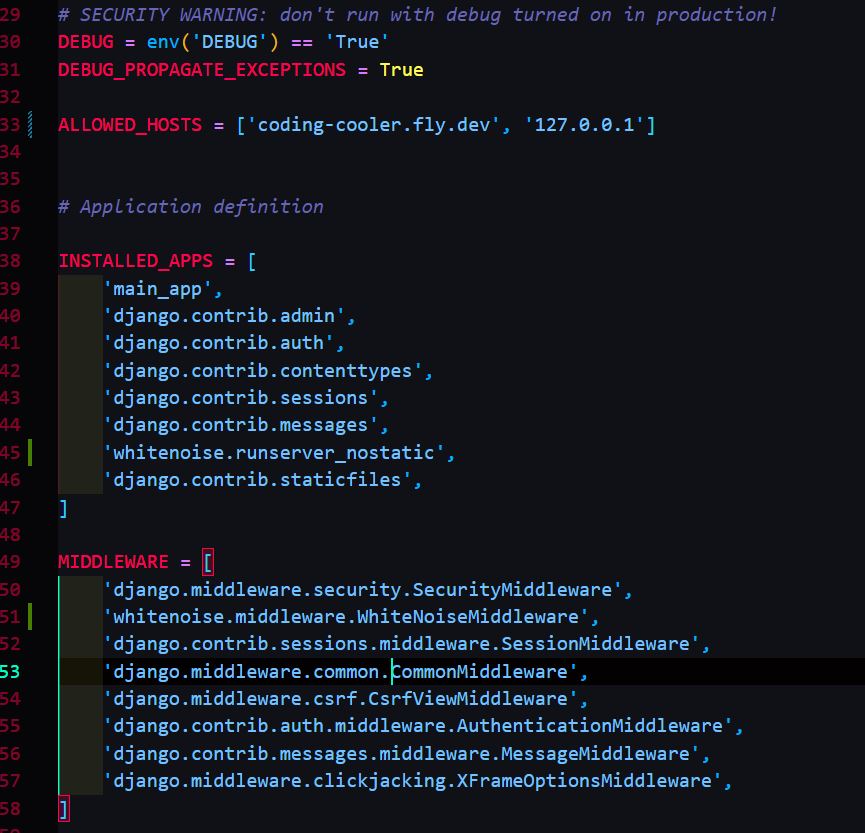
pip install whitenoise - So in your settings.py add this to your INSTALLED_APPS:
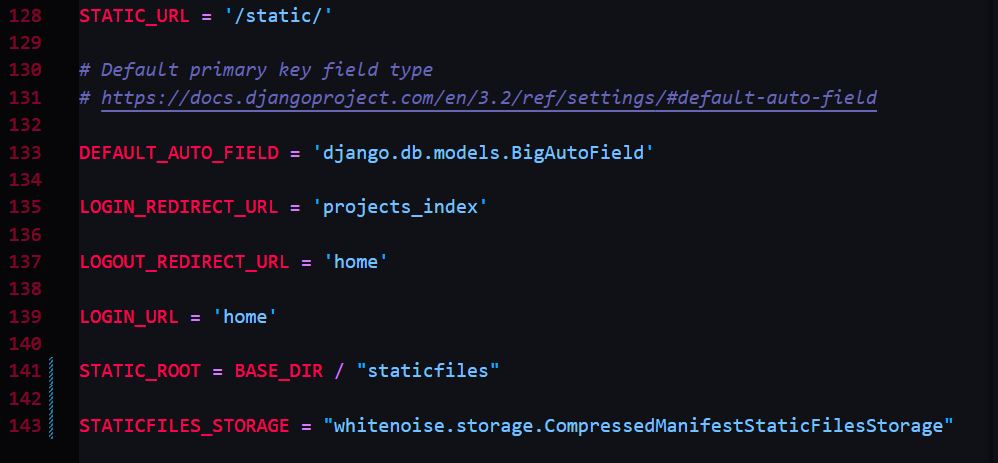
'whitenoise.runserver_nostatic', - Then at the bottom of settings.py add in:
STATIC_ROOT = BASE_DIR / "staticfiles" STATICFILES_STORAGE = "whitenoise.storage.CompressedManifestStaticFilesStorage"
- Now run
python3 manage.py collectstaticto make sure everything is working. - After opening your Django project, if you don't have your requirements set run:
pip3 freeze > requirements.txtand then run the commandpython3 -m pip install -r requirements.txt - We now need to make a procfile by running
touch Procfile, and addingweb: gunicorn YourAppNameHere.wsgior if that give you errors during deploymentweb: gunicorn YourAppNameHere:app. Replace your app name in the line.
- Open the link to the fly docs on Python apps.
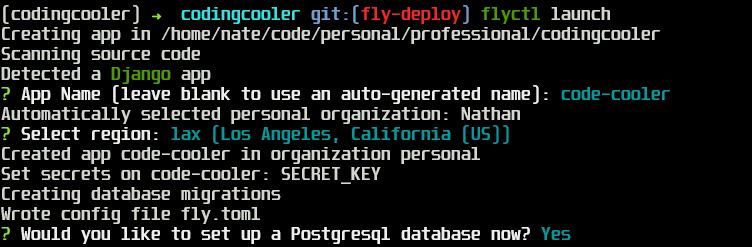
- from your terminal run
flyctl launch. And if this gives you an error you can run with the latest flyio docker image using :flyctl launch --image flyio/hellofly:latestor change the command to match the dockerimage in your app. - Add an app name, choose the closest server to you, and select
Ywhen prompted to set up your database. You'll select the single shared cpu free tier. WRITE DOWN THE CREDENTIALS AS YOU ONLY SEE THEM HERE ONCE. - We also need to add the fly.io recomended db requirement using
pip install dj-database-url - Fly will generate a
fly.tomlfile for us and inside there we now have a default configuration. Before we finish we need to tell fly where to look for our environment variables with the secrets set command:
flyctl secrets set KEY_NAME=somekindofvalue ANOTHER_KEY_NAME=someothervalue
- We now need to add in our database that fly made for us using those credentials. So run:
flyctl secrets set DATABASE_URL="postgres://postgres:[email protected]:5432/yourappname" - We need to make sure our settings.py has
ALLOWED_HOSTS = ['yourappname.fly.dev', '127.0.0.1']
- Finally last step we need to do is check out fly.toml file and Dockerfile. In the Dockerfile you may need to change the last CMD line from:
CMD ["gunicorn", "--bind", ":8080", "--workers", "2", "demo.wsgi"]
to:
CMD ["gunicorn", "--bind", ":8080", "--workers", "2", "yourappname.wsgi"]
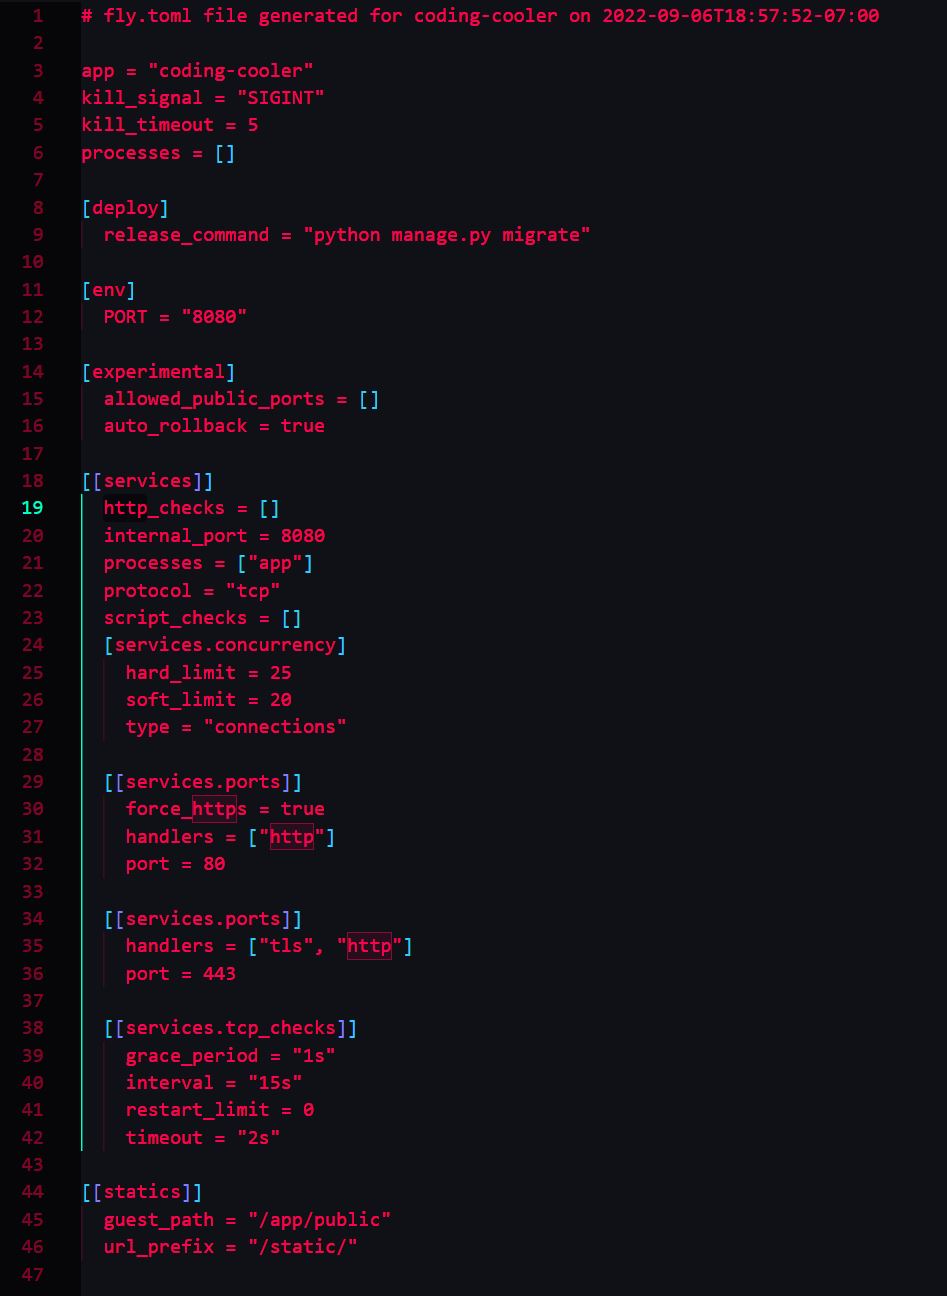
app = "YOURAPPNAME"
kill_signal = "SIGINT"
kill_timeout = 5
processes = []

[deploy]
  release_command = "python manage.py migrate"

[env]
  PORT = "8080"

[experimental]
  allowed_public_ports = []
  auto_rollback = true

[[services]]
  http_checks = []
  internal_port = 8080
  processes = ["app"]
  protocol = "tcp"
  script_checks = []
  [services.concurrency]
    hard_limit = 25
    soft_limit = 20
    type = "connections"

  [[services.ports]]
    force_https = true
    handlers = ["http"]
    port = 80

  [[services.ports]]
    handlers = ["tls", "http"]
    port = 443

  [[services.tcp_checks]]
    grace_period = "1s"
    interval = "15s"
    restart_limit = 0
    timeout = "2s"

[[statics]]
  guest_path = "/app/public"
  url_prefix = "/static/"
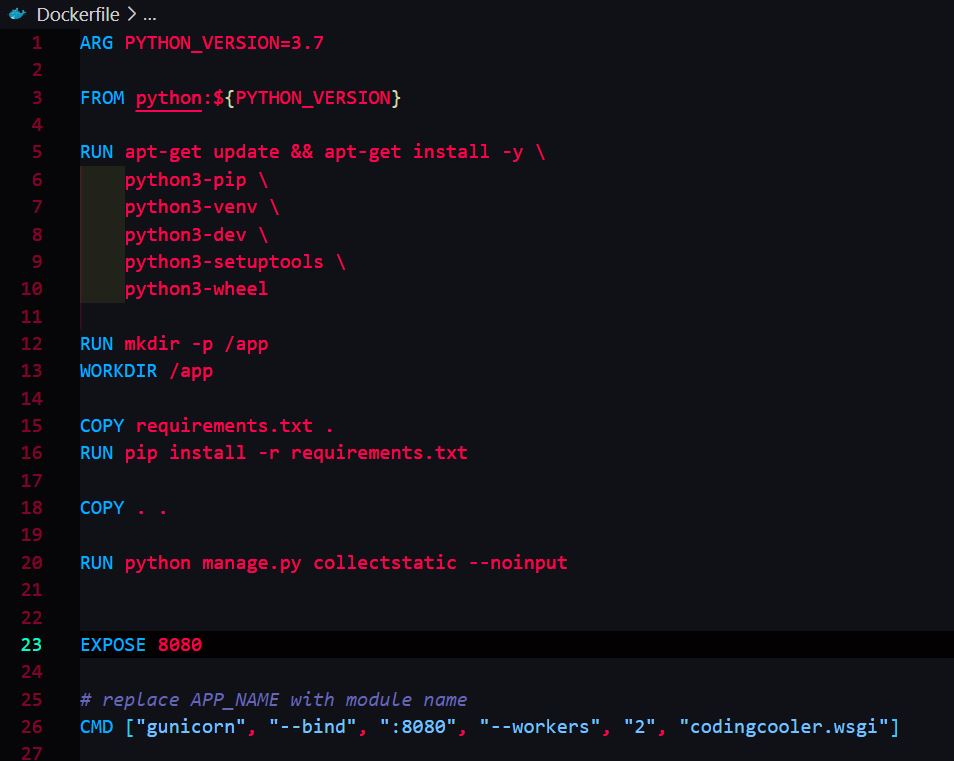
ARG PYTHON_VERSION=3.7

FROM python:${PYTHON_VERSION}

RUN apt-get update && apt-get install -y \
    python3-pip \
    python3-venv \
    python3-dev \
    python3-setuptools \
    python3-wheel

RUN mkdir -p /app
WORKDIR /app

COPY requirements.txt .
RUN pip install -r requirements.txt

COPY . .

RUN python manage.py collectstatic --noinput


EXPOSE 8080

# replace APP_NAME with module name
CMD ["gunicorn", "--bind", ":8080", "--workers", "2", "YOURAPPNAME.wsgi"]
- If you recieve the error
failed ruinning usr/bin/python manage.py makemigrations: exit status 1, try either changing in fly.toml:
release_command = "python manage.py migrate to python3 manage.py migrate
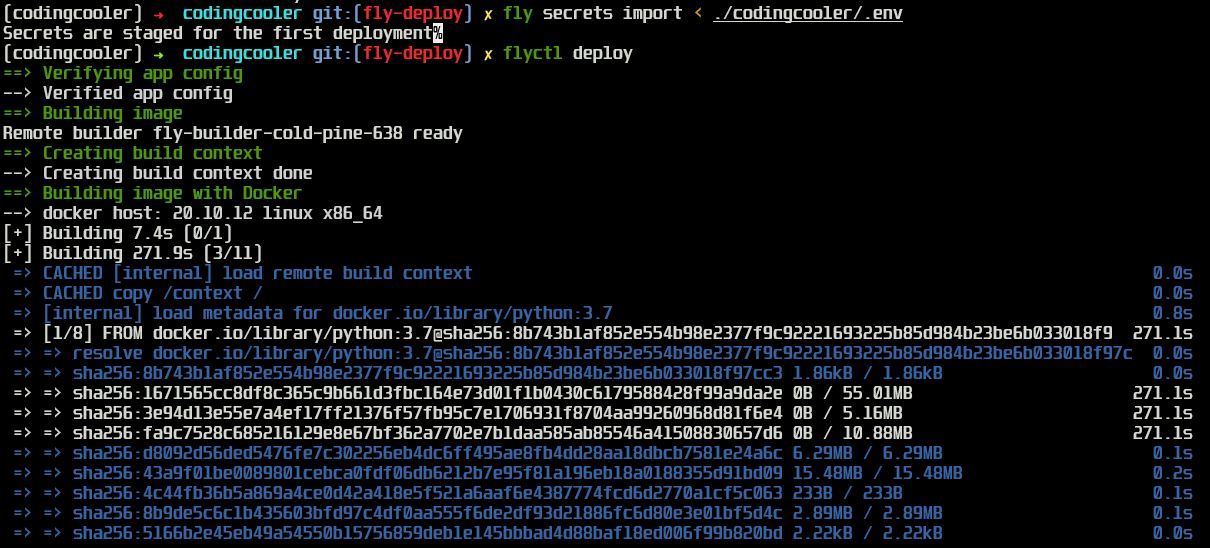
- To deploy to fly when you're ready, run
flyctl deploywhich will look for ourfly.tomlfile, start deploying and will return you to your regular command line when it's done. (This might take awhile.)