Converting text to dates in Excel ensures your data can be sorted, calculated, and analyzed correctly. Since Excel treats text as plain strings, converting it into proper date format using tools like Text to Columns, DATEVALUE, and TEXT helps make your data accurate and functional.
- Excel stores dates as serial numbers, while text dates are treated as strings.
- Converting them enables proper sorting, accurate calculations, and consistent formatting, making data more usable.
Converting Numbers to Dates
When numbers resemble dates (e.g., "20230115" for January 15, 2023), we can convert them to Excel’s date format using cell formatting. This method adjusts how Excel interprets and displays the number.
Step 1: Open MS Excel
Click on Windows' top open all programs and search for MS Excel, or you can search for MS Excel in the search bar to open MS Excel.
Step 2: Select our Data and Perform a Right-click
Once teh MS Excel opens select the data and right-click.
Step 3: Select Format Cells
Under drop-down menu choose Format Cell.

Step 4: Choose Date Format
Select "Date" from the Category list and choose the desired date format from the Type list.

Step 5: Preview Results
Once you have selected the format preview the result to see all changes.
Converting Text to Dates
Text-based dates (e.g., "01-12-2023" or "January 12, 2023") require specific methods to convert into Excel’s date format. Below, we outline three effective approaches.
Step 1: Open Excel and Select the Cells
Open the spreadsheet in Excel and select the cells which have the date in text format then go to home tab at top of the ribbon and then select replace from the find and select dropdown.
.webp)
Step 2: Use Find and Replace
Press Ctrl + H, replace “-” with “/”, and click Replace All. This may help Excel recognize dates.
.webp)
Step 3: Change the Date Format
Finally, our spreadsheet has changed the date text in the Date format.
.webp)
Using Text to Columns
The Text to Columns tool splits and reformats text into dates based on delimiters or Excel’s date recognition.
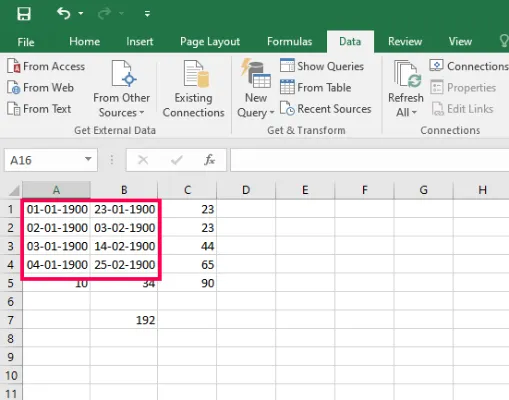
Step 1: Open MS Excel and Select the Cells
Open the spreadsheet with excel and select all data cells of one column and select the data tab in the top of the ribbon and then choose Texts to Columns from data tools. Then Convert Text to column wizard dialog box will appear and here we can see it is in Step 1 of 3 that is written in the dialog box.
.webp)
Step 2: Select the Data from Column data
Just click NEXT in step 1 and step 2 as it is and in step 3 select the Date from the column data format and press finish.
.webp)
Step 3: Select all the cells of another column
Similarly, select all data cells of another column and apply the above step to get the final result in date format.
-(1).webp)
Now we will understand how we change the date text in Date format.